
The most popular configuration for our Contact Form is to use the Email Address Send Method. This method allows you to send an email from your readers to one or more email addresses of your choice.
These email addresses can be shared inboxes or can feed directly into your help ticketing/help desk, CRM, or other system. Basically any system that allows email submission can be integrated with our Contact Form using this method!
To set up your contact form this way:
- In the lefthand navigation, go to Contact Form.
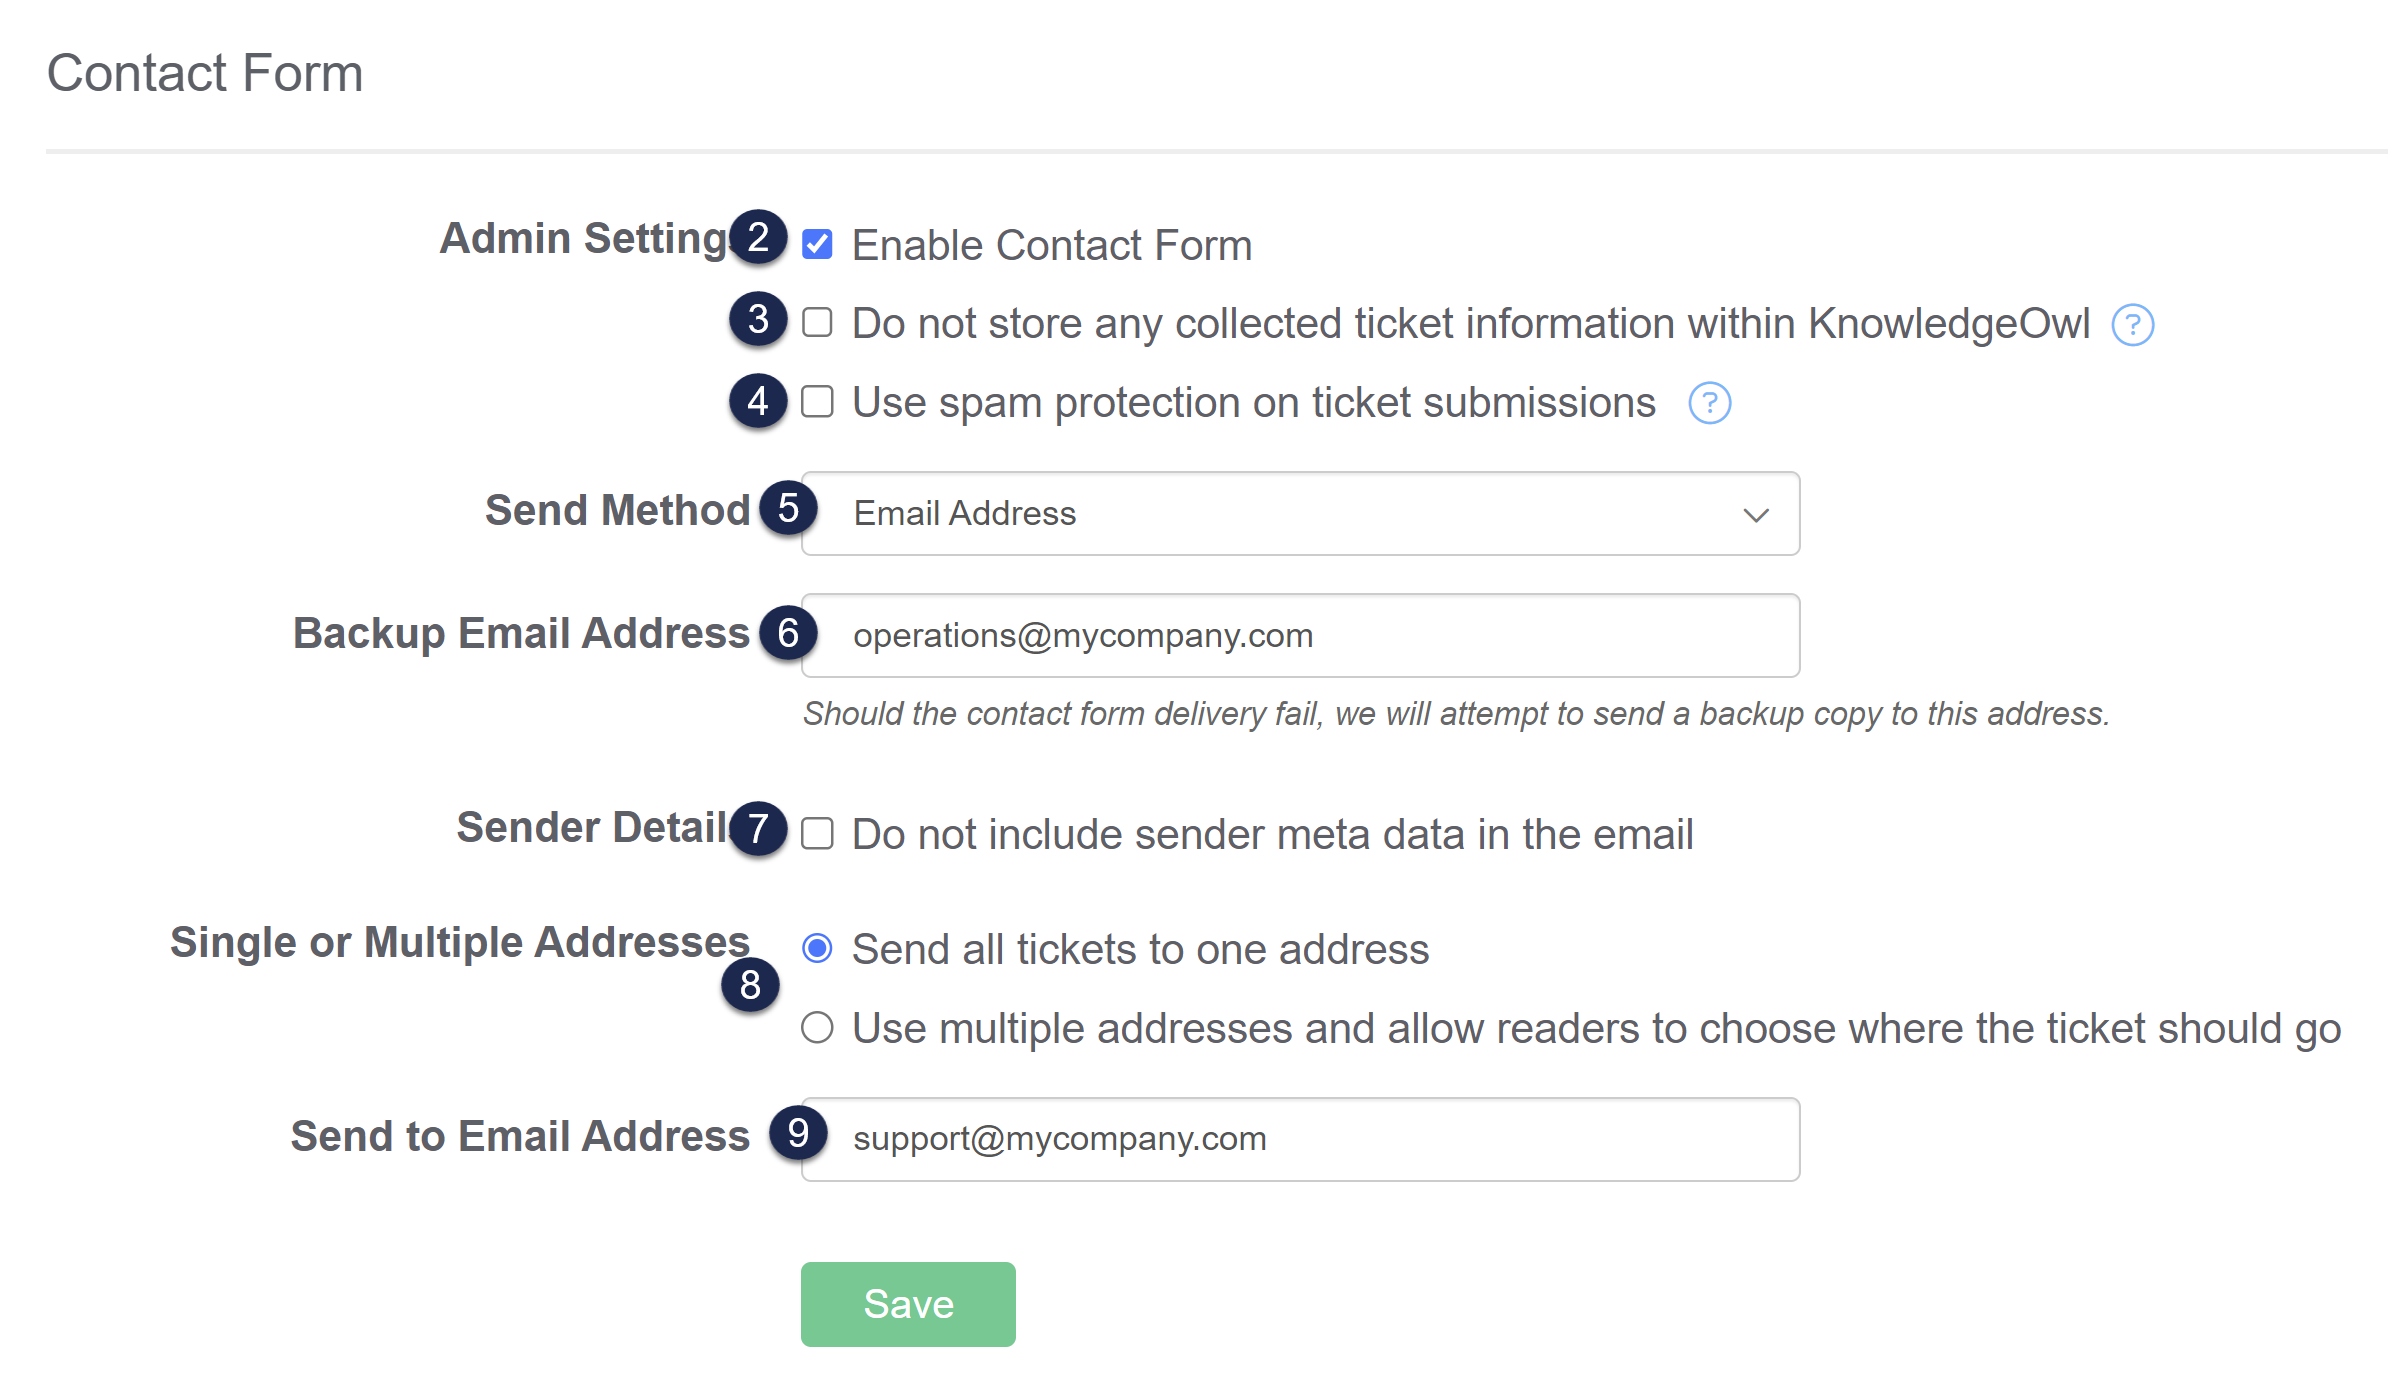 Contact Form configuration section, numbered to match the list below
 - Check the box next to Enable Contact Form to activate the contact form in your knowledge base.
- Optional: If you don't want any information about the ticket to be stored in KnowledgeOwl, check the box next to Do not store any collected ticket information within KnowledgeOwl. See What data is collected in the Contact Form? for more info.
- Optional, Recommended for any public-facing content: You can choose to Use spam protection on ticket submissions. If your knowledge base requires logins, you probably don't need this, but if your knowledge base is available to the public, we strongly recommend checking this box!
- This setting will use whatever spam protection method has been saved in Settings > Basic > Spam Protection Settings.
- If you are using a private domain with the reCAPTCHA spam protection method, you'll need to add reCAPTCHA information to Settings > Basic for this feature to work. See Add reCAPTCHA for more details.
- Choose Email Address as your Send Method. (We have direct integrations with Zendesk and Freshdesk, too).
- Optional, Recommended: Add a Backup Email Address. If we have any issues sending emails to your Send to Email Address, we'll resend the contact form submissions to this backup. See Contact form submission email delivery issues for more information on this setting.
- Optional: By default, the contact form captures some metadata about your senders. If you don't want to capture this metadata, check the box next to Do not include sender meta data in the email. See What data is collected in the Contact Form? for more info.
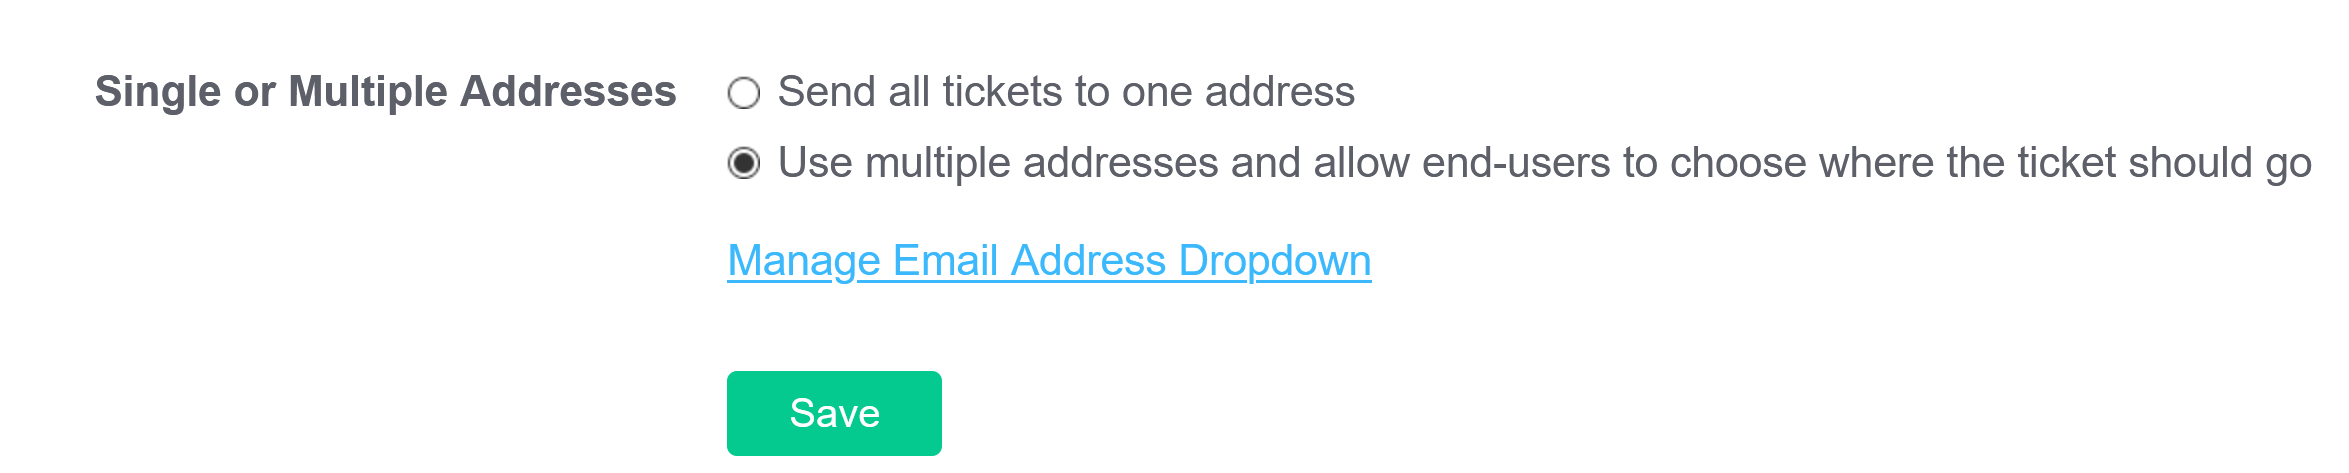
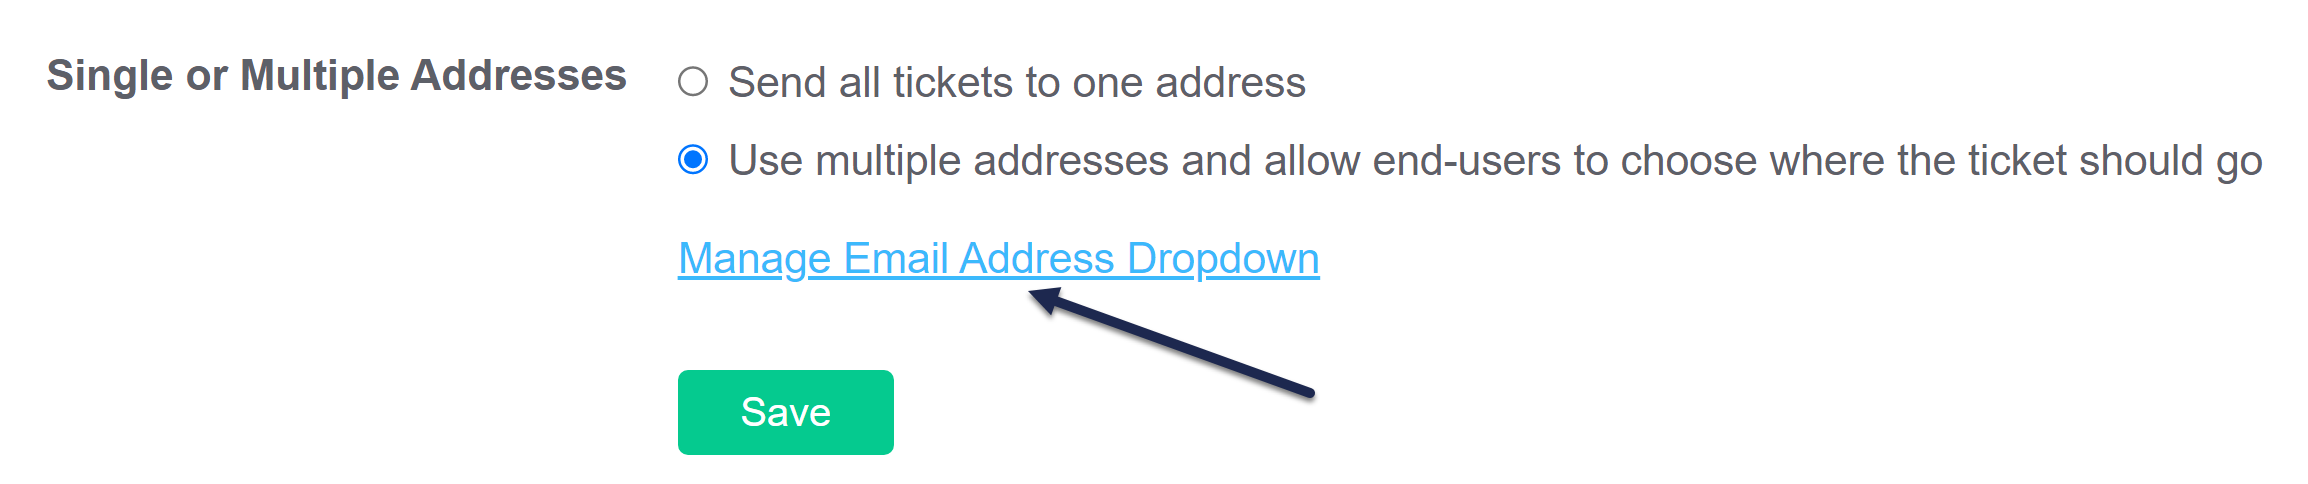
- You can choose to send contact form submissions to a single email address (the default selection) or to multiple addresses.
- When multiple addresses is selected, your readers will be able to see the different addresses and select one from a list. You'll see options to Manage the Email Address Dropdown if you select the multiple email address option:
 Sample Manage Email Address Dropdown link
- When multiple addresses is selected, your readers will be able to see the different addresses and select one from a list. You'll see options to Manage the Email Address Dropdown if you select the multiple email address option:
- If you are sending all tickets to one address, add that email address in the Send to Email Address field. This can be an individual email, shared group email, or an email address that creates tickets or conversations in your CRM, ticketing system, etc.Contact form submissions will be sent from helprequest@knowledgeowl.com. You may need to set up rules or exceptions for these emails to be delivered properly.
- If you selected multiple email addresses, click the Manage Email Address Dropdown to add the email addresses.
- In the Manage Email Addresses pop-up, you'll configure what your reader will see when they interact with the Contact Form (the Label) and the Email address(es) that will be emailed when that selection is made:
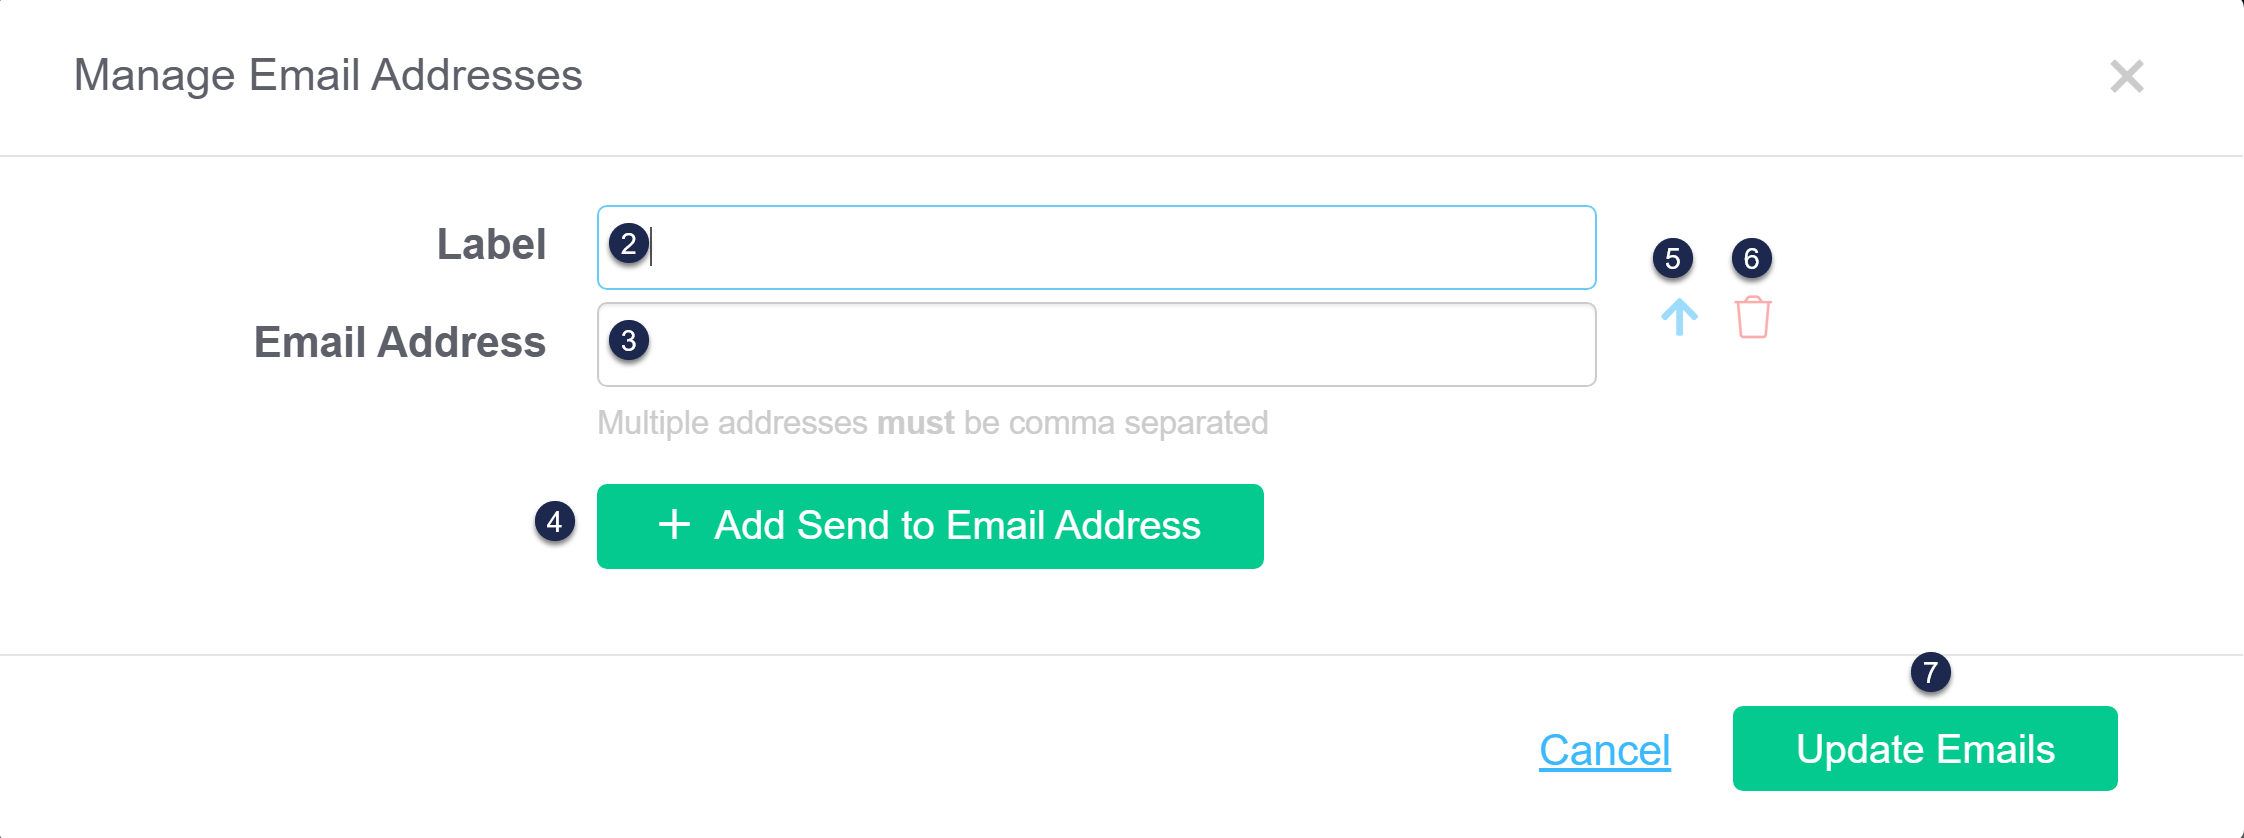
- Add the Label you'd like your readers to see in the Contact Form dropdown.
- Add at least one Email Address for that label--this is where the contact form submissions will be sent if the reader selects this option. You can send to multiple email addresses for each label by providing a comma-separated list, like:
email1@knowledgeowl.com, email2@knowledgeowl.com - To add an additional dropdown option, select the + Add Send to Email Address button.
- To reorder your dropdowns, use the up arrow to the right of a label/email address combo.
- To remove one of your dropdown options, use the trashcan to the right of the label/email address combo.
- Once you're done adding configuring your email addresses, select the Update Emails button to close the pop-up.
- In the Manage Email Addresses pop-up, you'll configure what your reader will see when they interact with the Contact Form (the Label) and the Email address(es) that will be emailed when that selection is made:
- Optional: Use the Contact Form Text fields to customize the Body fields for your Contact Form. Non-body field text can be customized using the Customize Text tool. See Section breakdown: Contact Form for more information.
- Optional: Use the Contact Form Custom Inputs fields to add more custom fields you'd like readers to fill out, and mark them as optional or required for submission.
- Once you've finished making changes, be sure to Save.


Your Contact Form is now live at /contact-us! You can Update wording in the Contact Form and/or Customize Contact Form Link to make it even more your own.
