
To access your self-assessment, reviewers will need two things:
- The URL for your knowledge base
- A login of some kind
Get your URL
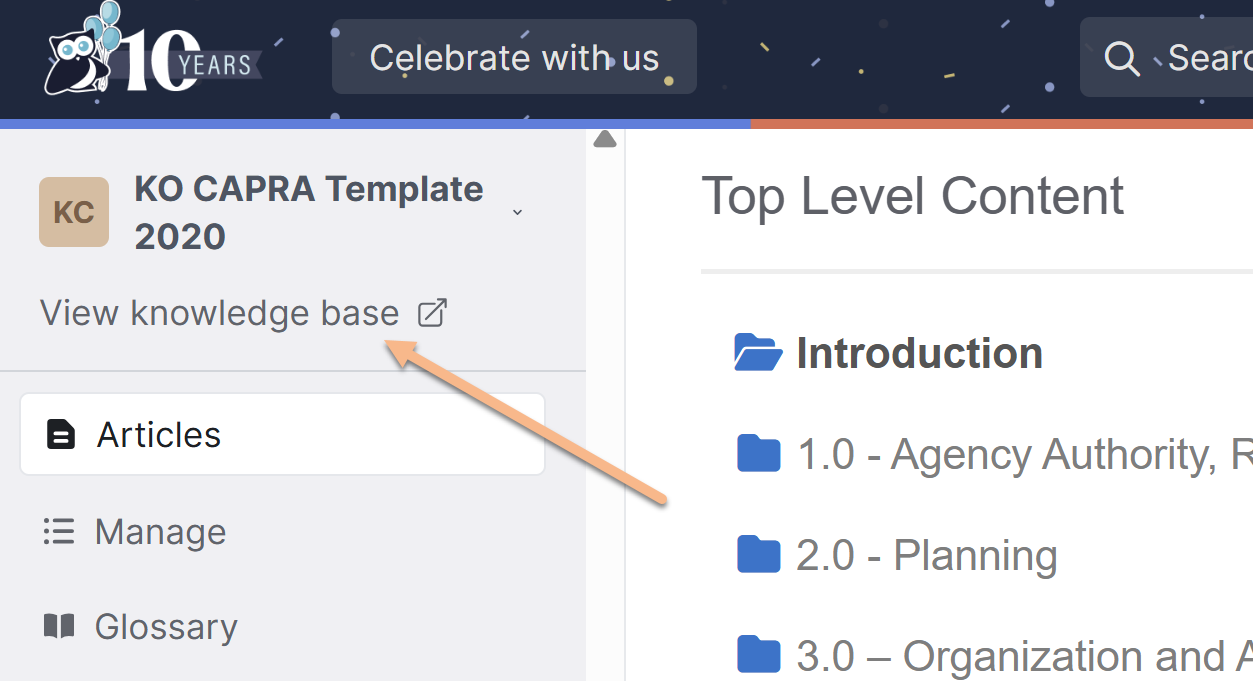
You can view and copy the URL for the knowledge base by selecting the View knowledge base link in the upper left corner of most pages:
Don't like the URL?
To change the URL of your knowledge base, follow the 1: Change your knowledge base URL instructions in Customize your self-assessment knowledge base.
Get the login credentials
Your self-assessment knowledge base has been set up with a Shared Password, but there are other options available! Refer to the sections below for additional information.
When our support team gives you the CAPRA accreditation knowledge base, anyone who accesses the knowledge base's URL and enters a single, shared password will be able to gain access.
To review or edit the shared password:
- Go to Security and access > Security settings.
- In the Authentication settings section, view or edit the Shared password.
- If you made changes, be sure to Save them.
If you'd prefer not to use a shared password, refer to the sections below for alternate security arrangements.
Some organizations prefer to remove the shared password from their self-assessment knowledge base, so that anyone with the URL can access it. If you'd like to make this change:
- Go to Security and access > Security settings.
- In the Authentication settings section, under Content authentication, select the radio button next to Public.
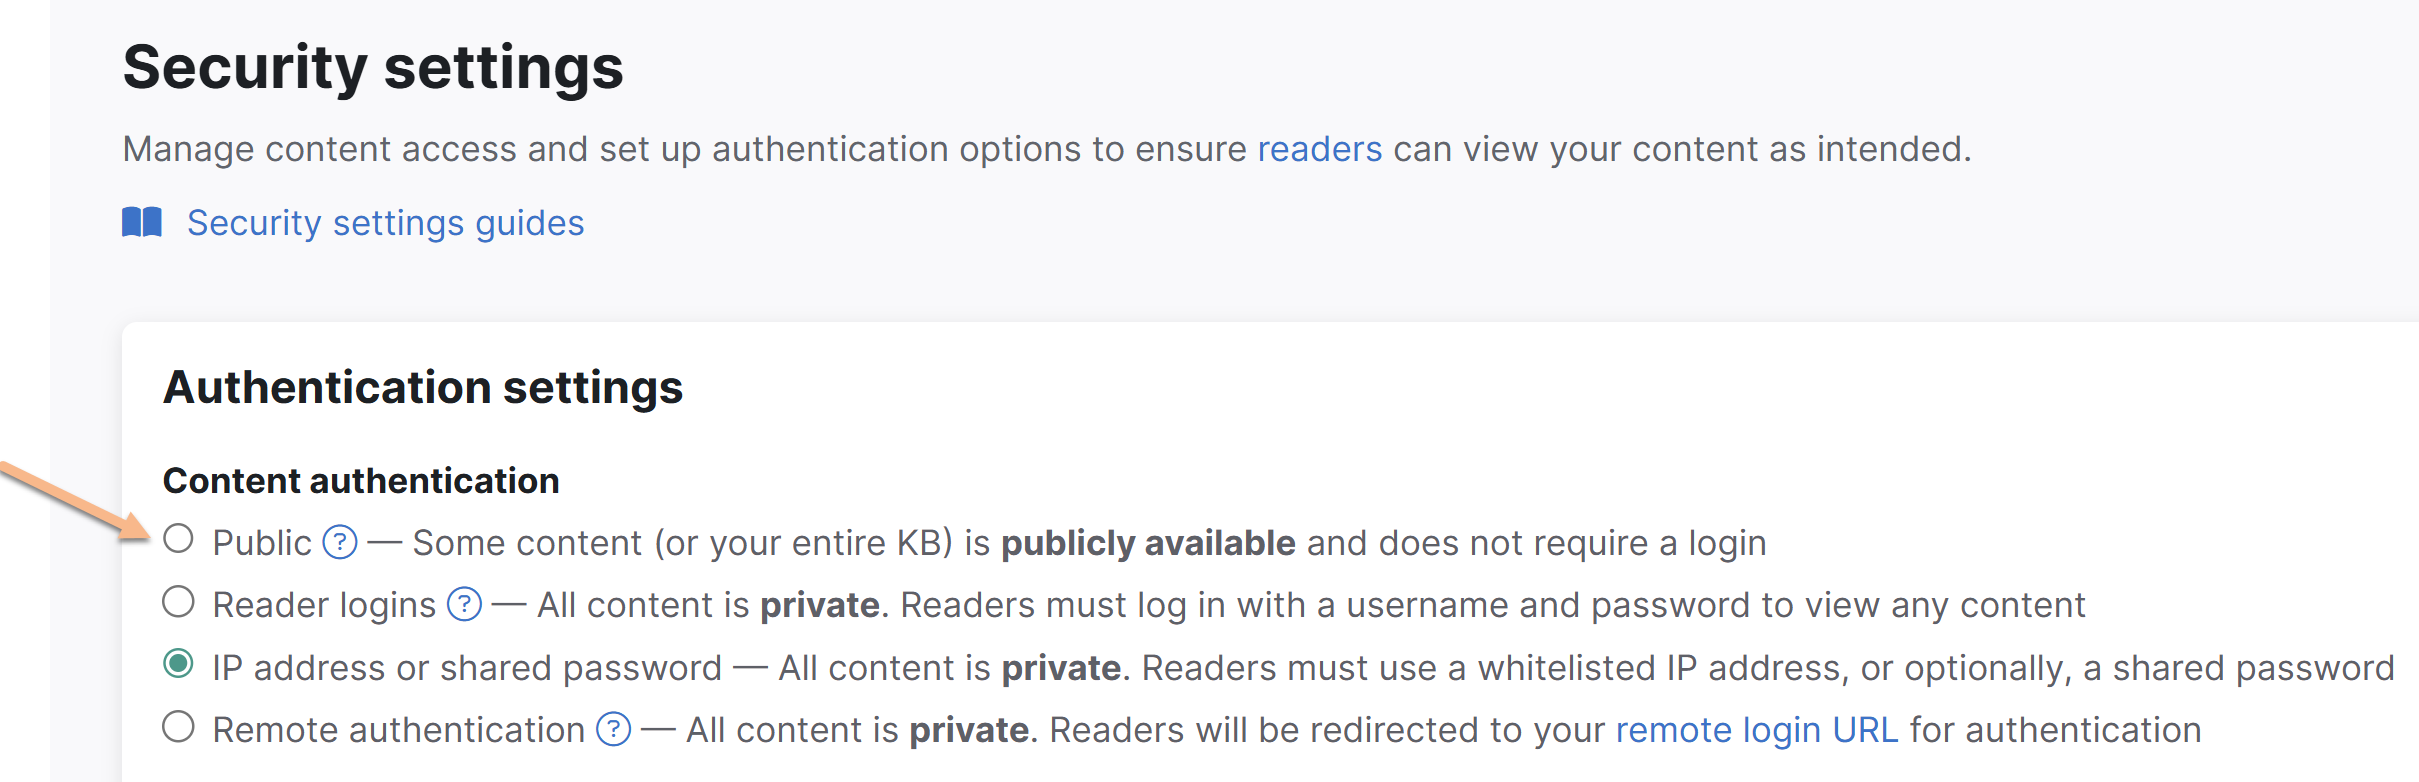
- Be sure to Save your changes.

Once you save this change, anyone with the URL to your knowledge base can access it.
Some organizations prefer to set up reviewers or teammates with their own individual accounts, rather than a shared password. This is a slightly higher level of security than the shared password. It requires a little more setup at the beginning.
If you'd like to set up your knowledge base this way:
- Go to Security and access > Security settings.
- In the Authentication settings section, under Content authentication, select the option for Reader logins.
- Be sure the Unauthenticated access behavior is set to Redirect them to the reader login page.
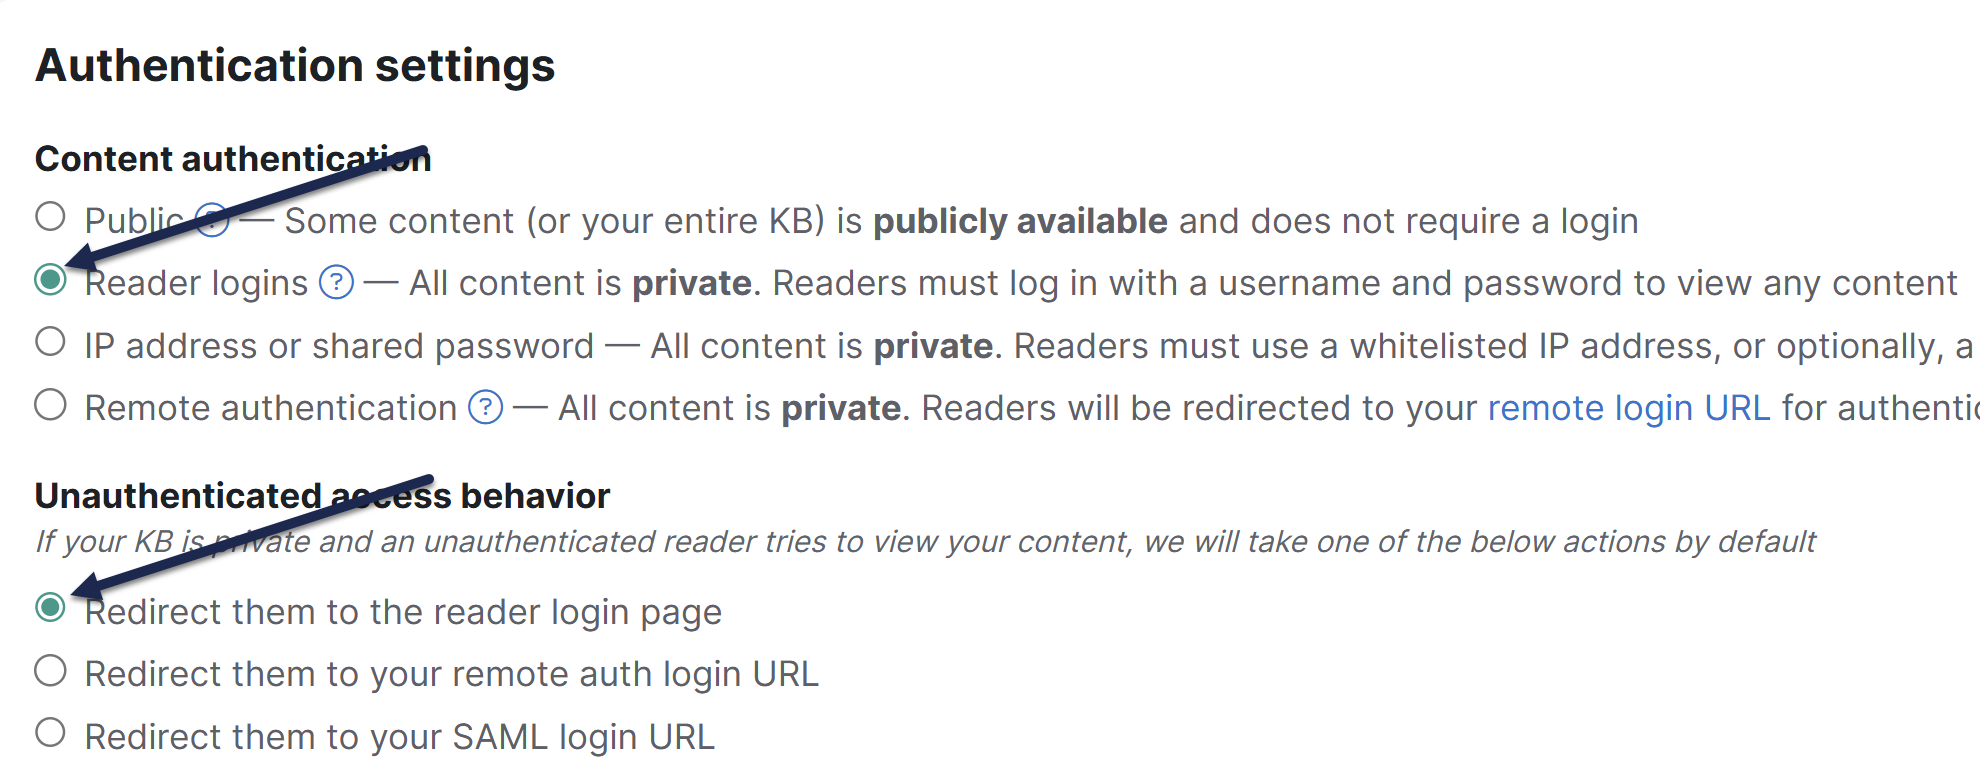 Set the Content authentication to Reader logins and the Unauthenticated access behavior to Redirect them to the reader login page
 - Be sure to Save your changes.

This will lock the knowledge base down to require individual reader accounts.
Once you know who your reviewers are, create a reader account for each of them using their email address. To create a reader account:
- In the upper right, go to Account > Readers. The Readers page opens.
- Create your reviewers one at a time using the + Add Single Reader option or upload a spreadsheet with all your reviewers to create the accounts all at once. The Add Single Reader option is the easiest, and that's what we recommend using here. Refer to Create a reader for full step-by-step instructions.
Optionally, you can also allow reader sign-ups in Account > Readers > Settings. This lets your reviewers "sign up" to your knowledge base so that they'd request access and enter most of their information directly. This might be a smoother way for you to get reviewers set up with accounts without having to know their email addresses initially.
For CAPRA accreditation, we recommend:
- Follow the setup instructions in Turn on reader signups.
- Require admin approval of sign-ups, as outlined in step 6 of those instructions. This guarantees that no one except the reviewers you approve will gain access.
- Send yourself an email notification when a new reader signs up so you know you need to approve them, as outlined in steps 7 and 8 of those instructions.
This ensures that random people aren't signing up and getting access to your accreditation, since you have to approve them, but makes it easy for reviewers to sign up and for you to know once a reviewer has done so.