
This tutorial will help walk you through setting up a an integration between AD FS and KnowledgeOwl using SAML 2.0. This feature is available on select plans.
Screenshot warning
The screenshots below may not match your version of AD FS, but the steps to complete the integration should be the same.
Step 1: Add your IdP info to KnowledgeOwl
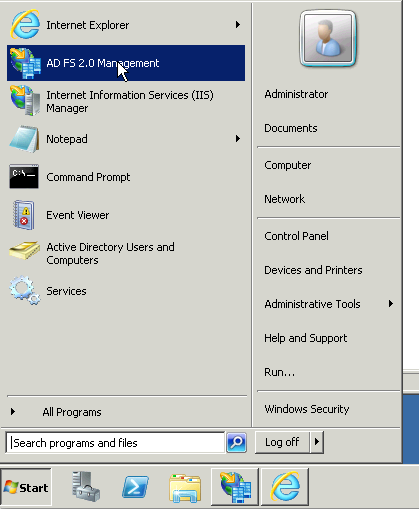
- On your Windows server, find and open AD FS 2.0 Management (commonly found in Start > Administrative Tools).
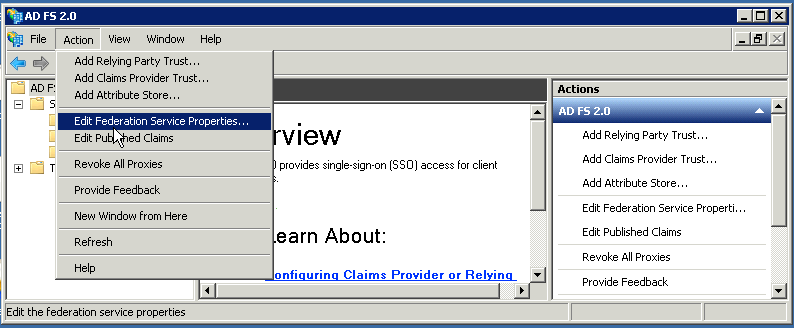
- Once you have opened AD FS Management, go to Action > Edit Federation Service Properties.
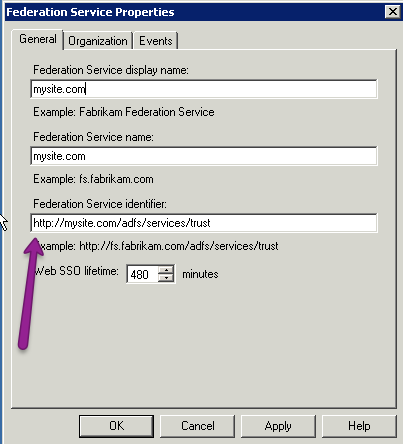
- Copy the Federation Service identifier URL.
- In KnowledgeOwl, go to Security and access > Single sign-on.
- Scroll to the Identity provider metadata section.
- Paste the link you copied in Step 3 as the IdP entityID.
- Enter your IdP login URL and IdP logout URL.
- If your AD FS build doesn't explicitly list these URLs, you can usually create remove
/adfs/services/trustfrom your IdP entityID URL and replace it with/adfs/ls/. For example, if my IdP entityID URL washttps://mysite.com/adfs/services/trust, my IdP login URL and IdP logout URL arehttps://mysite.com/adfs/ls.
- If your AD FS build doesn't explicitly list these URLs, you can usually create remove
- Be sure to Save your changes in KnowledgeOwl if you're not immediately continuing to Step 2.


Step 2: Upload the IdP certificate to KnowledgeOwl
Next, export your AD FS cert into an x509 DER format to upload into KnowledgeOwl. To do so:
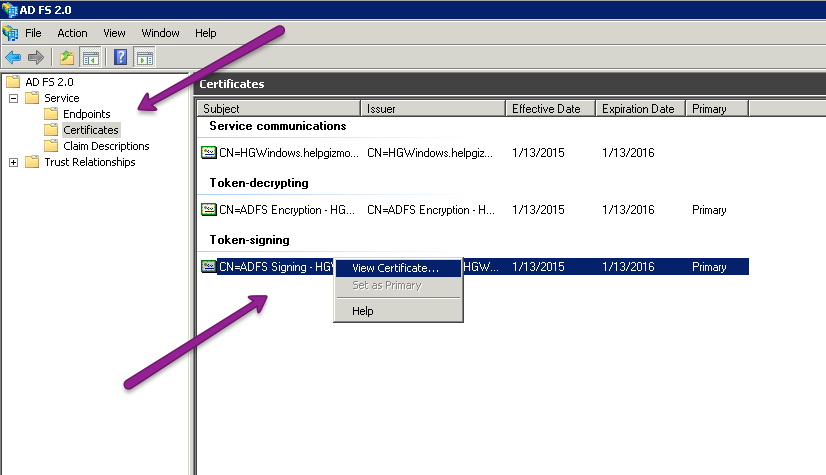
- In AD FS 2.0, go to Service > Certificates.
- In the main pane, right-click on the certificate in the Token-signing section.
- Select View Certificate... in the right-click menu.
- Open the Details tab.
- Select Copy to File...

- This opens a Certificate Export Wizard. In the wizard, choose Next until you get to the format page. On the format page, make sure that DER encoded binary X.509 is selected and choose next.
- Choose a filename and a location that you will remember for the cert and then finish the wizard.
- In KnowledgeOwl, go to Security and access > Single sign-on.
- Be sure you're in the SAML settings tab.
- In the Identity provider metadata section, select Upload certificate... to upload the file you just created.
- Once you have selected the correct certificate, be sure to Save your changes.


Step 3: Enable SAML SSO
Once you have entered the 3 IdP fields and have uploaded the IdP certificate into KnowledgeOwl, enable SAML SSO:
- Go to Security and access > Single sign-on.
- Be sure you're in the SAML settings tab.
- In the SAML settings section, select Enable SAML SSO reader logins.
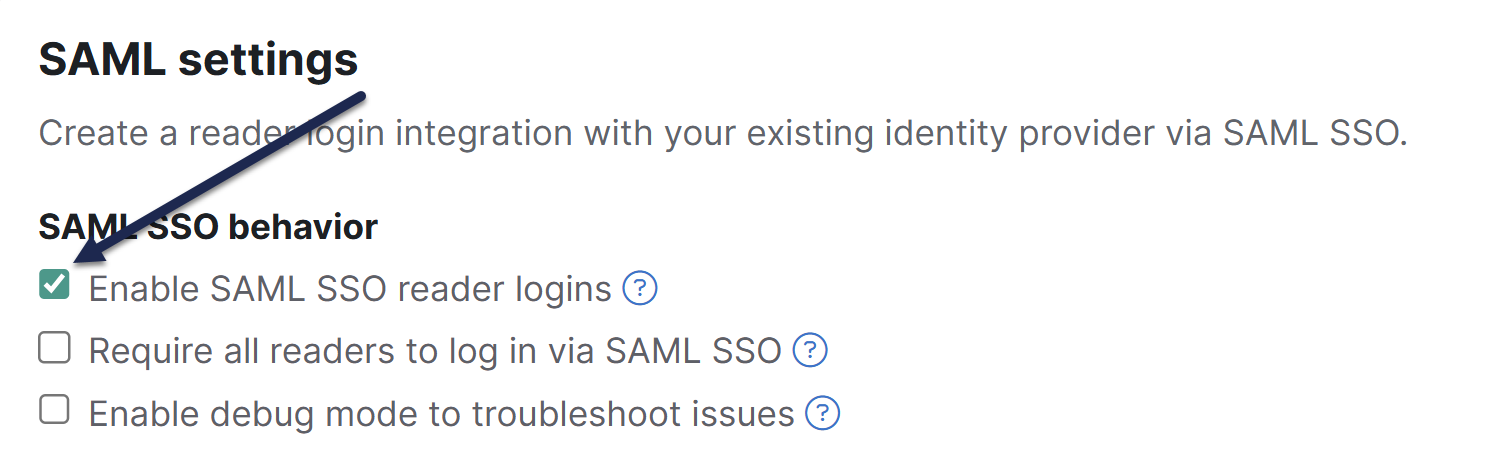
- Be sure to Save your changes.

Step 4: Add the KnowledgeOwl SP info to your IdP
Now that KnowledgeOwl has your information, you will need to grab some data from KnowledgeOwl to add into AD FS.
- In KnowledgeOwl, go to Security and access > Single sign-on.
- Be sure you're in the SAML settings tab.
- In the Service provider metadata section, select View metadata underneath SP metadata XML. The KnowledgeOwl metadata modal opens.
- Select anywhere in the Service provider metadata for knowledge base text box to highlight the full XML contents.
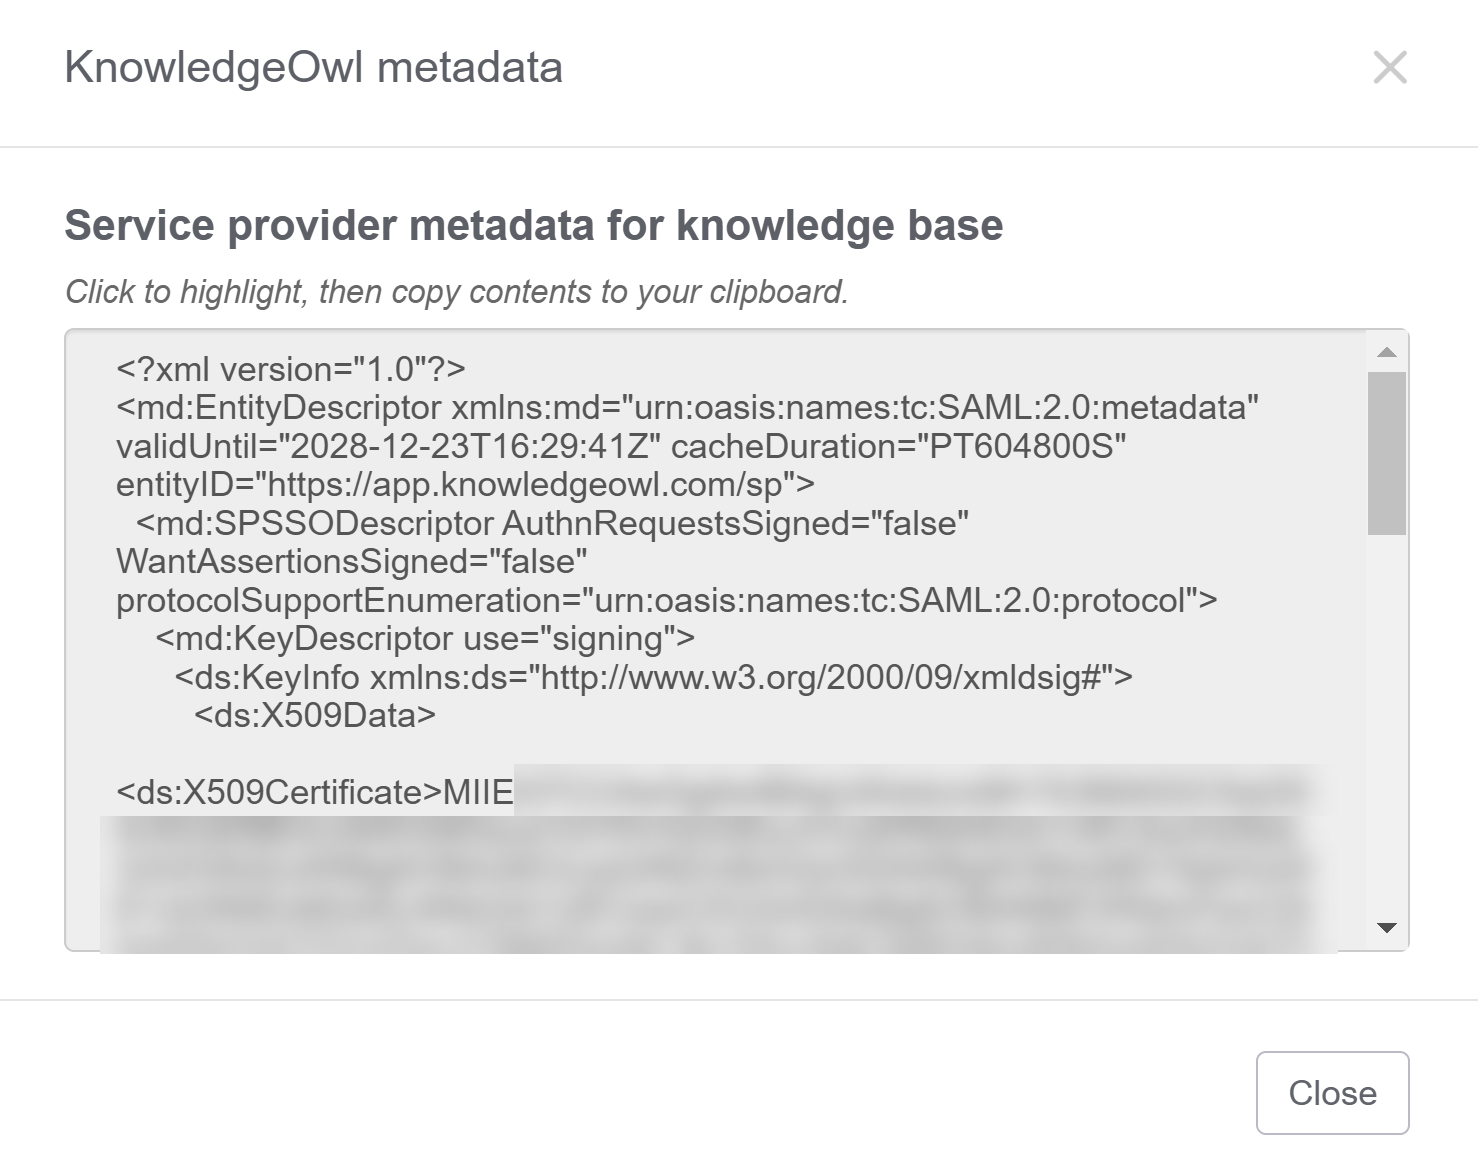
- Copy that text and paste it into the simple text editor of your choice (Notepad works well).
- Save the file as
ko-metadata.xml.- If you're using Notepad, set Save as type: to All Files to ensure it gets saved as an .xml. XML format is required for AD FS.
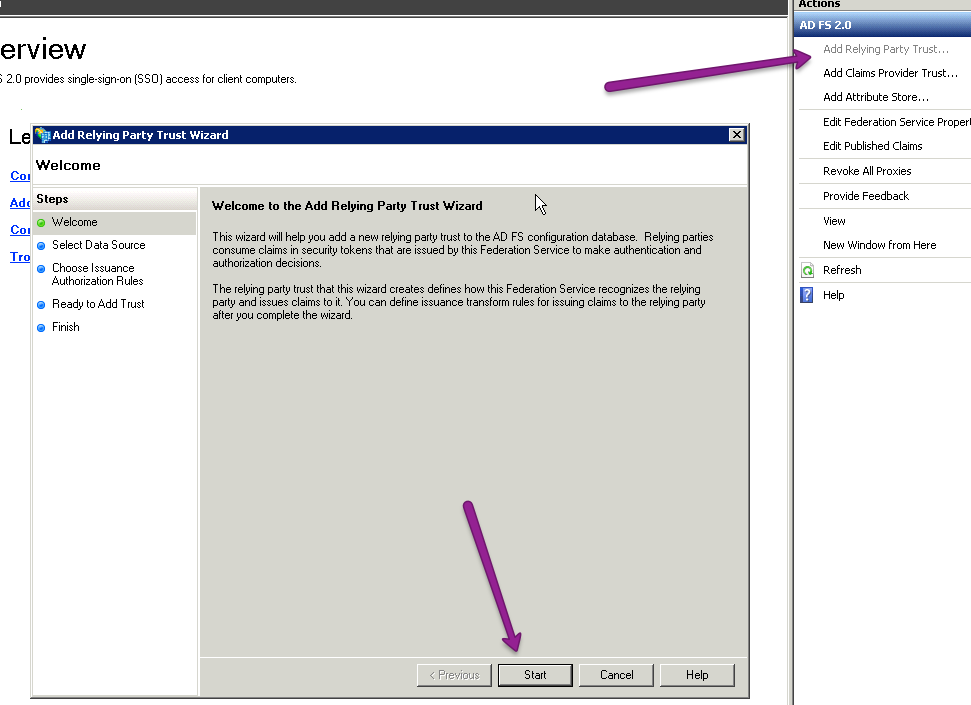
- In AD FS, select Add Relying Party Trust.... The Add Relying Party Trust Wizard opens.
- Select Start within that wizard.
- On the next screen, select Import data about the relying party from a file.
- Browse to the XML metadata that we saved in Step 6 and choose Next.
- Choose a name that makes sense, such as "KnowledgeOwl SSO", add whatever notes you would like, and select Next.
- For most setups, you can click next until you finish this wizard, which should open up the Edit Claim Rules dialog.
I don't see Edit Claim Rules
If the Edit Claim Rules dialog does not open automatically, you can navigate to it by going to Trust Relationships > Relying Party Trusts, select the trust identifier you created in Step 11, and click on Edit Claim Rules....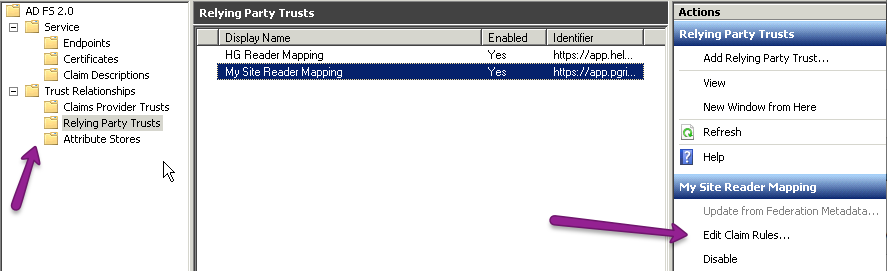
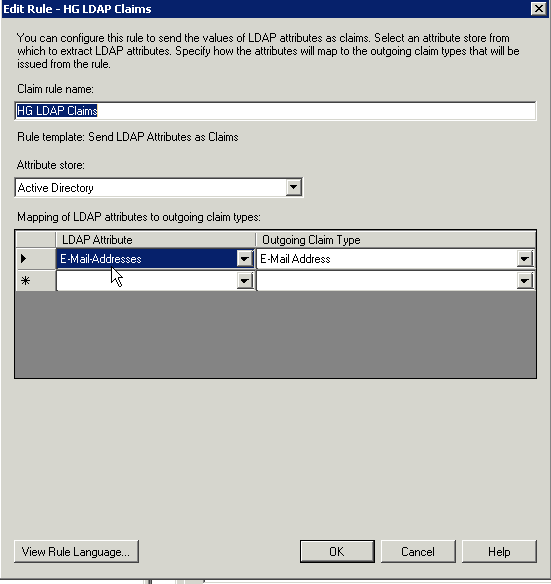
- In the Edit Claim Rules dialog, select Add Rule....
- Choose the default Send LDAP Attributes as Claims and select Next.
- Here you can choose what information you want to send to KnowledgeOwl. At the very least you need to send the E-Mail Addresses.
- Select Add Rule... again.
- This time under Claim rule template: choose Transform an Incoming Claim and select Next.
- Set the Claim rule name to KO Name ID or something similar.
- Set the Incoming claim type to E-Mail Address.
- Set the Outgoing claim type to Name ID.
- Set the Outgoing name ID format to Email.
- Be sure the option to Pass through all claim values is selected. Your configuration should look a bit like this:
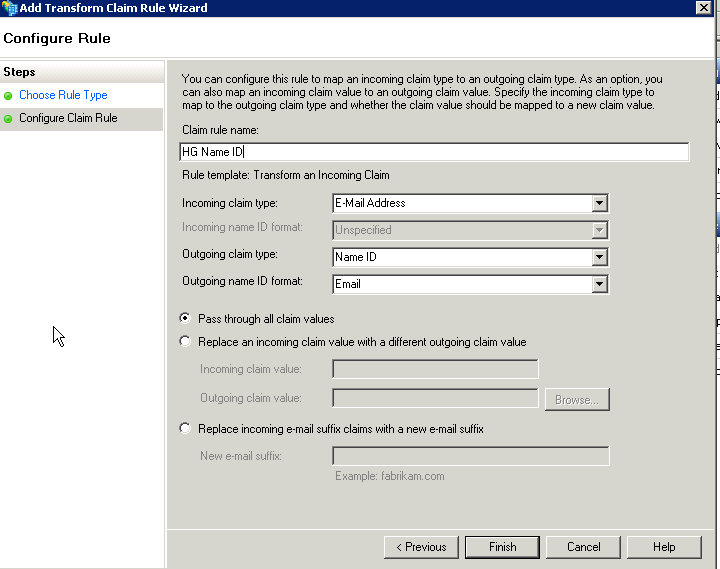
- Select Finish.


Step 5: Enable debug mode
AD FS may send the attribute claims over in a way that you are not expecting.
In order to view how AD FS is sending the claims, in KnowledgeOwl:
- In Security and access > Single sign-on in the SAML Settings tab, check the box next to Enable debug mode to troubleshoot issues.
- Save.
- In a private browser window or in an incognito tab, copy and paste the SP Login URL into the address bar. If the above steps were done correctly, you should be asked to log into your AD server where you will be redirected back to your knowledge base.
- In debug mode, you'll then see a list of the IdP attributes that AD FS is sending over.
- Keep this window open while you work on Step 6. Once you're done with Step 6, be sure to uncheck Enable debug mode to troubleshoot issues and re-save the settings.
Step 6: Map SAML attributes to fields in KnowledgeOwl
With your debug window open, you can now map SAML attributes to fields in KnowledgeOwl. To do so:
- In KnowledgeOwl, go to Security and access > Single sign-on.
- Open the SAML attribute map tab.
- In your debug output, locate the attribute value that contains your email address, and copy the Attribute Name exactly as it appears after the colon.
- Paste that attribute name into the fields for SSO ID and Username / Email in the KnowledgeOwl SAML attribute map tab.
- To map additional fields, repeat this process. Refer to SAML attribute map for more information.
- If you cannot directly map an IdP attribute to a KnowledgeOwl reader attribute, use Custom attribute map rules.
- Once you're done mapping fields, uncheck the Enable debug mode checkbox.
- Save all your changes.
- In the tab or window that contained the debug information, select Re-login to see any changes at the top to log in through AD FS again. If everything was successful, you'll log into your knowledge base. If so, congratulations! You now have a working SAML SSO integration with AD FS.
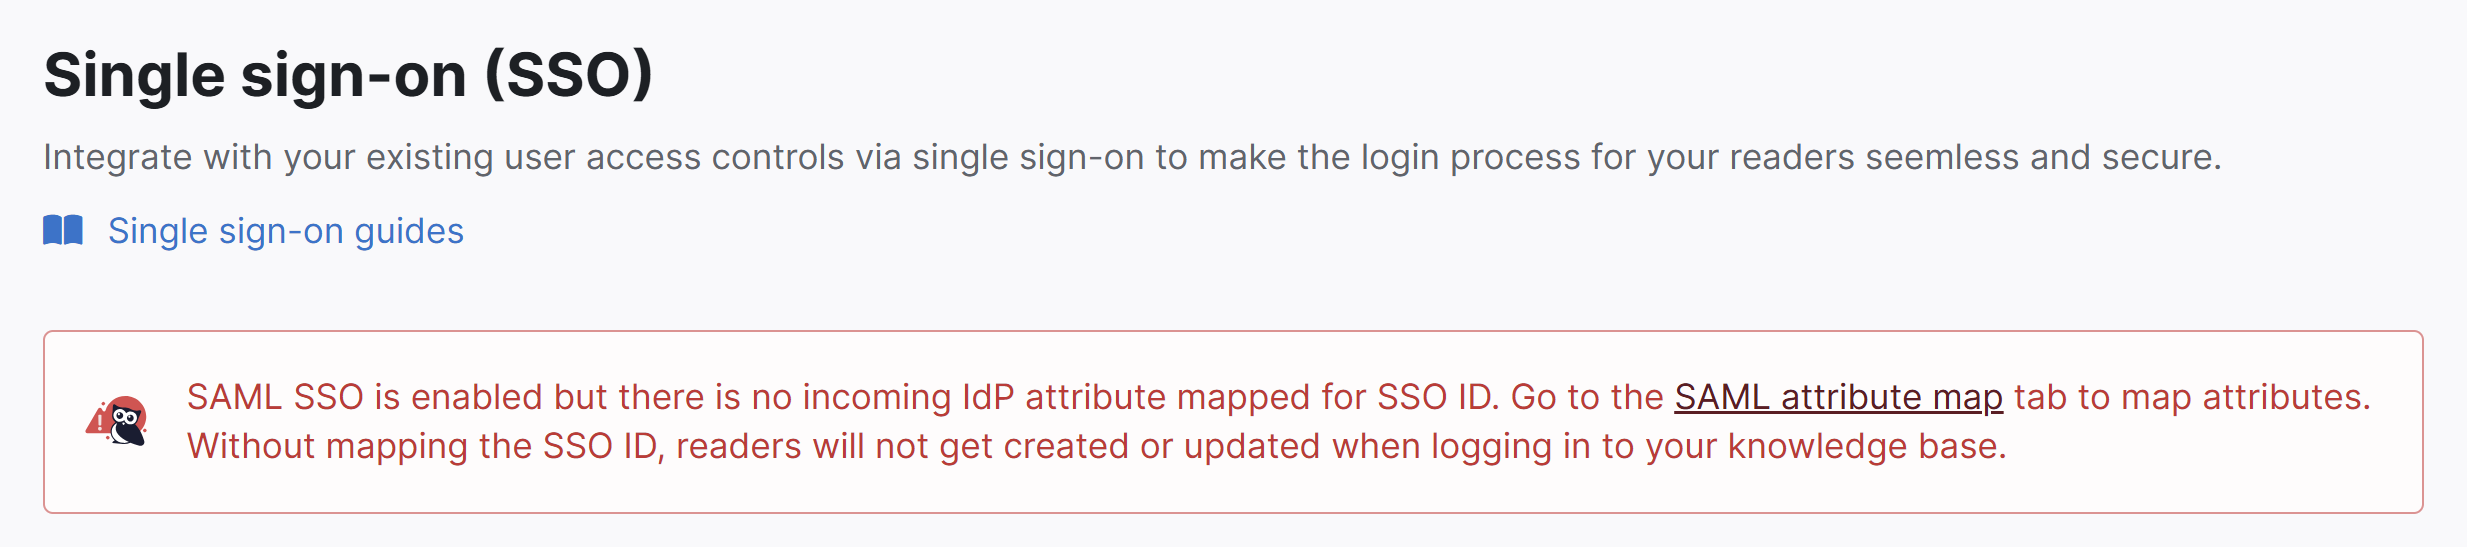
The SSO ID is a required mapping. If you don't set it up, you'll see a warning message in Security and access > Single sign-on:
Step 7: Optional settings
With your AD FS SAML SSO login working, review three additional options:
- To make it so that SAML SSO is the only access method for your knowledge base, go to Security and access > Single sign-on > SAML settings tab, select Require all readers to log in via SAML SSO, and Save. This overrides the Content authentication selection in Security and access > Security settings. Refer to SSO options for different knowledge base setups for more information.
- If you'd like to use the SAML SSO as your only or primary reader authentication mechanism, go to Security and access > Security settings. In the Unauthenticated access behavior subsection, select Redirect them to your SAML login URL and Save. Refer to SSO options for different knowledge base setups for more information.
- If you'd like to use SAML SSO for your authors, refer to Set up SAML SSO for authors.