
All new knowledge bases use category icons on their homepage. If you're using one of our older knowledge base themes, or you're using a knowledge base created from a copy of an older knowledge base, you may need to manually update your knowledge base to use category icons on the homepage.
There are two ways to use category icons in your homepage category panels:
- Use our pre-built merge code to do the work for you: This requires less work and technical knowledge, but it will change the HTML structure of your homepage, which may mean you'll need to update Custom CSS to style the panels the same way. Follow the Use the merge code setup instructions.
Recommended
We recommend starting with this approach, since it uses built-in functionality. - Keep your existing styles and use a script (and some additional Custom CSS) to style your icons: This is a bit trickier but means you won't have to touch your current styles much. Follow the Use a script setup instructions.
We'll walk through each option in more detail below.
Use the merge code
To use the merge code, update your homepage so that it's no longer using the [template("base-cats")] template.
Look before you leap
If your knowledge base is actively being used, contact us to request a sandbox copy of your knowledge base to test this template in, since it will change the styles a bit!
To generate the automatic panels for your current homepage, a template for base-cats is used. This template is usually added in one of two places:
- Customize > Homepage
- Customize > Style (HTML & CSS) > Custom HTML > Homepage
- Check each of these pages to see where
[template("base-cats")]is referenced. Make your edits in the same place. - Once you've found where the template is added, replace "base-cats" with "icon-cats". Your merge code should now look like:
[template("icon-cats")] - By default, the icon-cats template will:
- Display all of your categories
- Display four categories per row
- Won't display the category description
- If you're happy with that, you can Save now. Otherwise, you can adjust the merge code to change this behavior.
- To limit the number of categories it shows, add
,max=8. Make sure you have no spaces, and replace8with the maximum number of categories you want to show. For example, this merge code will limit the number of categories displayed to eight:[template("icon-cats,max=8")] - To adjust the number of categories displayed per row, add
,col=4. Make sure you have no spaces, and replace4with the number of columns of categories you want per row. For example, this merge code will display three categories per row instead of the default four:[template("icon-cats,col=3")] - To show the category description below the category's icon and title, add
,desc=1, which tells the merge code to show descriptions:[template("icon-cats,desc=1")] - You can use any combination of these settings together, too. This merge code will display a total of nine categories even if there are more, and will display them in rows of three with the category descriptions shown:
[template("icon-cats,max=9,col=3,desc=1")] - You can use the Update Preview option to get a sneak peek of how that will look.
- Once you've finished making changes, be sure to Save them.
If you're using the default styles on the homepage, that will shift the homepage from having two or three categories per row with this styling:
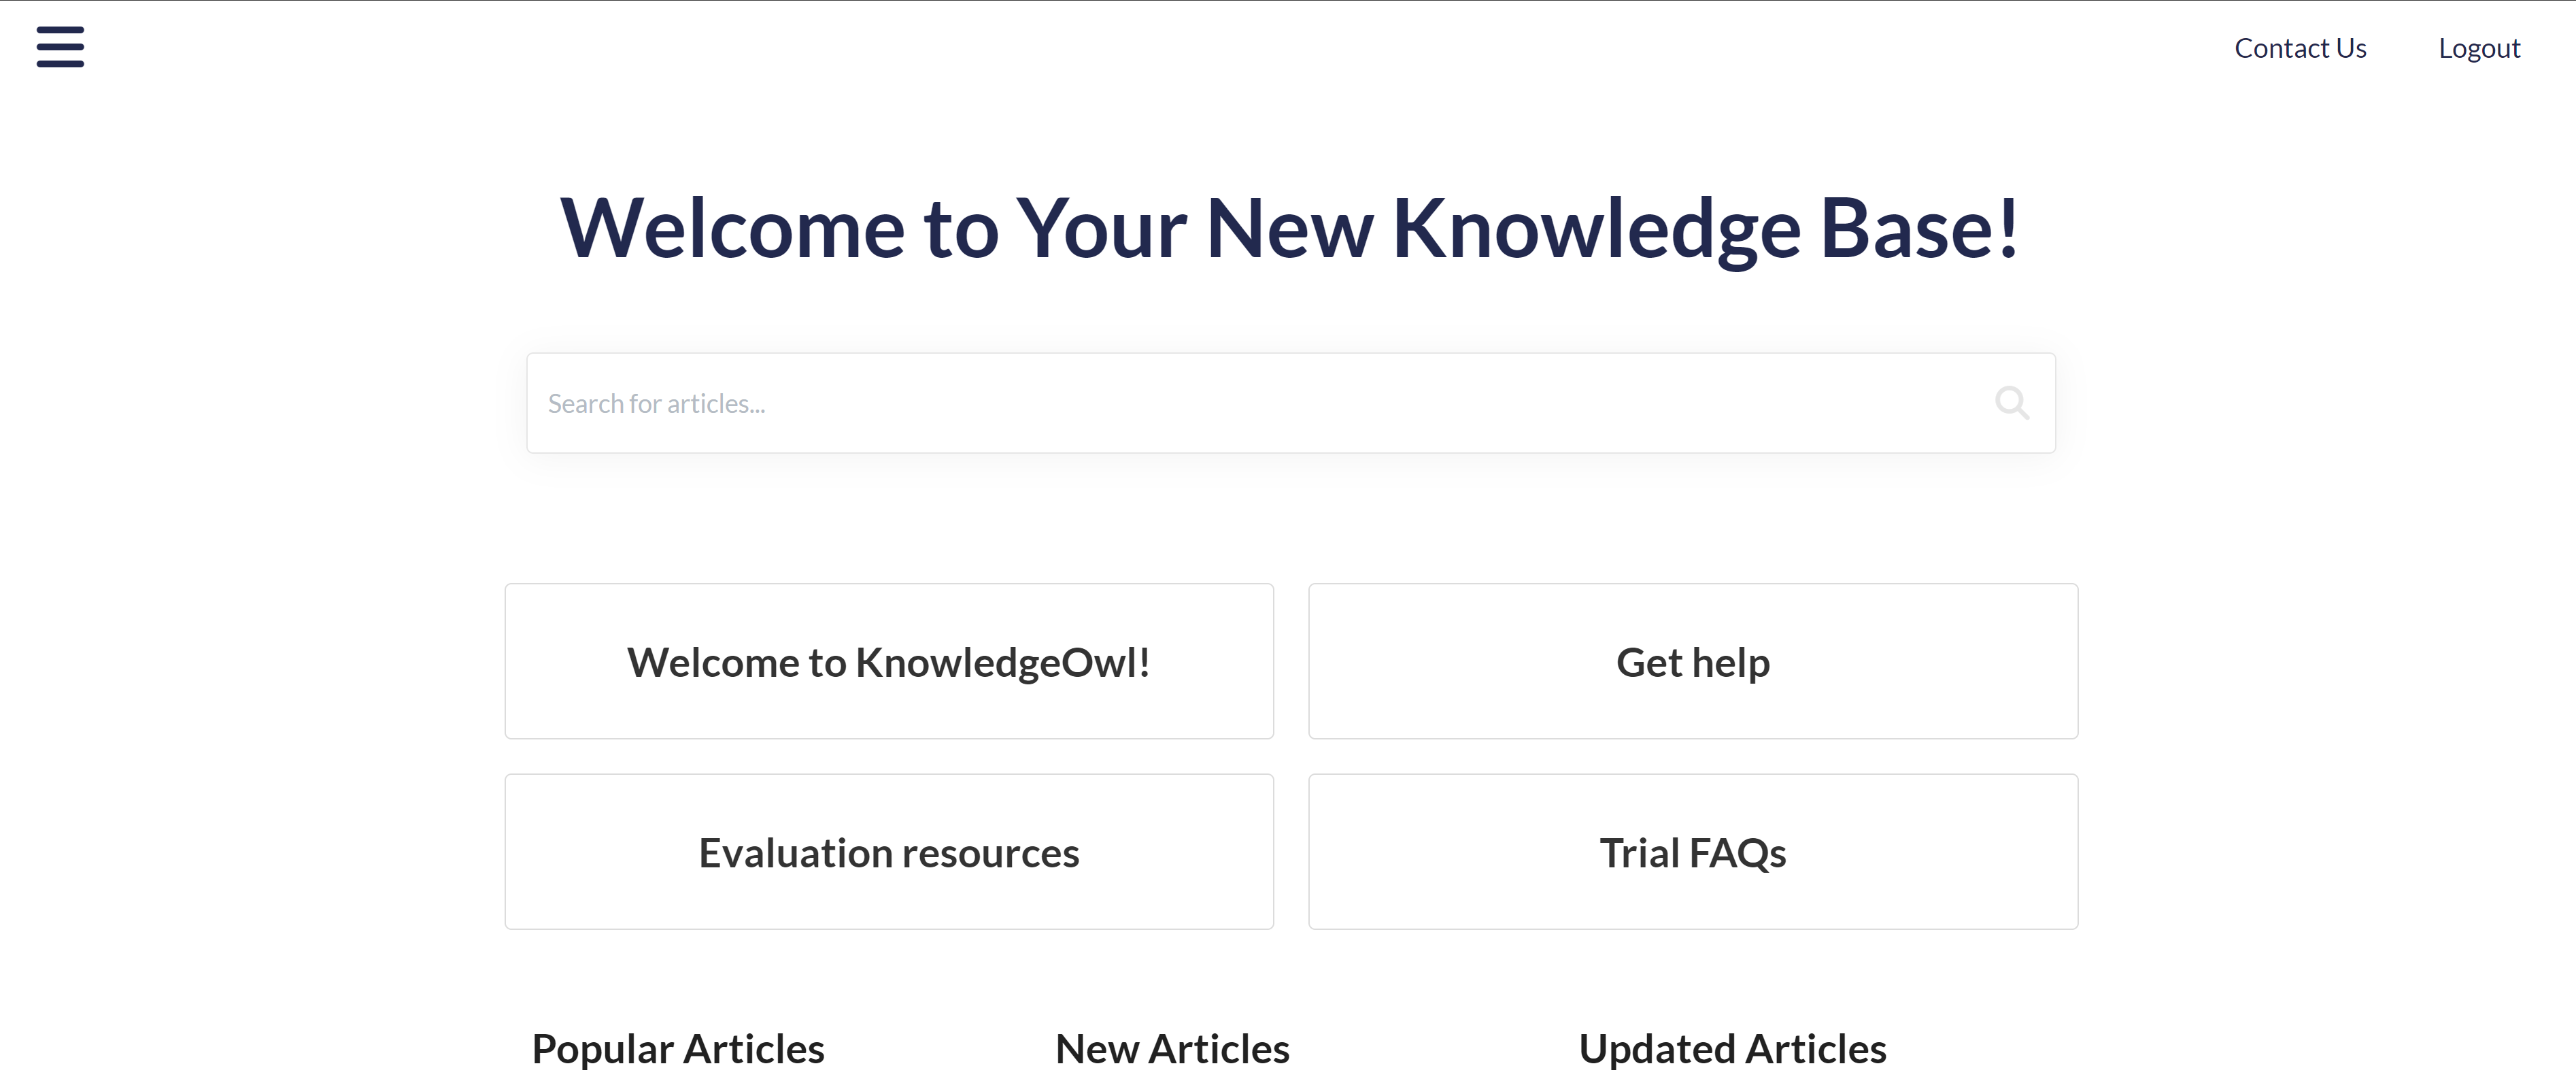 A sample knowledge base using the base-cats template
To have four categories per row with this styling:
Styling the panels
If you have Custom CSS already applied to your homepage category tiles, that CSS won't generally work on the icon-cats template, since it constructs the HTML and CSS classes differently.
In the base-cats format, the row of category tiles is put within a div class="category-list" with divs for faq-cat-panel-container and faq-cat-panel, something like this:
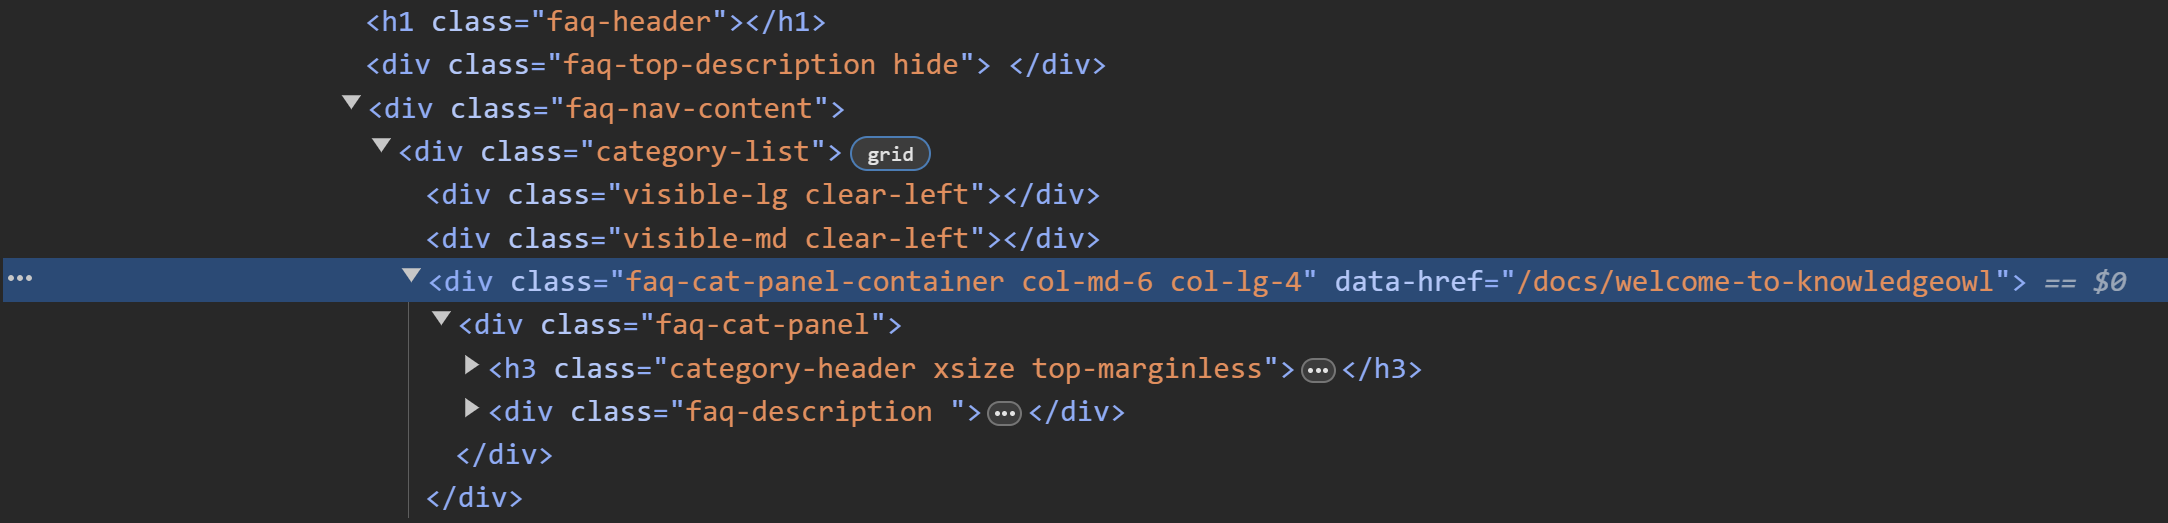 Sample HTML structure of a homepage using base-cats
faq-cat-panel div, which handles background, border, text alignment, and more.
Once you switch to icon-cats, the format changes significantly:
- The
category-listdiv picks up two extra classes (panelsandcolx, where x is replaced with the number of columns specified in the merge code). - The extra
faq-cat-panel-containeris completely removed. - The
faq-cat-panelclass changes tocat-icon-panel. - The div also includes a div for
category-icon. - The
cat-icon-panelgets a title set, which helps with accessibility.
The default styles we use for the icon-cats classes are:
.cat-icon-panel {
    border: 1px solid #e6e6e6;
    display: flex;
    align-items: center;
    justify-content: center;
    flex-direction: column;
    box-shadow: none;
    padding: 16px;
    border-radius: 5px;
    cursor: pointer;
    transition: all .2s ease-in-out;
    backface-visibility: hidden;
}

.category-icon {
    height: 100px;
    transition: all .2s ease-in-out;
}

.hg-minimalist-theme .cat-icon-panel .category-header,
.cat-icon-panel .category-header {
    font-size: 18px;
    color: #1d284f;
}

.cat-icon-panel .category-header {
    text-align: center;
}

.cat-icon-panel:hover {
    transform: scale(1.01) translateZ(0);
    box-shadow: 2px 4px 4px #aeaeae;
}

.cat-icon-panel:hover .category-icon {
    transform: scale(1.10);
}
You can copy these and paste them into your Custom CSS and start tweaking them to do your styles.
Updating your existing CSS
Alternatively, you can try to update your existing CSS in-place. This will take some trial and error, but here are some tips:
- If you have any CSS that is setting the
.faq-cat-panel-containerwidth, you should be able to remove this completely. We no longer wrap the panels in a container to handle width; the icon-catscol=variable lets you set this width directly in the merge code. Be sure that your merge code contains the appropriatecol=setting to mimic this width CSS. - If you have any existing CSS specifying that
.faq-cat-panel-containeror.faq-cat-paneluseflex(or any of the flex attributes), you should be able to remove that entirely. The icon-cats structure uses flex automatically. - If you have existing
.faq-cat-panelstyles, try copying that CSS and adding it to the.cat-icon-panelclass.- For example, if I have this CSS in my existing knowledge base:
.hg-home-page .category-list .faq-cat-panel { border: 2px solid black; box-shadow: none; padding: 16px; border-radius: 5px; } - I can add a comma and add the same selectors but replace .faq-cat-panel with .cat-icon-panel:
.hg-home-page .category-list .faq-cat-panel,
.hg-home-page .category-list .cat-icon-panel {
  border: 2px solid black;
  box-shadow: none;
  padding: 16px;
  border-radius: 5px;
}
- For example, if I have this CSS in my existing knowledge base:
- Changes to the base styles for the
.cat-icon-panelas well as the h3 within them should be fairly easy to update using this method. - You may need to add new
:hoverstyles for.cat-icon-panel:hoverand.cat-icon-panel:hover .category-iconrather than updating existing styles for.faq-cat-panel:hover, depending on how the existing CSS was formatted. You can use the default CSS in the previous section as a base and compare that with your current CSS for hover effects to try to find the right combination. - Preview is your friend when testing these CSS changes, or ask our team for a sandbox copy of your current knowledge base to test in!
Use a script
If you don't want to use the merge code, you can use the base-cats template combined with a script to extract the icons. This is a little clunkier but does work.
We strongly encourage you to try the merge code approach though, as it is slightly more accessible for screen readers and much easier to work with for future styling needs.
Add to your knowledge base's Custom HTML and Custom CSS to extract the category icons and display them.
Before you begin
It's a great idea to have at least one category icon added to a category, so you can confirm the script is working and figure out what style tweaks might be necessary.
To get the category icons displaying on your homepage:
- Go to Customize > Style (HTML & CSS).
- In the Customize HTML, CSS, and JS section, select Custom HTML.
- Select Homepage from the Select HTML section to edit dropdown.
- Copy the script below and paste it into the bottom of the Custom HTML editing pane:
<script> //This script runs on the homepage and looks for category icons added to the category, extracts and displays them. $(function() { $.each($(".faq-cat-panel-container"), function() { var imageURL = $(this).find("input.category-icon-url").val(); $(this).find(".faq-cat-panel").prepend("<div><img class='category-icon' src='"+imageURL+"' alt=''></div>"); }); $('.faq-cat-panel-container').show(); }); </script> - Now select Custom CSS.
- Copy the CSS below and paste it into the CSS editing pane. The
.category-iconclass can be used to style your icons as you'd like--the style here is just an example. You can play with this more or talk to our support team for additional help getting the icons to appears as you'd like!/* Hide the homepage category containers at first, so that the category icon script will display them once they run This prevents a blip where the panels show briefly without the icon */ .hg-home-page .faq-cat-panel-container { display: none; } /* Style the category icon; you can use any variety of CSS here */ .category-icon { max-width: 3em; padding-bottom: 0.5em; } - You can preview your changes; just be sure you Save them once you're done.
Variations
If you'd like the alt text of the image to be populated by the category title, use this script instead:
<script>
    //This script runs on the homepage and looks for category icons added to the category, extracts and displays them.
  $(function() {
    $.each($(".faq-cat-panel-container"), function() {
      var imageURL = $(this).find("input.category-icon-url").val();
      var catTitle = $(this).find(".category-header a").text();
      $(this).find(".faq-cat-panel").prepend("<div><img class='category-icon' src='"+imageURL+"' alt='"+catTitle+"'></div>");
    });
    $('.faq-cat-panel-container').show();
  });
</script>