
You can have more than one knowledge base on your account. Content can be synced across knowledge bases, but settings (including theme), libraries (files & snippets etc) and reporting is all kept separate for each knowledge base.
To add a new knowledge base:
- Go to your dashboard by selecting the owl in the top left of the navigation bar or selecting the knowledge base name in the upper left and selecting Dashboard.
- Once your dashboard loads, select + New Knowledge Base:

A modal opens to prompt you for some details about the knowledge base. Follow the instructions. - Be sure you assign at least one author to the new knowledge base! (Your author account is assigned by default.)

If you don't see the option to add a new knowledge base, you don't have another knowledge base slot available on your account, so you'll need to add one:
If you pay by invoice, contact us to add another knowledge base.
If you pay by automatic in-app payment method, you can add additional knowledge bases to your account at any time. To do so:
- Go to Account > Billing. The Billing page opens.
- Select Edit in any section on this page to open the Edit your subscription page.
- Use the plus (+) and minus (-) controls in the Knowledge bases section to add or remove Extra knowledge bases:
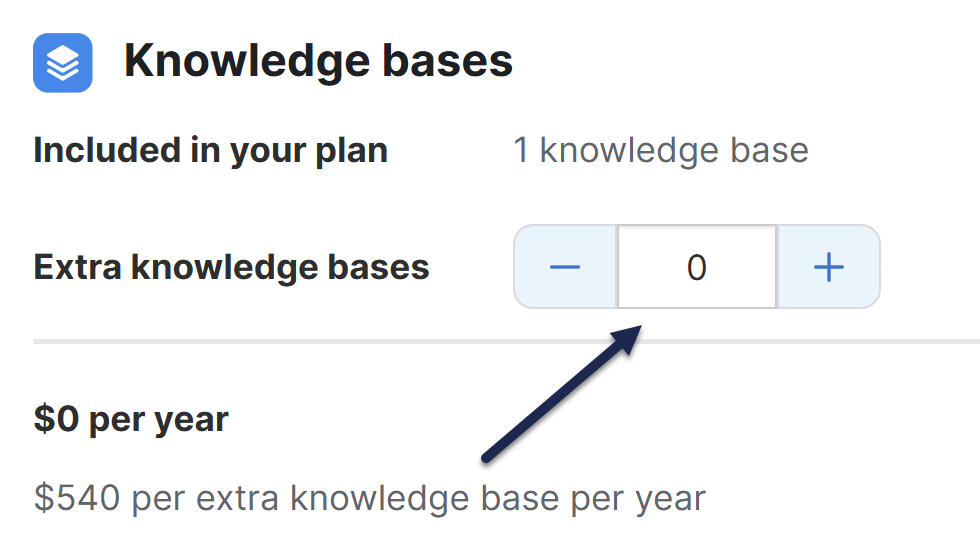
- The Total at the bottom of the page updates to reflect the changes you make above.
- Once you've made the adjustments you'd like, select Upgrade subscription at the bottom of the page to save the changes.
The Subscription Change modal opens to confirm the change. - Verify that the cost displayed here for the full subscription term looks correct and select OK.

We'll immediately process the payment and the knowledge base slot is now available.
- Select the owl in the upper left to go to your dashboard.
- Once your dashboard loads, select + New Knowledge Base:
A modal opens to prompt you for some details about the knowledge base. Follow the instructions. - Be sure you assign at least one author to the new knowledge base! (Your author account is assigned by default.)
If you have room on your account, you can create a copy of an existing knowledge base for a variety of purposes: testing/troubleshooting, translating, new versions of software, and as a template.
The following items won't copy:
- Files storage and labels (all images and files in the content of the new, copied knowledge base will link to the original source knowledge base's file storage)
- Synonyms
- Revisions
- Related Articles
- Shared content relationships (though the articles/categories will be copied in full, just no longer linked). Refer to Synced content in copied knowledge bases for steps on how to audit and re-create shared content.
- Articles' date created (though date modified and date published will)
To copy your knowledge base:
- Select the owl in the top left of the navigation bar or select the knowledge base dropdown in the upper left and select Dashboard.
- Select the gear icon in the top right of the knowledge base you want to copy.
Don't see the gear cog icon?
If you don't have a gear icon, you don't have permission to copy a knowledge base. Contact your knowledge base administrator. - Select Copy.
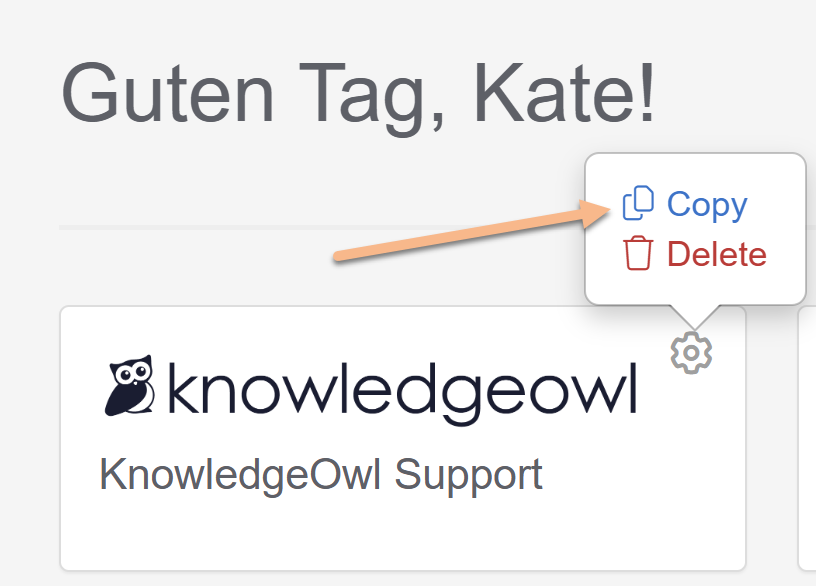 Select the gear cog icon > Copy.
The Copy Knowledge Base modal opens.Don't have the Copy option?
If you have the gear cog icon but don't have the Copy option, you don't have any empty knowledge base slots in your account. Follow the steps in Create an additional knowledge base to purchase another knowledge base slot. - Enter a New Knowledge Base Name to distinguish this knowledge base from the original.
- Enter a New Knowledge Base Sub-Domain to distinguish this knowledge base from the original.
- Leave the option to sync all the content unchecked unless you are sure you want to do this (refer to Sync all content below for more information).
- Select Copy Project to begin the copy.
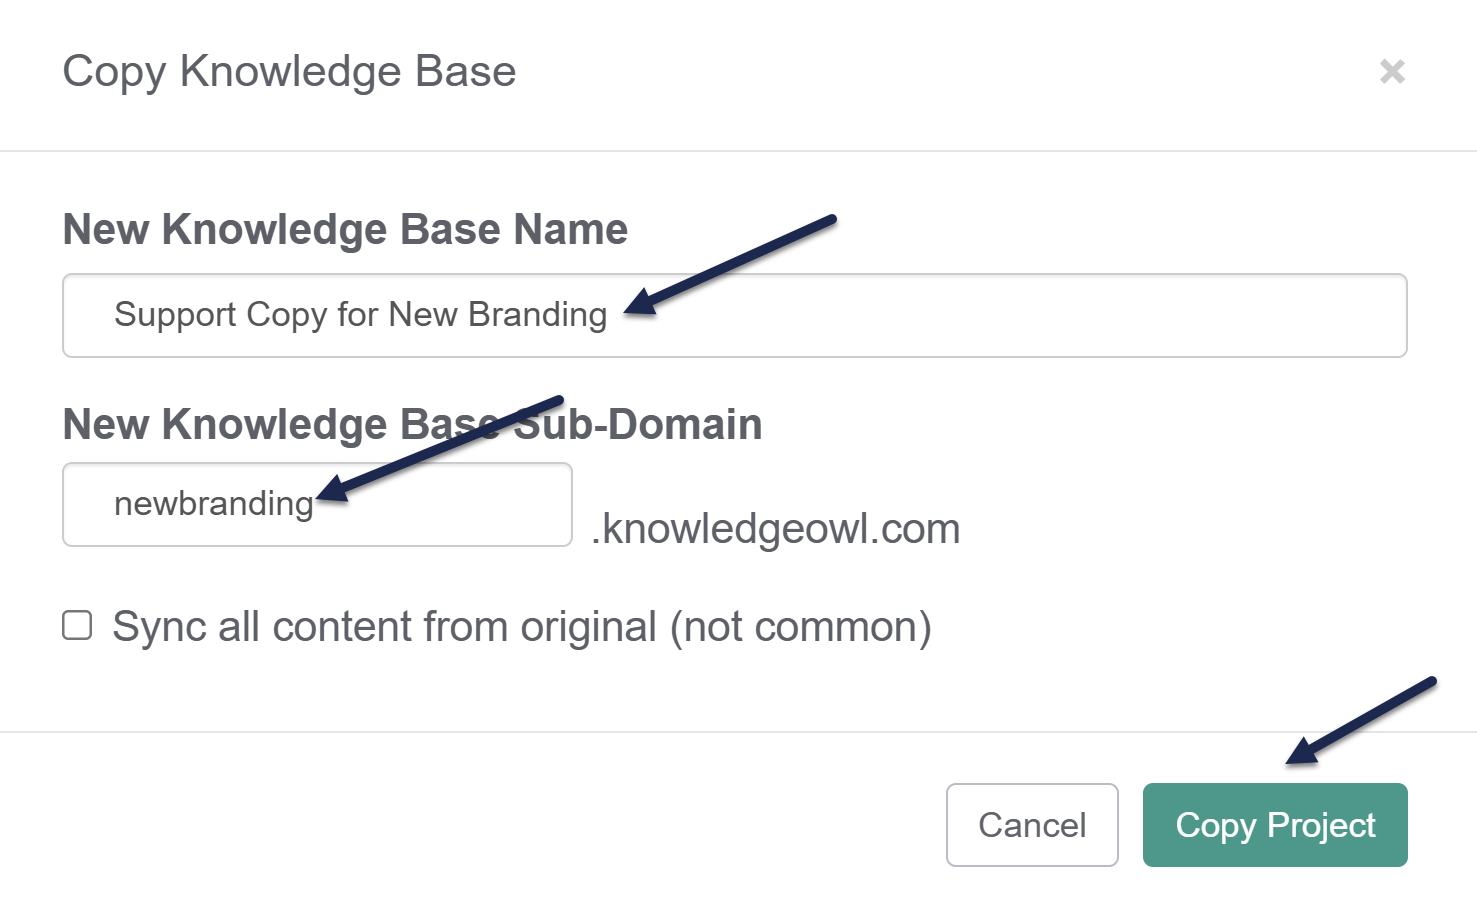 Enter a New Knowledge Base Name and Sub-Domain, then select Copy Project


You'll see a progress bar while the knowledge base copies. Larger knowledge bases take longer to copy. You'll receive a confirmation message once the copy is complete.
Once a copy exists, these features can take longer to become available:
- Indexing all copied content for search: Usually completes within 1-2 hours.
- Generating all individual article PDFs: These get split into small batches and run over the next 2-24 hours, depending on the size of the knowledge base.
So if you view the knowledge base right after the copy finishes and search doesn't seem to fully work or an article PDF doesn't load, don't panic--this is normal!
Transition to the copy
If you've taken a copy of a knowledge base and would like to delete the original and move its files/update content links to files to the new knowledge base, please contact us to help!
What does "sync all content" do?
Sync all content from original creates each top-level category in your new knowledge base as a synced category, with the existing top-level category in the source knowledge base as its source. This effectively synchronizes all content changes between the two knowledge bases, so that updating content in one knowledge base (such as creating or deleting articles, editing article content, and so on) also automatically updates the synced knowledge base. Refer to Synced knowledge base for how these syncs work.
In most cases, synchronizing all content is NOT the option you want. All copies will take a point-in-time copy of the original source knowledge base. If you leave "sync all content" unchecked, the two knowledge bases remain independent moving forward: edits to one will not impact edits to the other. Only select Sync all content from original (not common) if you want the two knowledge bases to continue to mirror each other's content moving forward permanently.
Uh-oh, I synced and I didn't mean to
If you've accidentally synced all content and don't want it synced moving forward, contact us and ask us to fully unlink the two knowledge bases.
To delete a knowledge base you no longer need:
- Select the owl in the top left of the navigation bar or selecting the knowledge base dropdown and select Dashboard.
- Select the gear icon in the top right of the knowledge base you want to delete.
- Select Delete.
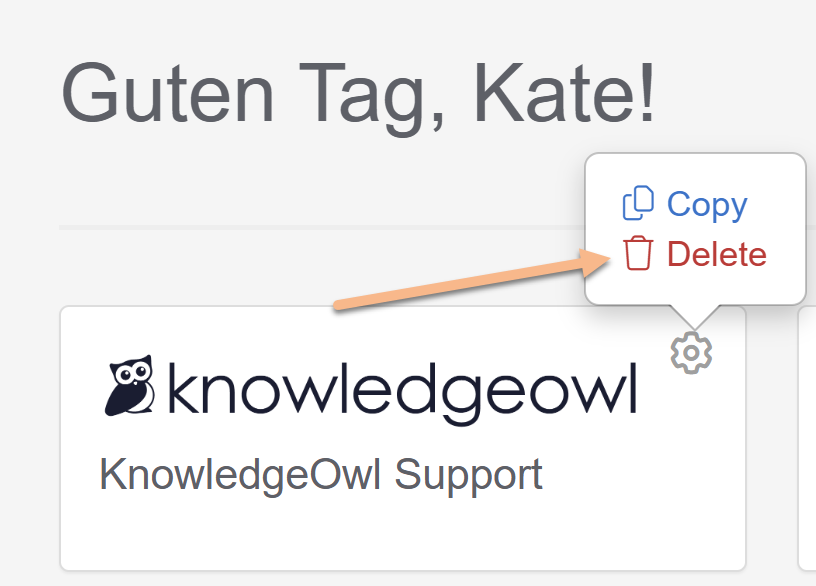 Select the gear cog icon > Delete.
 - Once you select delete, a modal opens to confirm the action. The knowledge base's name will appear in bold.
- If the named knowledge base is the one you want to delete, select OK to complete the deletion. (If it's not, select Cancel and find the correct knowledge base!)

If you accidentally delete a knowledge base, please contact us for help retrieving it.
If you don't intend to use that knowledge base slot for a new knowledge base and would like to stop paying for it, refer to Remove an unused knowledge base slot to downgrade your account and save some money.
If you pay for KnowledgeOwl via invoice, please contact us to add or remove a knowledge base slot from your account.
If you pay for KnowledgeOwl automatically with a payment method in Account > Billing, you can add or remove knowledge bases yourself, at any time. We'll automatically prorate a credit (downgrade) and adjust your upcoming payments based on the changes you make. Refer to Creating an additional knowledge base for adding knowledge bases.
To remove a knowledge base you aren't using:
- Go to Account > Billing. The Billing page opens.
- Select Edit in any section on this page to open the Edit your subscription page.
- Use the plus (+) and minus (-) controls in the Knowledge bases section to add or remove Extra knowledge bases:
- If you try to remove a knowledge base but are currently using all knowledge base slots, a warning displays letting you know you must delete a knowledge base in order to downgrade. Follow the instructions to delete a knowledge base from the dashboard before you remove the knowledge base slot.
- The Total at the bottom of the page updates to reflect the changes you make above.
- Once you've made the adjustments you'd like, select Downgrade subscription at the bottom of the page to save the changes.
The Subscription Change modal opens to confirm the change. - Verify that the cost displayed here for the full subscription term looks correct and select OK.
If you have trouble doing any of the above, please contact us!