
When you copy a knowledge base, all shared content links will remain intact in the knowledge base you are copying. But in the copied knowledge base, no shared content links will exist--we remove them during the copy process. All previously synced content is created as one-time copy.
If you'd like to maintain those shared content links, you'll need to manually re-create shared content links in the copied KB. We recommend following a three-step process:
- Use a CSV export in Manage in the original knowledge base to identify all articles with syncing relationships and determine their parents.
- Delete and re-create shared content articles in the copied knowledge base.
- Delete and re-create shared content categories in the copied knowledge base.
Use a CSV export in Manage
To begin this process:
- In the upper lefthand navigation, go to Manage.
- Select the All Non-Deleted filter from the filter dropdown. See Using standard Manage filters for more information on working with this type of filter.
- Click on the option to Export articles to CSV. See Export the Manage Articles list to CSV for step-by-step instructions on working with these exports.
- In the Export articles interface, be sure you check the boxes next to:
- App Edit Link
- Shared Content Article
- Linked to Article
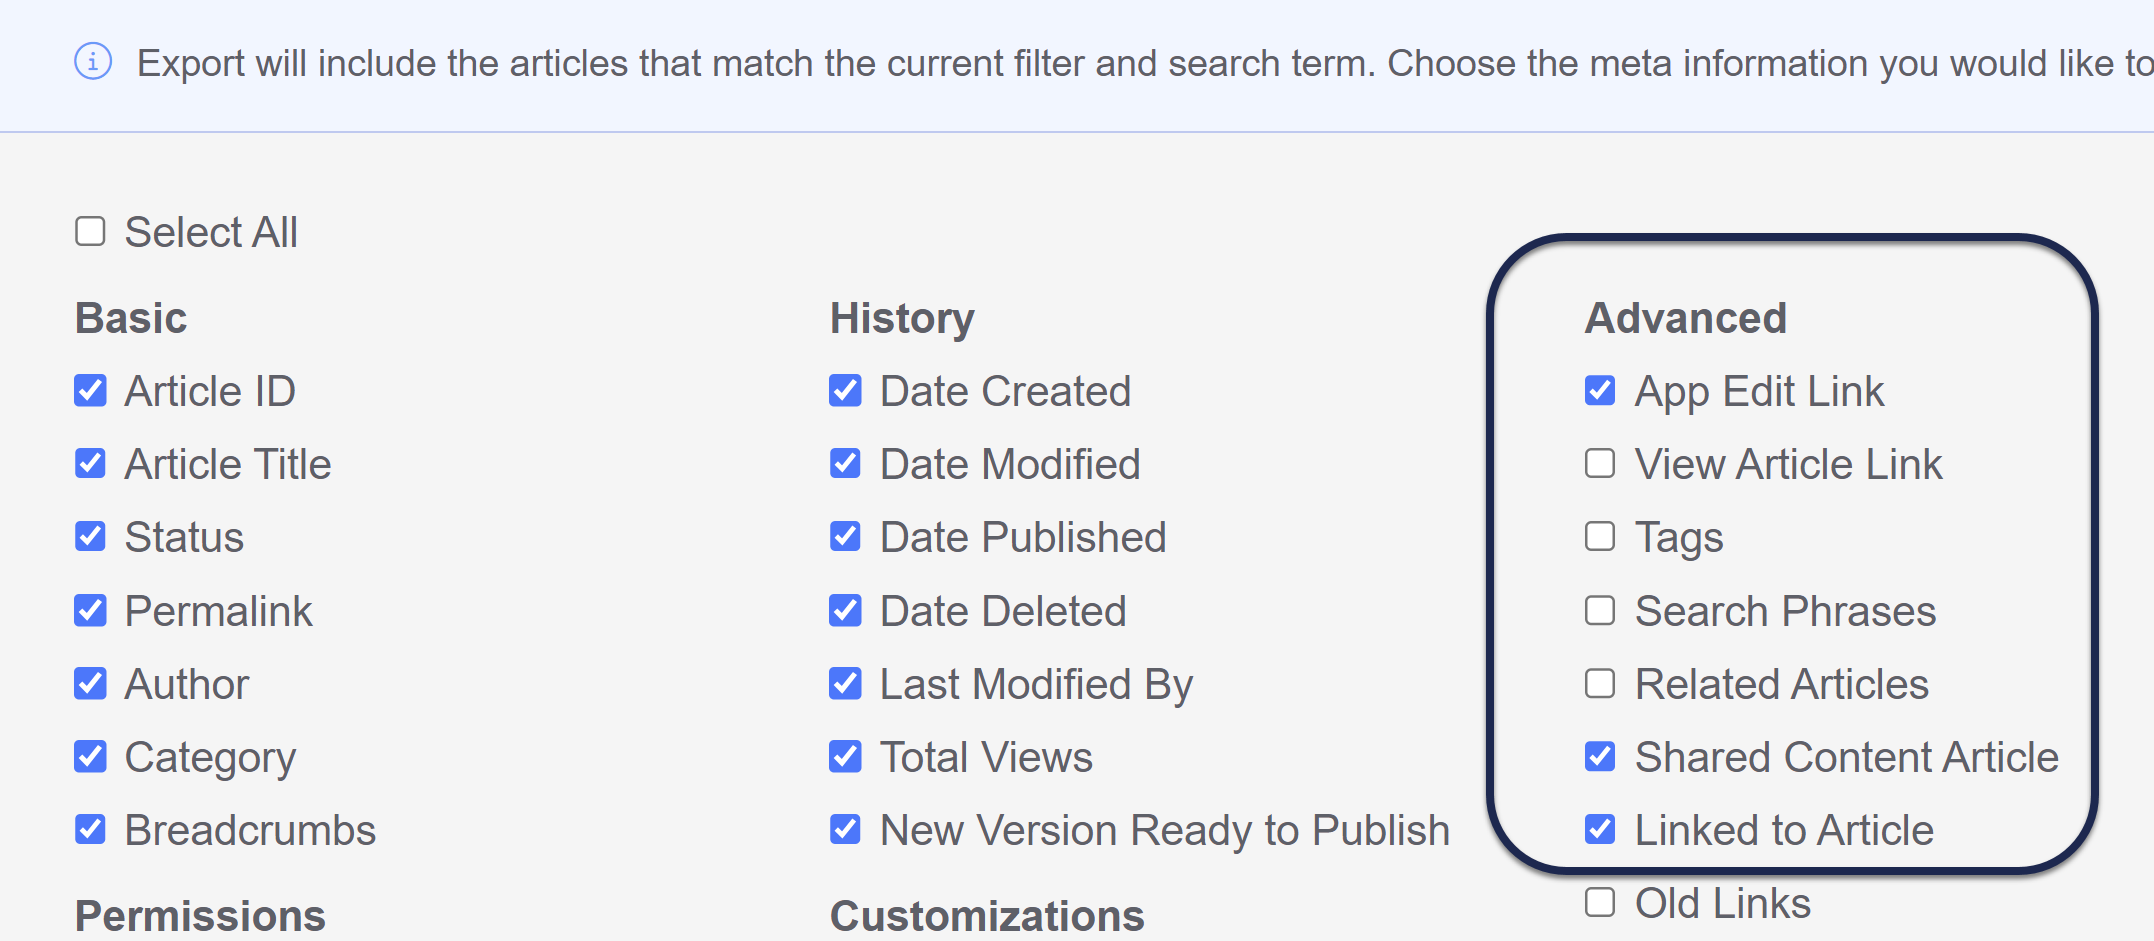
- Make any other selections you'd like, and then select the Export Articles button.
- Download the CSV once it's available.
- Open the CSV in Excel or another spreadsheet software (we use Excel below).
- You can now follow the steps below to identify child shared content articles and child shared content categories.

Re-creating child shared content articles
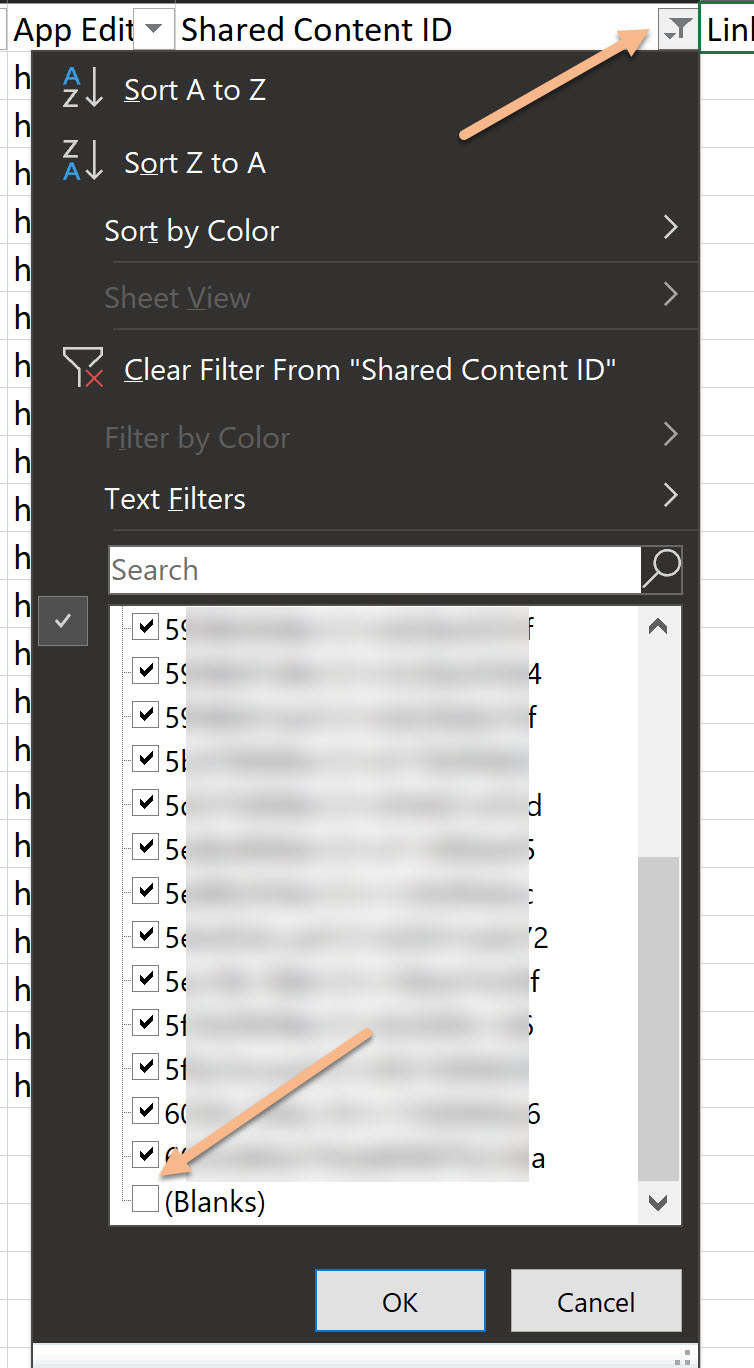
Using the Manage CSV export from above, add a filter to the Shared Content ID column.
Filter to show all rows with a value in them (remove Blanks).
Articles which are shared content child articles will have the article ID of the parent article here. If this returns anything, you have shared content relationships you may want to re-create.
- If you're using Excel, you can add filters by going to Data > Filter, then clicking on the dropdown that appears next to the column header. Uncheck the box next to (Blanks) and you'll get the list you need.
You can use the App Edit Link value to determine the parent article, by copying that value and pasting it into your browser. This will open the article in edit mode, and you can click the hyperlink presented in the message to view its parent article.

(We recommend grabbing the parent article's information and adding it into the CSV spreadsheet in a new column to make it easier to work through this all at once.)
Ultimately, what you'll want to have is:
- A list of the articles that are child articles (which the filters above will give you)
- The original parent article for those (which you can identify using the App Edit Link in the CSV export)
- The correct parent in the new copied knowledge base: this might be the same parent article in the original knowledge base or it might be an article in the new copied knowledge base--it depends whether the original shared content was all within one knowledge base or synced from other knowledge bases.
Using this list, for each shared content child article in your copied knowledge base, if you want to re-create them as shared content articles, you'll want to:
- Delete the article in the copied knowledge base.
- Create a new article in the same category, using the Share content from an existing article option.
- Search for the appropriate parent article, which may be in the copied knowledge base or in a different knowledge base.
- Create the article using the same title and permalink used previously.
Re-creating shared content categories
Using the Manage CSV export from above, add a filter to the Linked Article ID column and filter out all Blanks.
Articles which are linked as part of a shared content category will have their parent article ID in this column.
If this returns anything, you have one or more shared content categories you may want to re-create in the copied knowledge base.
In your copied knowledge base, if you want those categories to be synchronized, you'll need to delete them and re-create them as shared content categories.
First, figure out which category was synced in the original knowledge base, if you don't already know:
- Review the Category and Breadcrumbs of the articles your filter returned.
- Open the categories in the full breadcrumb until you get to the top-most shared content category. Shared content categories have a message across the top in the editor letting you know they are synchronized. You can use the hyperlink in the message to identify the knowledge base and category that is the parent:
 Sample shared content child category message; this category's parent is the New user guide category in the Reference KB

If you want to have the category and all articles within properly synchronized in the copied knowledge base:
- In the Articles interface in the copied knowledge base, delete the top-most category that should be a shared content category. This will delete the category and all of the articles created during the copy, which aren't synchronized.
- In the Articles interface, add a category and use the Shared content option.
- Use the knowledge base mentioned in the message you identified above, and search for the category by name.
- Once you create the category this way, it will automatically create all subcategories and articles as shared content, keeping them fully in-sync.