
Images, screenshots, and sample files can add examples and detail to your documentation. Use the Insert Image option in the editor to add images in your articles.
To add images to your articles:
- Open the article in the editor.
- In the editor toolbar, select the Insert Image editor control (landscape icon) or use Ctrl + P:
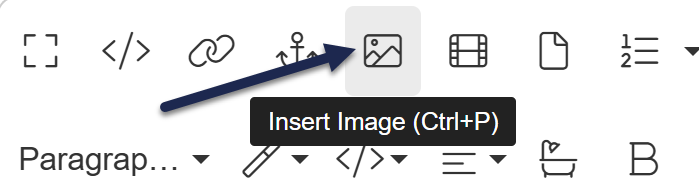 The Insert Image option in the Modern Editor
Once you select Insert Image, a small modal opens where you select how you want to insert the image. Choose from these options:
- Upload Image: Upload a new image to KnowledgeOwl. Follow the Upload new image instructions.
- By URL: Save yourself the step of downloading an image; paste in the URL of an image from a publicly-available website. Follow the Insert by URL instructions.
- Add From Library: Add an image you've already uploaded to KnowledgeOwl. Follow the Add existing image instructions.
Once you've inserted your image, you can also make some small edits to how it displays. Refer to Edit the inserted image for more information.
Upload new image
Use the Upload Image option (upload arrow icon) to upload an image file directly from your computer to KnowledgeOwl.
To use this option:
- In KnowledgeOwl, select Insert Image. The modal opens to the Upload Image option (upload arrow icon).
- If for some reason the modal opens to a different option, select the Upload Image upload arrow icon (first icon) in the Insert Image modal.
- Drag and drop your image into the Drop image section, or click anywhere in the Drop image section, browse to the image you want to upload, select it, and select Open.
- The image uploads to your Files page and is added to your article.
To make further adjustments to the image, refer to the Edit the inserted image instructions.
Insert by URL
Use the By URL option (the link icon) to paste in a URL from another website. This can be a fast way to add images from your company website, for example. The image needs to be on a site that doesn't require login or authentication.
To use this option:
- Copy the URL for an image from a publicly-available website.
- In KnowledgeOwl, select Insert Image.
- Select the By URL link icon (second icon) in the Insert Image modal.
- Paste the image's URL into the provided field.
- Select Insert.
The image is added to your article. To make further adjustments to the image, refer to the Edit the inserted image instructions.
Add existing image
Use the Add From Library option (folder icon) to insert an image that you've already uploaded to your Files. This is a great way to keep your Files storage organized and reuse images or screenshots in multiple pages.
To use this option:
- In KnowledgeOwl, select Insert Image.
- Select the Add From Library folder icon (last icon) in the Insert Image modal. The Add from Library modal opens.
- Browse or search for the image you want to insert. Once you find it, select it.
- Select Insert File to insert the image into your article.
The image is added to your article. To make further adjustments to the image, refer to the Edit the inserted image instructions.
Edit the inserted image
Once your image has been added, you can further tweak how it displays by selecting anywhere on the image to open the image contextual menu:
 Sample image contextual menu
Use this menu to:
- Replace this image with a different image (arrows icon).
- Change the Alignment for the image (line icon and dropdown).
- Choose between Align Left, None (which generally centers the image), and Align Right.
- Add an Image Caption (speech bubble icon). Captions display below the image, like the "Sample image contextual menu" caption on the screenshot above.
- Remove this image from the article (trash can icon).
- Insert Link to the image, so readers can click on it to navigate somewhere. This is useful if you're using an image for navigation purposes.
- Change the Display option for the image (star icon and dropdown).
- Choose between Inline or Break text. Inline will allow text around the image, basically embedding it in the text; Break text will force a text break before and after the image.
- Change the Style for the image (magic wand icon and dropdown). All images are given the Responsive Image style automatically, so that they'll resize based on screen and device size. We recommend keeping this style at all times. You can also add one of three other styles:
- Rounded: Will add a light rounding of the corners of the image. This style typically works the best if there's a good color contrast between the edges of the image and the background around it.
- Circle: Will try to make the image circular. For wide images, this often makes them oval. Use this style with care, as it may hide some of the image.
- Thumbnail: Adds a 2px border around the image and lightly rounds the corners.
- Add Alternative Text for the image (letter i icon).
- If the image was added from library and you have a file description added to the file, the alternative text will copy that file description when you add it. Refer to Add a file description for alt text for more information on working with file descriptions.
- If you're following accessibility best practices, informative images in your documentation should include alternative Text (also known as alt text) to provide a short description conveying the essential information presented by the image. This text can be used by screen readers and other assistive devices to help convey the information the image presents. Refer to Add alternative text to images for more information on working with alternative text. Refer to Accessible images for image accessibility best practices.
- Change Size for the image (four-way arrow icon).
- This opens Width and Height controls. To keep your image scaling well, we recommend only changing the Width. Use a percentage (%) or pixel (px) sizing.
- If you don't want to guess at resizing numbers, you can also select the image and click and drag one of the blue corner boxes to resize dynamically.
Looking for more philosophical than practical guidance? Check out our Image best practices guide.