
In a topic display category, the Quick Links section gets a grey background and displays each article in a bullet point list, like this:

Here in our Support KB, we add a "Table of contents" header with a border, change the bullet points to carets, and change the colors. So ours looks like this:

Interested in making a similar set of changes? Below, we walk through the various elements on how we did it.
Change the bullet points to an icon
To change the bullet points to the right-pointing caret, we add some Custom CSS and remove some existing Custom CSS (if it exists!). This uses our existing integration with Font Awesome.
- Go to Customize > Style (HTML & CSS).
- In the Customize HTML, CSS, and JS section, select Custom CSS.
- Select Find.
- Search for "Topic Category styles". If you don't find a section for this, jump to step 6. If you do find an entry that looks a bit like the code sample below, continue to step 5:
- Delete the CSS below
/* change quick links styles */: - Copy the CSS below and paste it in where those styles were. If you didn't need to complete Step 5, just add this anywhere into your Custom CSS:
/* In topic display categories, add > before each article title */ .topic-toc-item::before { font-family: 'FontAwesome'; content: "\f105" !important; /* set icon */ color: #F8B88B; /* set icon color */ font-size: 12px; } - Edit the hex code in row 5 of the pasted code to set the color of the icon.
- The code above sets it to use an icon for ">", but you can use nearly any Font Awesome icon you'd like. To adjust the icon, replace content value (
\f105) with the unicode value of a different Font Awesome icon:- Open Font Awesome.
- Search for the icon you want.
- Select the icon to open its details.
- Font Awesome displays the unicode value near the upper right. If you select or click on that Unicode, it should automatically copy to your clipboard. For example, if we wanted to use the circle plus icon, we'd select
f055to copy it.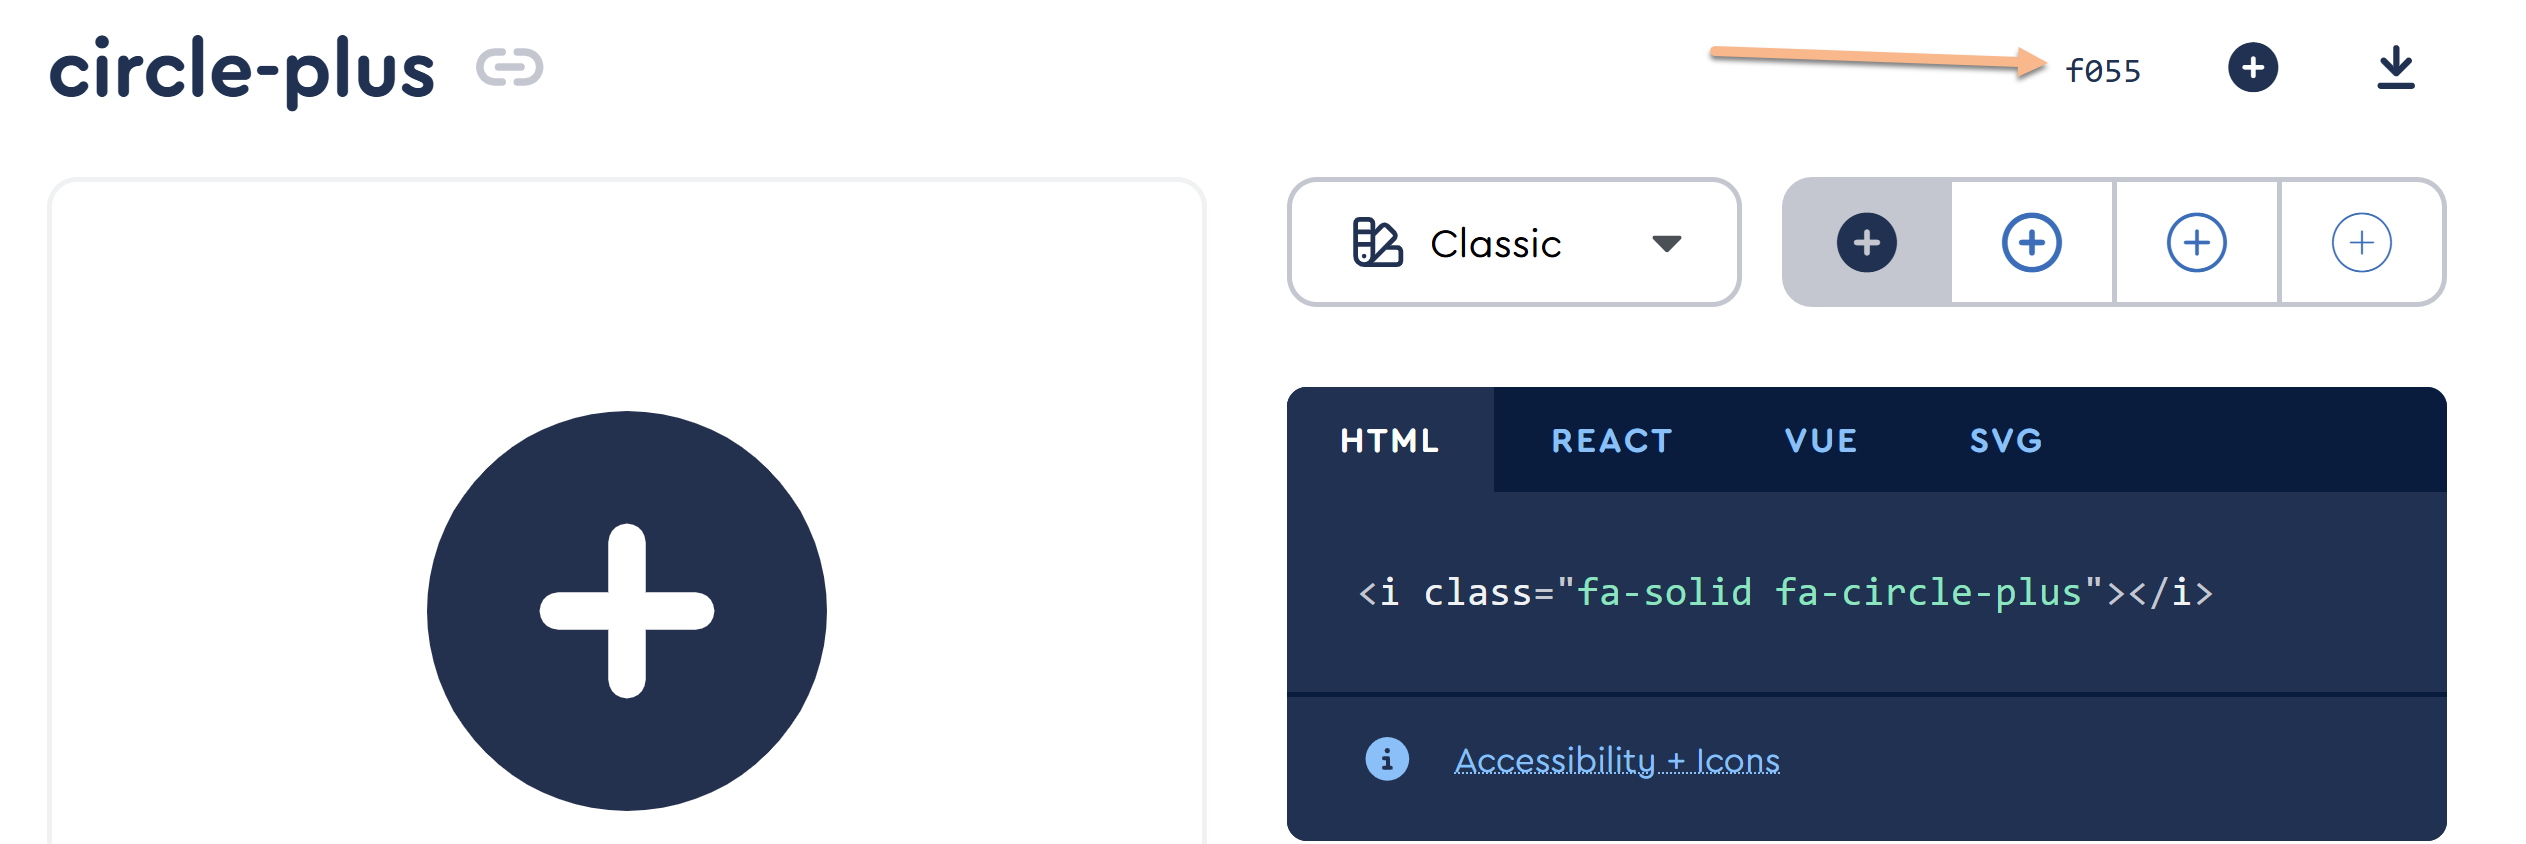
For example, here, we adjust our code to use that circle-plus value:/* In topic display categories, add > before each article title */ .topic-toc-item::before { font-family: 'FontAwesome'; content: "\f055" !important; /* set icon */ color: #F8B88B; /* set icon color */ font-size: 12px; } - Optional: You may need to play with the pixel size (px) of the font-size listed, as we picked one that looked good for our default font sizes and family.
- Be sure to Save your changes.
Change the background color and borders
We've also tweaked the background color and the borders slightly in our example. Here's the Custom CSS we added to Customize > Style (HTML & CSS) to achieve that look:
/* Change background color and borders */
.topics-toc-cntr {
  background: #FAFBFC;
  border: 1px solid #E6E6E6;
  border-radius: 5px;
}
You can add this CSS into the same section as you added the icon-adjusting CSS above.
Add the Table of contents header
For this part, we run a script in the Article Custom HTML to create a div to house the table of contents header and insert it. First, we add a script to the Custom HTML to handle the div itself; then, we add some Custom CSS to style that div.
- Go to Customize > Style (HTML & CSS).
- In the Customize HTML, CSS, and JS section, select Custom HTML.
- Select Article from the Select HTML section to edit dropdown.
- Copy the code below and paste it in to the bottom of the HTML pane:
<script> //Add a "Table of contents" title into the Quick Links of a topic display category, formatted appropriately. $(function() { //check if the .topics-toc-cntr exists and has col-md-6 divs in it (means it spans two columns and has extra padding) if( $('.topics-toc-cntr div.col-md-6').length > 0) { //Insert Table of contents with -col class in before the first column. $("<div class='td-toc-col'>Table of contents</div>").insertBefore(".topics-toc-cntr div.col-md-6:first-of-type"); } else { // No .col-md-6 means no columns, so insert Table of contents without col class so it's properly aligned. $("<div class='td-toc'>Table of contents</div>").insertBefore(".topics-toc-cntr .topic-toc-item:first-of-type"); } }); </script> - If you'd like to use a header other than Table of Contents, replace
Table of contentsin rows 7 and 10 with the text you'd like to use. For example, here it's replaced with "In this article":<script> //Add an "In this article" title into the Quick Links of a topic display category, formatted appropriately. $(function() { //check if the .topics-toc-cntr exists and has col-md-6 divs in it (means it spans two columns and has extra padding) if( $('.topics-toc-cntr div.col-md-6').length > 0) { //Insert Table of contents with -col class in before the first column. $("<div class='td-toc-col'>In this article</div>").insertBefore(".topics-toc-cntr div.col-md-6:first-of-type"); } else { // No .col-md-6 means no columns, so insert Table of contents without col class so it's properly aligned. $("<div class='td-toc'>In this article</div>").insertBefore(".topics-toc-cntr .topic-toc-item:first-of-type"); } }); </script> - Be sure to Save your changes.
Once you've added that header, you'll need to style it, too. We add some Custom CSS in the same section of CSS we added the other styles:
- Still in Customize > Style, select Custom CSS.
- Copy the CSS below and paste it in to your CSS pane, preferably with the other Topic Category styles CSS:
/* Script in Custom HTML > Article adds Table of contents div with .td-toc and .td-toc-col classes, style that */ .td-toc, .td-toc-col { border-bottom: 1px #E6E6E6 solid; /* Add a border underneath the header */ font-weight: bold; /* Set to bold, otherwise default font weight is used */ color: #1D284F; /* Override default color */ padding-bottom: 10px; /* Add some space below the header/above the border */ margin-bottom: 10px; /* Add equal amount of space below the border/above the article list */ } /* Extra padding to the ToC div when there are multiple columns so the header indents to match the content */ .td-toc-col { padding-left: 15px; } - Adjust the CSS as you'd like, to change the border, font-weight, color, and so on. For example, if you don't want a border between the header and the article list, remove lines 4, 7, and 8 from the CSS sample. If you don't want to bold the header, remove row 5.
- Be sure to Save your changes.