
- KnowledgeOwl account - sign up or log in
- Zapier account - sign up or log in. Note that you can test Zaps, including premium functionality, on the free tier, but you need a paid plan to use Webhooks by Zapier in a live Zap.
- Recommended: a test knowledge base, or test section, so you can try out your Zaps without affecting live documentation or real data.
- For the tutorial: a Google account.
The basic steps to use Zapier with KnowledgeOwl’s webhooks are:
- Log in to Zapier and create a new Zap, using Webhooks by Zapier. Set Catch Hook as the trigger event. Make a note of the Custom Webhook URL.
- Log in to KnowledgeOwl and create a webhook for your knowledge base: Webhooks overview and creation. Use the Zapier custom webhook URL as the Endpoint.
- Trigger the webhook with some test data (for example, create an article, or submit a contact form).
- Use the test data to configure your Zap.
This section provides a step by step tutorial of a potential use case for the Zapier and KnowledgeOwl webhooks integration. In this example, you will catch every new contact form submission, and send the data to a Google Sheets spreadsheet.
The tutorial includes detailed steps for using Zapier. You can also refer to the Zapier documentation, Trigger Zaps from Webhooks, and their Webhooks overview, which includes a tutorial video.
- Log in to Google Sheets.
- Create a new blank spreadsheet.
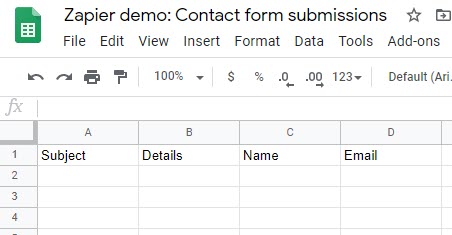
- Add the following column headings:
- Subject
- Details
- Name
- Log in to Zapier. You can create a Zap in the Dashboard, but it is clearer to see the options in the Zap editor. Select Zaps > Create Zap to open the editor.
- In Name your zap, give your Zap a meaningful name, such as “KnowledgeOwl tutorial”.
- In the Choose App & Event section, search for and select "Webhooks by Zapier".
- In Choose an Event, select Catch Hook.

- Select CONTINUE.
- Copy the Custom Webhook URL.
- In a new tab, log in to KnowledgeOwl.
- Create a new webhook: select Your Account > Webhooks > + Create New Webhook.
- Under Knowledge Bases, select your test knowledge base.
- Under Webhook Events, select contactForm.submit.
- In Webhook Type, select API.
- Paste Zapier’s custom webhook URL into Endpoint.
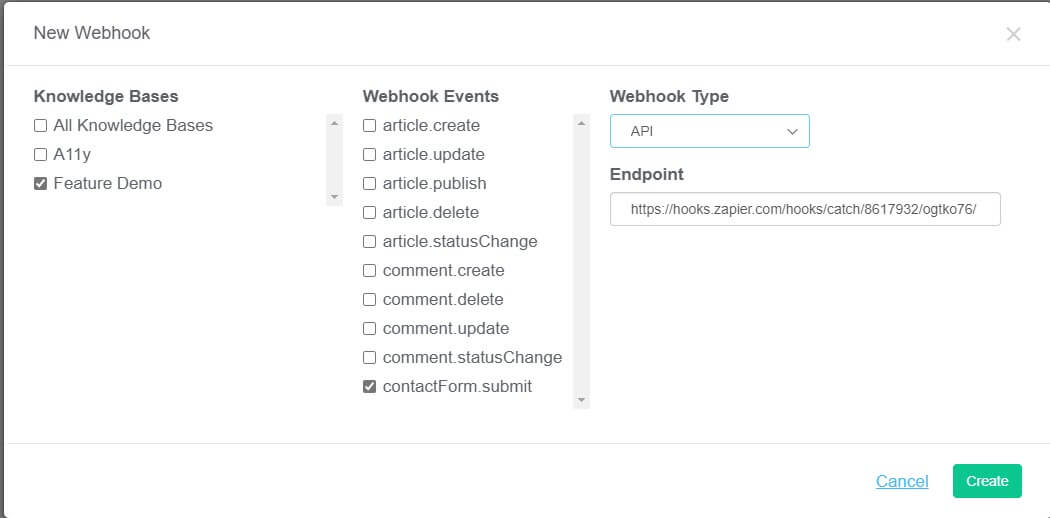
- Select Create.
- We now need to get some test data into Zapier. Go to your knowledge base contact form, add a subject and details (this can just be “test” or whatever you like), and submit it.
- Return to Zapier. In Find Data, you can select which request to use as your example data. Select the form submission you just sent. It may be called something like “Request A”. When you select it, you can see details, such as time and subject.
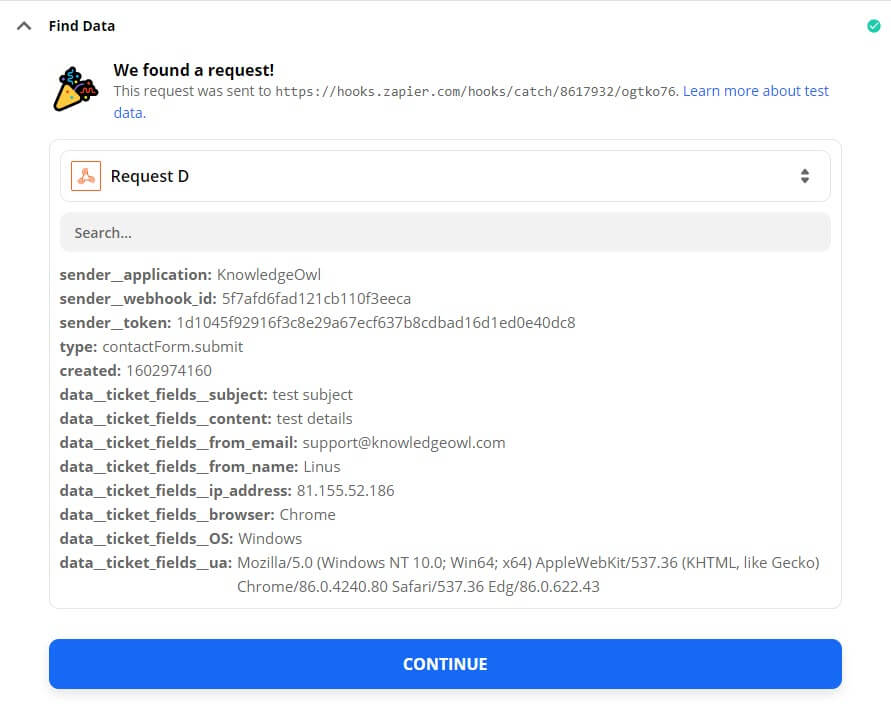
- Select CONTINUE.
- Zapier may offer you the option to test the webhook. You can skip this: we know it is working because the find data step worked.
- Select CONTINUE.
- In the Choose App & Event section, search for and select "Google Sheets".
- Select Create Spreadsheet Row.
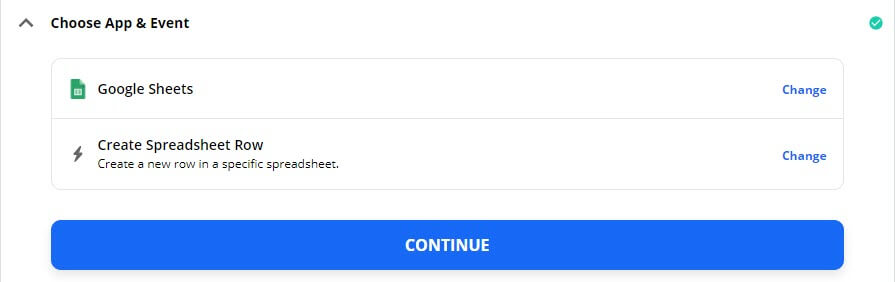
- Select CONTINUE.
- Zapier prompts you to sign in to Google Sheets with your Google account. Sign in, and give Zapier the permissions it asks for.
- Select CONTINUE.
- In Customize Spreadsheet Row, select the Drive, Spreadsheet, and Worksheet you want to send data to. Select the spreadsheet you created at the start of the tutorial.
- Zapier automatically detects your worksheet’s column headings. For each heading, you need to link it to an object in the webhook payload. This is the data that Zapier received when you submitted your test contact form. In the fields provided by Zapier, browse for and select the data you want to send to that column of your spreadsheet. For example, if you set up the spreadsheet with a “Subject” column, Zapier will provide a Subject field. Browse for the data object that contains the contact form subject (Data Ticket Fields Subject) and select it.
 Sample gif showing the above steps.
 - Once you have completed all the fields, select CONTINUE.
- You can now test the Zap. Select TEST & CONTINUE.
- Zapier will tell you when the test is successful. Go to the spreadsheet to check: the data from the test contact form submission should now be in the spreadsheet.
- To set the Zap live and start logging all your contact form submissions, select TURN ON ZAP. You need a paid Zapier account to turn on the Zap, as Webhooks by Zapier is a premium feature.


The tutorial described how to get data from a contact form into Google Sheets. You can use webhooks for lots of other things. Here are a few ideas.
Forward contact form submissions to Salesforce
Linus uses Salesforce to manage his customer relationships. He wants to ensure anything submitted with his knowledge base contact form is captured by Salesforce. He creates a Zap that listens for the contactForm.submit event. then forwards the data to Salesforce using the Salesforce Zapier integration.
Automate social media
Linus wants to promote new content on Twitter. He sets up a Zap that sends a tweet whenever a new article is published, using the article.publish event and the Zapier Twitter integration.
View a list of KnowledgeOwl webhooks here: Available webhook events.