If you or one of your teams already has content in Word, you can import individual documents or a .zip file of multiple documents into your knowledge base.
How Word import works
We strip out a lot of the proprietary Word formatting to streamlined HTML that will work with your knowledge base's default styles. (If you've copied and pasted Word into the article editor before, the Word importer basically does this process using the "Clean" formatting option.)
If the importer can't convert the content properly, it errors.
Our importer can:
- Create a single article from a single Word document: As one Article
- Create multiple articles from a single Word document: As multiple Articles
- Create multiple articles from multiple documents: From Zip Archive
For single article and zipped file imports, the first heading in the document becomes the article title and the body of the article is whatever is below that.
For single document as multiple articles imports, the heading tag you selected becomes the article title, and the text beneath it becomes the article body.
Review your imports
We strongly encourage you to review imported content, since many things like lists, tables, or other layouts don't look the same once they're converted to HTML.
Prerequisites
Before you begin, you'll need access to the Word document(s) you'd like to import. If you want to import multiple Word documents at once, create a .zip file archive that contains all the Word documents.
Choose the import type that makes sense for your documents and follow the appropriate instructions below.
Import as one article
- In KnowledgeOwl, go to Tools > Imports. The Import content page opens.
- Select Word Import.
- Select As one Article. The Upload your Word docx file modal opens:
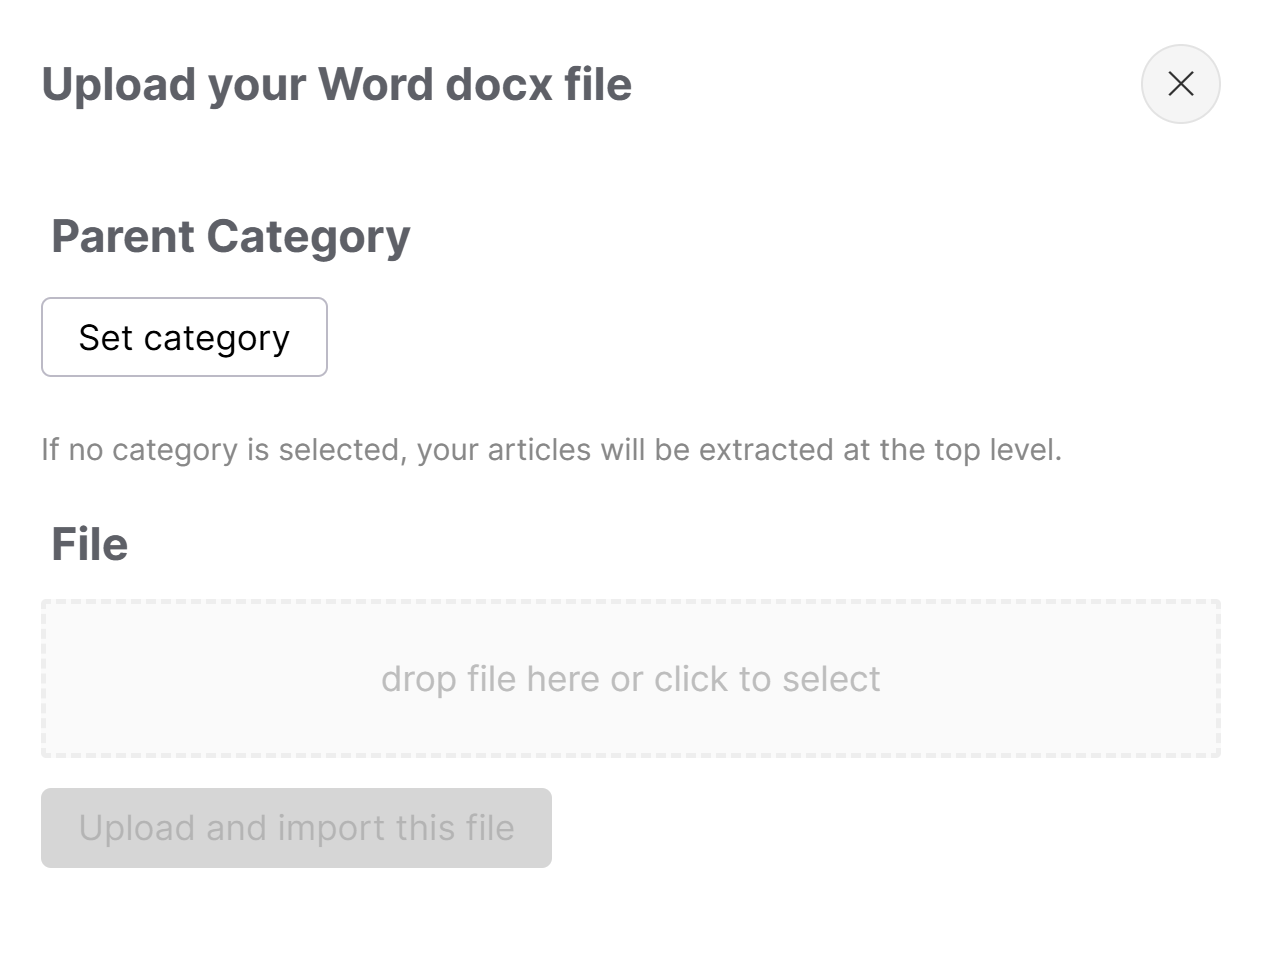 Sample single article upload modal
 - If you'd like to create the imported article within an existing category, select Set category. In the Set Parent Category modal, enter part of the category title and select the category from the suggestions. Select Set Category to save this selection and return to the main modal. If you don't set a category, the article is created as a top-level article. (You can always move it to a category later!)
- For the File, drag and drop a Word document into the box or select anywhere in the box to open a window to browse to the file on your computer.
- Once the file is added, select Upload and import this file to begin the import. A progress bar displays.
Word imports take several minutes to process, even for small documents. Feel free to navigate away and come back to this page later.
Once the import is complete, the page displays a confirmation message.
If your import fails, the page displays a failure message. Contact us and send us the Word document that had issues and we'll do our best to figure out what's going on!
Import as multiple articles
- In KnowledgeOwl, go to Tools > Imports. The Import content page opens.
- Select Word Import.
- Select As multiple Articles. The Upload your doc/docx file modal opens:
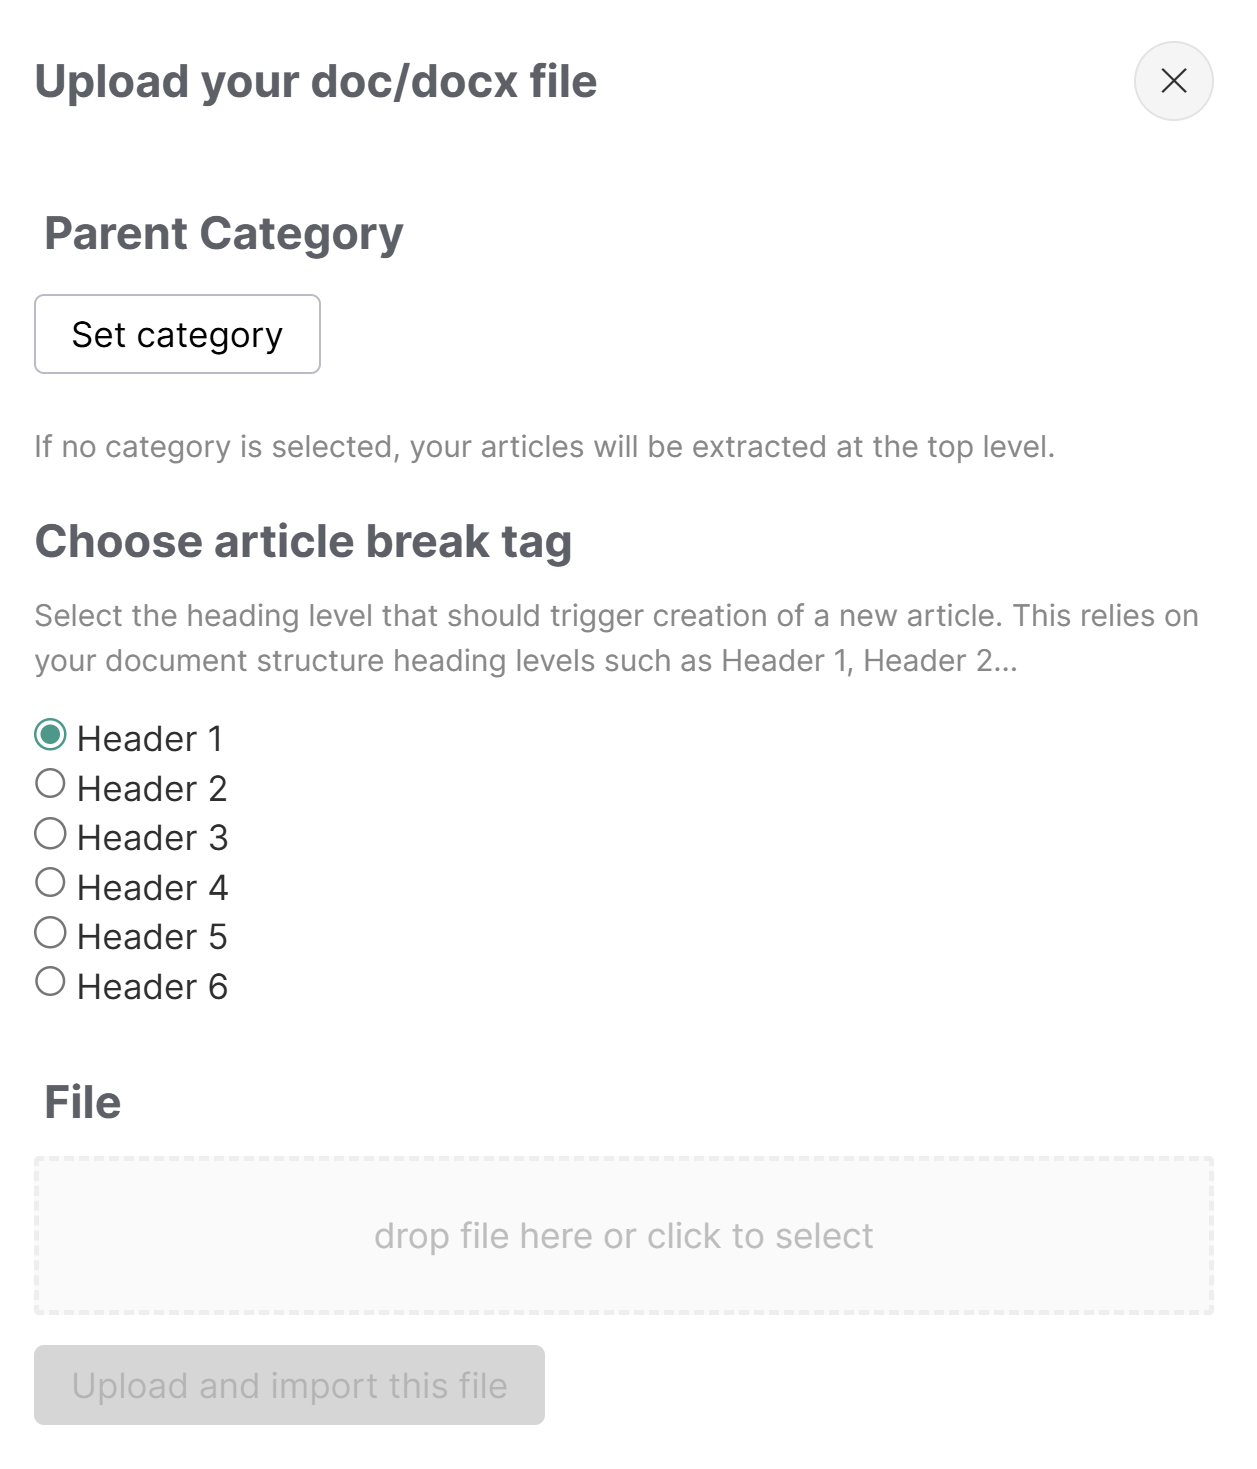 Sample multiple articles upload modal
 - If you'd like to create the imported article within an existing category, select Set category. In the Set Parent Category modal, enter part of the category title and select the category from the suggestions. Select Set Category to save this selection and return to the main modal. If you don't set a category, the article is created as a top-level article. (You can always move it to a category later!)
- To split your single document into multiple articles, select the Choose article break tag to use as the divider between articles. This importer assumes you're using header 1, header 2, and so on in the document. Whatever break tag you use will be used to generate the articles' titles, with the text following that header level as the article body.
- For the File, you can drag and drop a Word document in or select anywhere in the box to open a window to browse to the file on your computer.
- Once the file is added, select Upload and import this file to begin the import. A progress bar displays.
Word imports take several minutes to process, even for small documents. Feel free to navigate away and come back to this page later.
Once the import is complete, the page displays a confirmation message.
If your import fails, the page displays a failure message. Contact us and send us the Word document that had issues and we'll do our best to figure out what's going on!
Import from zip archive
- In KnowledgeOwl, go to Tools > Imports. The Import content page opens.
- Select Word Import.
- Select From Zip Archive. The Upload your zip file modal opens:
 Sample single article upload modal
 - If you'd like to create the imported articles within an existing category, select Set category. In the Set Parent Category modal, enter part of the category title and select the category from the suggestions. Select Set Category to save this selection and return to the main modal. If you don't set a category, the article is created as a top-level article. (You can always move it to a category later!)
- For the File, drag and drop your zip file into the box or select anywhere in the box to open a window to browse to the file on your computer.
- Once the zip file is added, select Upload and import this file to begin the import. A progress bar displays.
Word imports take several minutes to process, even for small documents. Feel free to navigate away and come back to this page later.
Once the import is complete, the page displays a confirmation message.
If your import fails, the page displays a failure message. Contact us and send us the Word document that had issues and we'll do our best to figure out what's going on!
If you or one of your teams has already been using Confluence as a knowledge base solution, you may have a lot of content there you'd like to move over to KnowledgeOwl. You can import that content from a Confluence space directly into your KnowledgeOwl knowledge base with a few clicks.
Prerequisites
Before you begin, generate an HTML export of your Confluence space. Refer to Confluence's instructions for your setup:
- Confluence Cloud: Follow the instructions to Export a space. Be sure you export as HTML.
- Confluence Server: Follow the instructions to Export multiple pages to HTML or PDF section. Be sure you export as HTML.
Download the zipped archive file and have it ready.
Import your content from Confluence
- In KnowledgeOwl, go to Tools > Imports. The Import content page opens.
- Select Confluence Import.
- To Upload your Confluence HTML export zip file, drag the file into the box or select the box, browse to the file, and select it.
- Once KnowledgeOwl recognizes the file, the Upload File button activates. Select it to upload the file.
- A progress bar displays while the file uploads. Once the Zip file uploaded successfully message displays, select Start Import in that confirmation message:
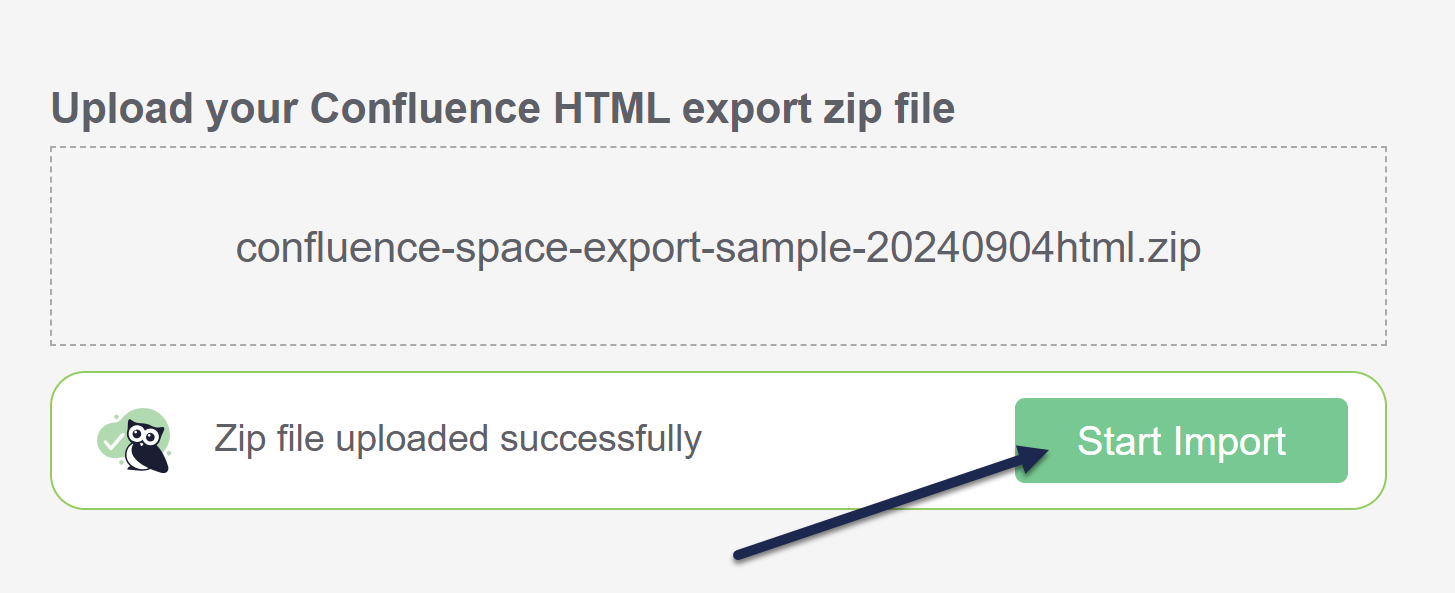 Select Start import once you see the Zip file uploaded successfully message.
The page refreshes to display a progress bar. Once the import completes, a confirmation message displays.
If you're testing the import in a new knowledge base and want to make changes and try to re-import, delete this knowledge base and create a new knowledge base to re-test the import. Refer to Testing imports for more details.
How the Confluence import works
Confluence and KnowledgeOwl are formatted and architected differently, so the importer does some converting as it goes.
Architecturally, Confluence doesn't have the concept of categories versus articles, it just uses pages, which can be parent or child pages. When we import them, we convert parent pages to custom content categories. Child pages without any children are converted to articles.
We also perform these style/formatting cleaning steps, designed to get your content behaving like native KnowledgeOwl content as quickly as possible:
- Remove all element class names.
- Remove all inline styles (setting fonts, font sizes, colors, etc.).
- Remove
<style>blocks from within articles to ensure articles get your knowledge base's default styles. - Other than the article title, we migrate all h1s to h2s, h2s to h3s, and h3s to h4s, since we display the article title as the lone h1 on the page.
- For all image elements, we add our
img-responsiveclass, which helps guarantee the image will resize based on different screen sizes. - For all tables:
- Add our
"table-bordered"class, which we add to new tables by default. - Add
style="width: 100%;"to the table to match our default. - Move
<tbody><tr><th>rows into<tbody><thead>rows, so they get our table header styles.
- Add our
Import failures
If your file fails to import, we'll warn you that there was an issue:
 Sample import failed message
Please contact us and share the HTML zip file that caused the failure so we can troubleshoot what went wrong.
If you or one of your teams has already been using Zendesk as a knowledge base solution, you may have a lot of content there you'd like to move over to KnowledgeOwl. You can import that content from a Zendesk knowledge base/help center directly into your KnowledgeOwl knowledge base with a few clicks.
Prerequisites
Be sure you have admin access to your Zendesk account before you try to import, since you'll need to access some options in Admin Center. Specifically, you'll need:
- your Zendesk subdomain
- a Zendesk user email with access to the Zendesk knowledge base you're importing content from
- a valid Zendesk API token. This may require you to enable API access in your Zendesk account. Refer to Managing access to the Zendesk API for instructions on both.
Import your content from Zendesk
- Confirm you can get the required information from Zendesk. (Generally you can do all of this if you can access
/admin/homein your Zendesk account.) - In KnowledgeOwl, go to Tools > Imports. The Import content page opens.
- Select Zendesk import.
- Enter your Zendesk subdomain name as the Zendesk Domain. For example,
knowledgeowlis the domain we'd enter for a help center located at knowledgeowl.zendesk.com.Don't use Zendesk private domain
If you're using a private domain with your Zendesk account, don't use your full private domain. Use your Zendesk subdomain! - Enter a Zendesk Username. This is the email address of an existing Zendesk user who has access to the Zendesk knowledge base. If you've accessed Zendesk to gather this information, you can generally use your own.
- Enter a valid Zendesk API token as the Zendesk API Key. Refer to Managing access to the Zendesk API for information on enabling API access and generating tokens. Here's what the import fields might look like importing from a knowledge base that's part of the knowledgeowl.zendesk.com account:
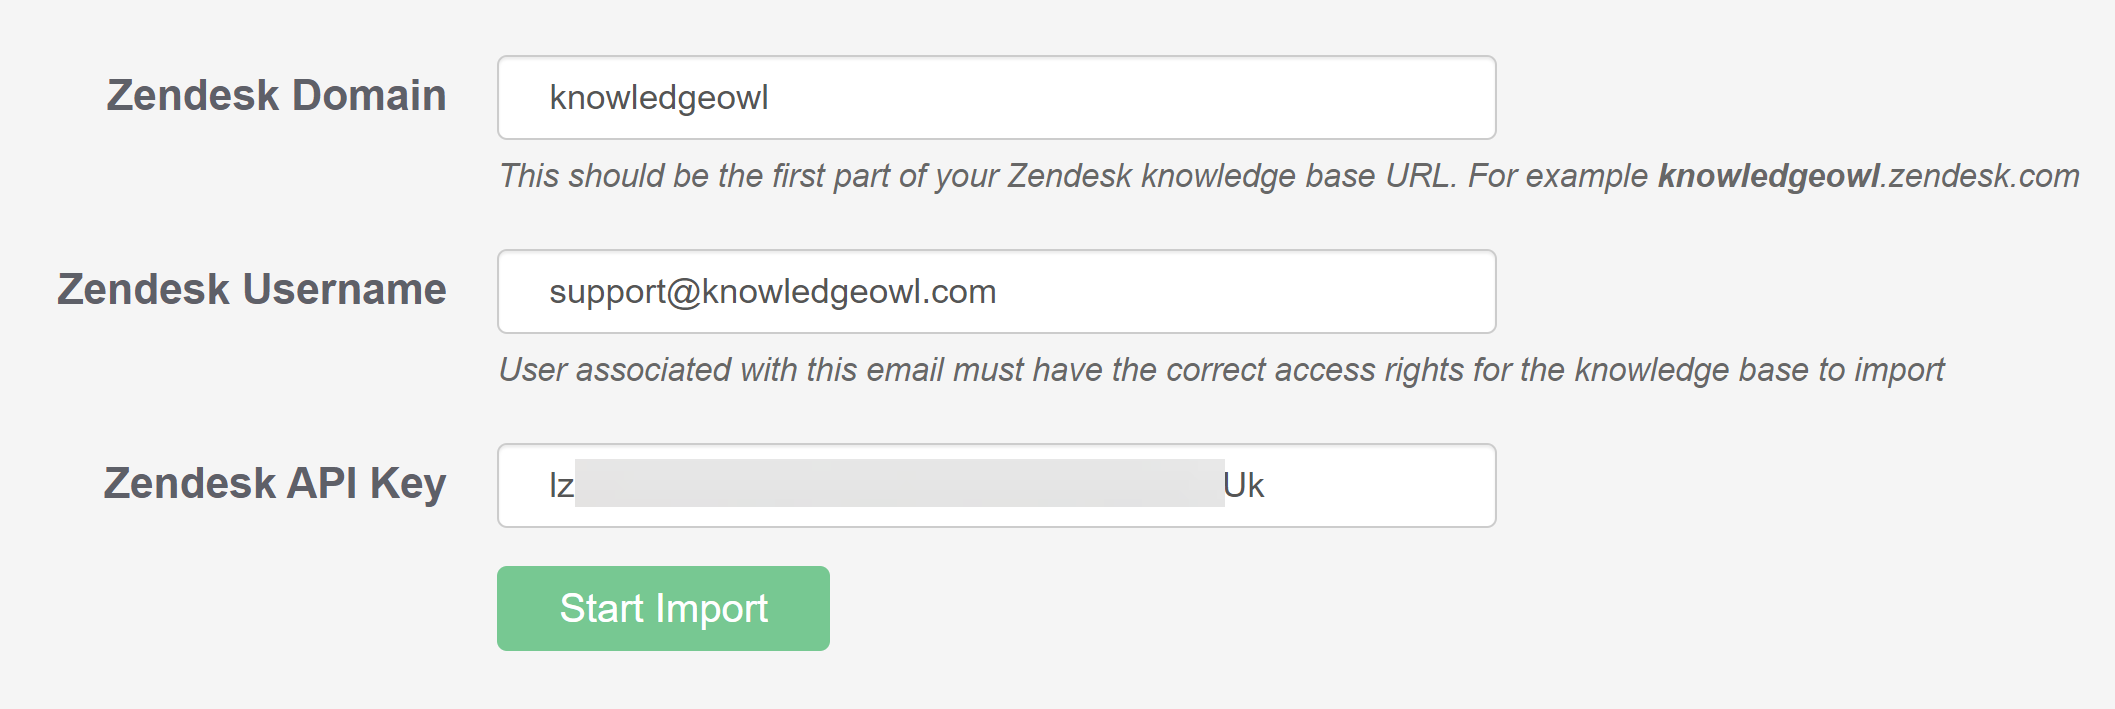 Sample completed import fields
 - Once you've filled in each of the fields, select Start import.
The page updates to display a progress bar. Once the import is complete, a confirmation message displays.
If you're testing the import in a new knowledge base and want to make changes and try to re-import, delete this knowledge base and create a new knowledge base to re-test the import. Refer to Testing imports for more details.
If you or one of your teams has already been using Freshdesk as a knowledge base solution, you may have a lot of content there you'd like to move over to KnowledgeOwl. You can import that content from a Freshdesk knowledge base/help center directly into your KnowledgeOwl knowledge base with a few clicks.
Prerequisites
Before you begin, you'll need two pieces of information from your Freshdesk account:
- Your Freshdesk subdomain
- Avalid Freshdesk API key. Refer to Freshdesk's How to find your API key documentation for more information.
Import your content from Freshdesk
- Confirm you can get the required information from Freshdesk.
- In KnowledgeOwl, go to Tools > Imports. The Import content page opens.
- Select Freshdesk Import.
- Enter your Freshdesk subdomain name as the Freshdesk Domain. For example,
knowledgeowlis the Freshdesk subdomain forknowledgeowl.freshdesk.com. - Enter a Freshdesk API Key. Refer to the Freshdesk API documentation for instructions on finding your API key.
- Once you've filled in each of the fields, select Start Import.
The page updates to display a progress bar. Once the import is complete, a confirmation message displays.
If you're testing the import in a new knowledge base and want to make changes and try to re-import, delete this knowledge base and create a new knowledge base to re-test the import. See Testing imports for more details.
KnowledgeOwl doesn't have a pre-built import option for Helpjuice in Tools > Imports, but you can still import your content from Helpjuice!
- Export your most recent Helpjuice backup. If you're unfamiliar with this process, follow Helpjuice's How to Export Your Helpjuice Data and Articles instructions (follow the instructions for Backup).
- Contact us to send this zip file and request we import it.
Some restrictions
This feature is available on select plans.
Use the KnowledgeOwl API to import content. You'll need development resources to be able to use it. Visit our API documentation to learn more.
New or trial accounts
If you have a new or trial account without much content or customizations, you can test imports without worry. If something goes wrong or you want to try again, delete the current knowledge base and create a new one.
To delete your knowledge base and start over:
- Select the owl in the top left to go to your dashboard.
- Select the gear icon next to your knowledge base's name.
- Select Delete.
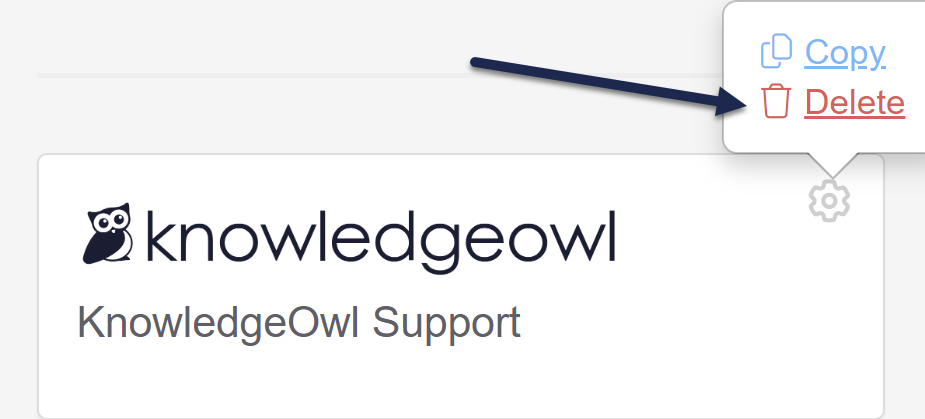 Select the gear cog icon and select Delete.
A modal opens to confirm you want to delete the knowledge base. - Once you've confirmed the name displayed in the modal is the knowledge base you planned to delete, select OK to complete the deletion.
If you only have one knowledge base, this will restart the setup process for a new knowledge base. If you have multiple knowledge base slots on your account, select + New Knowledge Base to create a new knowledge base.
Refer to Create an additional knowledge base for more information on adding a new knowledge base.
Existing accounts
If you already have an account with a knowledge base set up, you might not want to test an import in your production knowledge base. Here are a few options for testing imports outside of production:
- If you have additional knowledge base slots in your subscription, create a new knowledge base to test the import.
- If you don't have additional knowledge base slots, add more to your subscriptions under your Account > Billing.
- If you want a temporary knowledge base for testing, contact us so we can set you up with a complimentary sandbox knowledge base.
People migrating from other knowledge base tools get really excited to import content because it will "save so much time." Then, once the import is done, they begin reviewing content and making a change here, a change there, a slight organizational tweak over here...and then suddenly they end up manually reviewing and updating every single piece of content in the entire knowledge base. The total amount of time may be significantly longer than if they'd manually moved content over from scratch and made changes and edits upfront.
So we recommend a three-step approach:
- If KnowledgeOwl has a prebuilt import tool for your previous provider, test out the import and see how you like it. (Or, if you have developer resources and are working with a different source system, explore using our API to craft your own import.)
- Try importing a few pages manually by hand.
- Review the output of each process and how much you like it. Choose the path forward that makes the most sense for you.
Though it may seem counter-intuitive, sometimes manually migrating your content ends up being faster, since you can do content reorganization, cross-referencing, and fix formatting issues as you go and feel fully confident at how good that content looks.
Regardless of whether you're importing in bulk or manually importing content a la carte, we recommend that you:
- Review your existing knowledge base's organization and structure. Does it meet your readers' needs? Have you always wished it was different? Now could be a great time to make some changes.
- Review content for idiosyncrasies or tweaks that were necessary in your existing knowledge base platform, but unnecessary in KnowledgeOwl. Some differences might be the way categories can be laid out, tables of contents, links, hyperlinks, Link to Article links in KnowledgeOwl, how images or files are referenced, etc.
- Review content to make sure it's up to date. Importing out-of-date content sometimes can cause more headache than just creating new content from scratch.
- Review your content's existing permissions and access. Do you need/want to segregate content by groups? Do you need or want to restrict editing of certain content to particular author teams? If so, setting those groups and teams up in advance of adding your content can allow you to create/import it assigned to the correct access restrictions.


