
Salesforce SSO will restrict access to your knowledge base to only individuals with a valid login to your Salesforce account. Readers logged in to Salesforce will be able to access your knowledge base, and anyone who tries to access your knowledge base that is not logged into Salesforce will be redirected to Salesforce to log in. This feature is available on select plans.
Not compatible with other login options
Salesforce SSO will override all other Content authentication settings in Security and access > Security settings.
You will likely need Admin privileges in Salesforce to complete all the steps below.
First, we need to enable Salesforce SSO in KnowledgeOwl and add the Salesforce Login URL. This feature is available on select plans.
- In KnowledgeOwl, go to Security and access > Single sign-on.
- Open the Salesforce SSO tab.
- In Enable SalesForce SSO, select Allow readers to log in through your Salesforce SSO integration.
- In Salesforce, copy the base URL for your account. On older accounts, this will look something like
https://na17.salesforce.com. In newer or branded accounts, it will look likehttps://knowledgeowl.my.salesforce.com. - In KnowledgeOwl, paste your Salesforce URL in the SF login URL and add
/apex/ko_loginto the end. In the end, the entire URL will look similar tohttps://na17.salesforce.com/apex/ko_login.
- Save those settings in KnowledgeOwl.
Now we'll begin setting up the Salesforce components. For all Salesforce steps, you'll need to be in the Setup portion of Salesforce.
- In Salesforce, go to Setup > Custom Code > Apex Classes.
- Create a new apex class.
No Apex Class option
If you don't see the option to create a new apex class, you'll likely need to perform the following steps in your sandbox environment before deploying to your production instance. - Copy and paste the following code into the new apex class:
public class KnowledgeOwlLoginController { public string md5String {get;set;} public string timeStamp {get;set;} public string redirect {get;set;} private User activeUser; private string koToken = '<YOUR_KO_REMOTE_AUTH_TOKEN>'; public KnowledgeOwlLoginController () { String userName = UserInfo.getUserName(); activeUser = [Select Email From User where Username = : userName limit 1]; timeStamp = String.valueof(DateTime.now().getTime() / 1000); redirect = ApexPages.CurrentPage().getParameters().get('r'); String hash = UserInfo.getUserId() + this.koToken + timeStamp; Blob keyblob = Blob.valueof(hash); Blob key = Crypto.generateDigest('MD5',keyblob); md5String = encodingUtil.convertToHex(key); UpsertReader(); } //create or update the reader information in KnowledgeOwl public HttpResponse UpsertReader() { //replace static value with user specific field to pass through desired reader groups String reader_groups = '<SF Group1,SF Group2>'; HttpRequest req = new HttpRequest(); HttpResponse res = new HttpResponse(); Http http = new Http(); //post reader information to KnowledgeOwl req.setEndpoint('https://<YOUR_KO_URL>/sf-reader-create'); req.setMethod('POST'); req.setBody('timestamp='+timeStamp+'&hash='+md5String+'&ssoid='+UserInfo.getUserId()+'&username='+activeUser.Email+'&first_name='+UserInfo.getFirstName()+'&last_name='+UserInfo.getLastName()+'&groups='+reader_groups); req.setHeader('Content-Type', 'application/x-www-form-urlencoded'); req.setCompressed(false); res = http.send(req); return res; } } - Replace
<YOUR_KO_REMOTE_AUTH_TOKEN>in row 6 with the KnowledgeOwl auth token found on Security and access > Single sign-on > Salesforce SSO. - Replace
<SF Group1,SF Group2>in row 24 with either a comma-separated list of groups you'd like to add your reader to or a field that stores that information. - Replace
<YOUR_KO_URL>in row 31 with the URL of your knowledge base's homepage. Our domain issupport.knowledgeowl.com/helpso that's what we would use, for example://post reader information to KnowledgeOwl req.setEndpoint('https://support.knowledgeowl.com/help/sf-reader-create'); req.setMethod('POST'); req.setBody('timestamp='+timeStamp+'&hash='+md5String+'&ssoid='+UserInfo.getUserId()+'&username='+activeUser.Email+'&first_name='+UserInfo.getFirstName()+'&last_name='+UserInfo.getLastName()+'&groups='+reader_groups); req.setHeader('Content-Type', 'application/x-www-form-urlencoded'); req.setCompressed(false); res = http.send(req); return res; } } - Once you're done updating those fields, Save the apex class in Salesforce.
Next, we need to add the knowledge base URL as an allowed Remote Site in Salesforce. To do so:
- In Salesforce, go to Setup > Security > Remote Site Settings.
- Select New Remote Site.
- For the URL, use your knowledge base's homepage URL with the /help, /home, or /docs removed. So for our site, we'd use
https://support.knowledgeowl.com: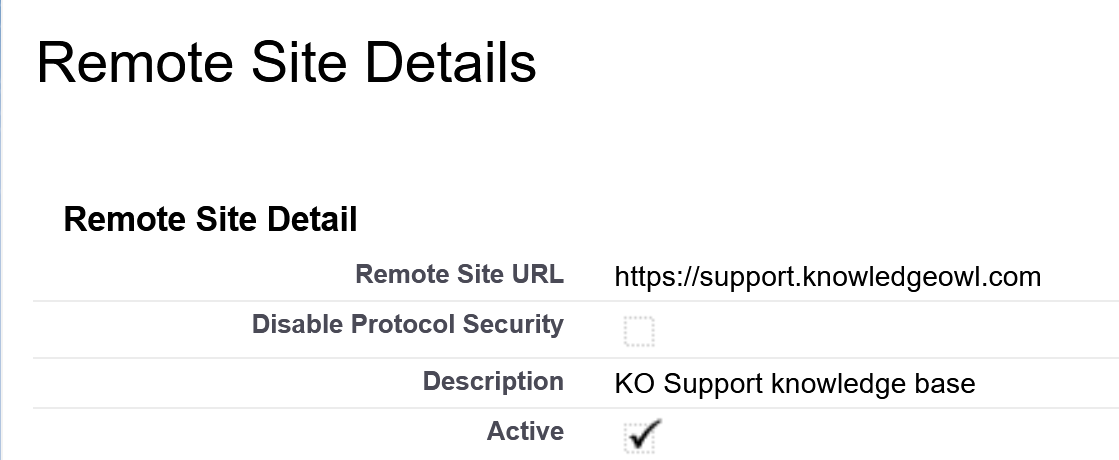
- Be sure to save your changes.

For this step, you'll need to find your Develop > Pages settings in Salesforce.
Depending on your account, this may be in:
- Setup > Custom Code > Visualforce Pages
- Setup > Build > Develop > Pages
- General Account Settings > App Setup > Develop > Pages (only for much older accounts)
Once you've found this option:
- Create a new Visualforce page.
- Enter any Label you'd like.
- Enter
ko_loginas the Name. You must enter this value for the integration to work! - Copy the code below and paste it into the Visualforce Markup section:
<apex:page controller="KnowledgeOwlLoginController"><h1>Redirecting to KnowledgeOwl...</h1> <script> var koURL = 'https://<YOUR_KO_DOMAIN>/sf-remote-login'; koURL += '?external_id=' + escape('{!$User.Id}' ); koURL += '×tamp={!timeStamp}'; koURL += '&hash={!md5String}'; koURL += '&r={!redirect}'; window.location = koURL; </script> </apex:page> - Replace
<YOUR_KO_DOMAIN>in row 4 with your KnowledgeOwl knowledge base homepage. Our homepage ishttps://support.knowledgeowl.com/helpso we'd usesupport.knowledgeowl.com/help: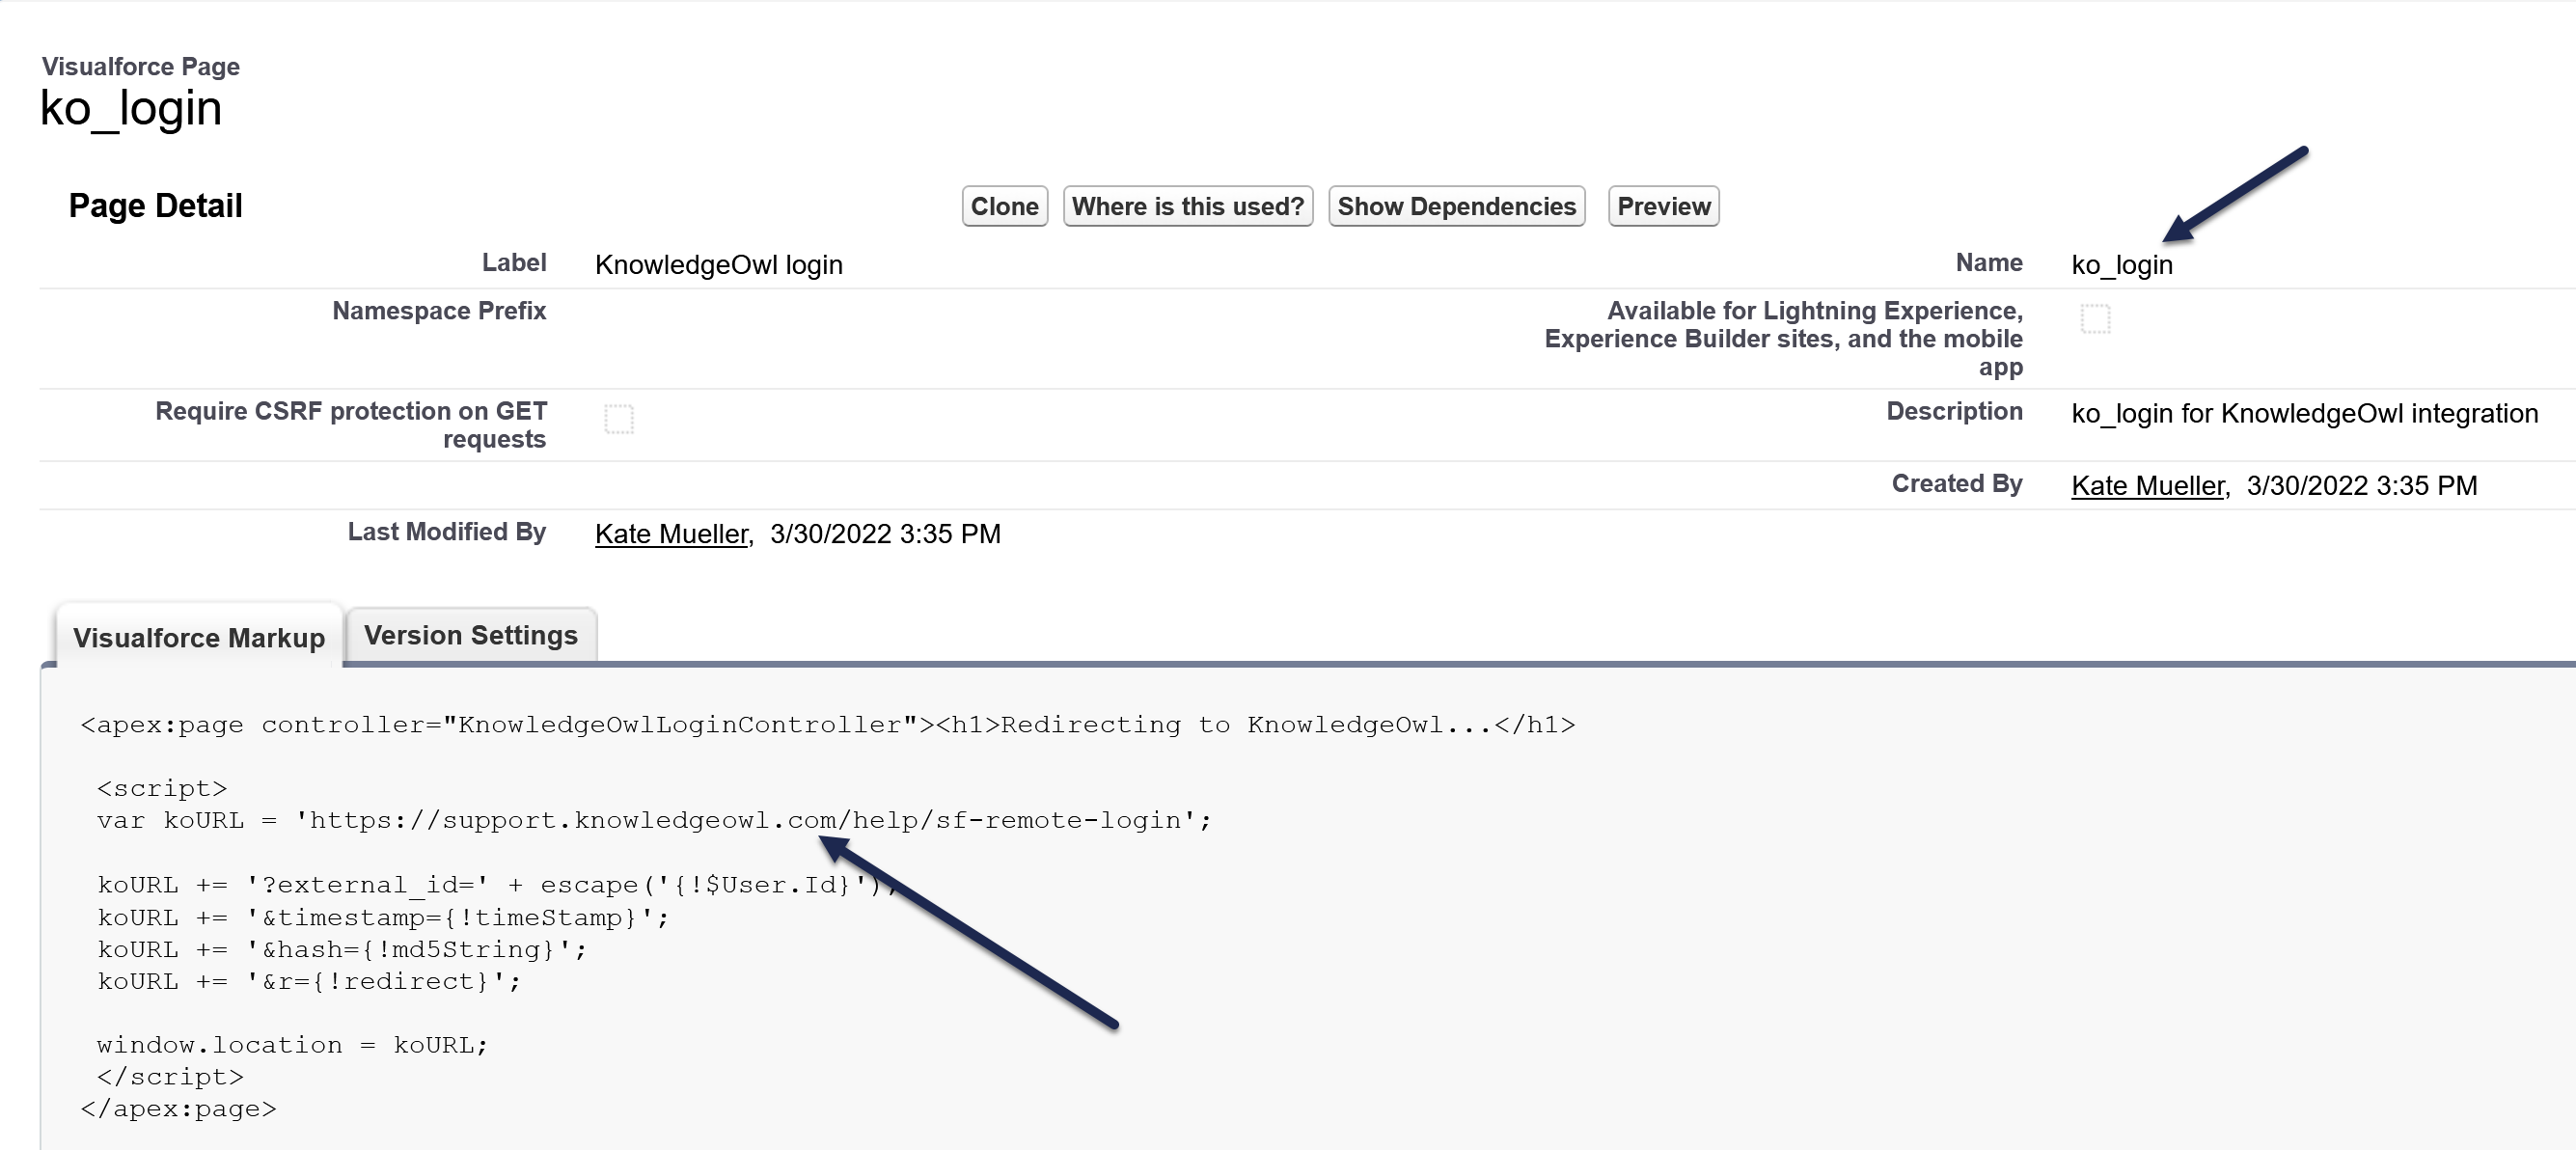
- Save.

Once you've created the Visualforce page, open the Security settings for the Visualforce page you just created.
Navigate back to the menu option you used to open Pages above--if you're using Setup > Custom Code > Visualforce Pages the Security link will appear to the left of the Visualforce page name when you're viewing the list of pages.
- Open the Security settings for the Visualforce page you just created.
- Add the user profiles you wish to be able to use this integration. This will depend on your Salesforce configuration.
- Save those changes.
Now, you can create the final two apex classes needed for the integration. To do so:
- Navigate back to Setup > Custom Code > Apex Classes.
- Create another new Apex class.
- Copy the code below, paste it into the apex class body, and Save the new class.
@isTest global class MockHttpResponseGenerator implements HttpCalloutMock { // Implement this interface method global HTTPResponse respond(HTTPRequest req) { // Create a fake response HttpResponse res = new HttpResponse(); res.setHeader('Content-Type', 'application/json'); res.setBody('{"foo":"bar"}'); res.setStatusCode(200); return res; } } - Finally, create one more new Apex class. Copy the code below, paste it into the body, and Save the new class
@isTest private class KnowledgeOwlLoginTest { static testMethod void loginVarsTest() { //Set mock callout class Test.setMock(HttpCalloutMock.class, new MockHttpResponseGenerator()); //instantiate the controller KnowledgeOwlLoginController controller = new KnowledgeOwlLoginController(); // Call method to test. HttpResponse res = controller.UpsertReader(); // Verify response received contains fake values String contentType = res.getHeader('Content-Type'); System.assert(contentType == 'application/json'); String actualValue = res.getBody(); String expectedValue = '{"foo":"bar"}'; System.assertEquals(actualValue, expectedValue); System.assertEquals(200, res.getStatusCode()); } } - Once you have saved that class, select Run Test to ensure that your new Apex classes have full code coverage and are ready to deploy to your production environment.
- Test it out! When a reader tries to access your knowledge base, they must be logged in to your Salesforce account. If they aren't, they'll be redirected to Salesforce to log in and redirected back to your knowledge base once they do.