
Many email providers are moving away from basic authentication in favor of an OAuth2 implementation. Where basic auth uses a username/password combination, OAuth2 has a more involved process involving a client ID and a client secret, plus an additional authorization step that generates a token that gets used behind the scenes. It's considered a more secure form of authentication.
Because OAuth2 is more involved, we're building out SMTP support for it based on customer request.
SMTP OAuth2 support
KnowledgeOwl currently supports Microsoft OAuth2 SMTP. If you need us to set up another SMTP provider's OAuth2 authorization flow, please contact us and let us know the provider--we add new providers based on customer interest.
We've tested our OAuth2 configuration with the Azure Portal.
You'll need your IT administrator to set up the Microsoft/Azure side of SMTP. We'd also recommend either giving them direct access to configure our side of the SMTP setup or making sure you have time set aside to work with them to get things set up in KnowledgeOwl properly.
The setup process involves four major steps:
- Create a Microsoft app to handle the requests.
- Set up the SMTP service in KnowledgeOwl.
- Authorize the SMTP service in KnowledgeOwl.
- Send a test email in KnowledgeOwl to verify the service is fully functioning.
Refer to the more detailed instructions below to complete each step.
Microsoft/Azure admin steps
- Create an app on the Microsoft side to handle these requests. We found this Microsoft documentation helpful as a starting place:
- Have at least one active email account that can be used by that app. This user account must have the Authenticated SMTP permission in Mail > Email Apps.
- Here are the settings we used for our app, though you may want to tweak for your setup:
- Single tenant app registration OR Multi-tenant app registration
- Copy the Web URI below and add it as a redirect URI:
https://app.knowledgeowl.com/oauth2/custom-smtp-token - In API permissions, we used Microsoft Graph > delegated permissions and used these permissions:
- Mail.Send
- Mail.Send.Shared
- SMTP.Send
- The app you create will need to go through an authorization process within KnowledgeOwl, initiated by a user of your organization. Use Power Shell to set that user's value for
SmtpClientAuthenticationDisabledtofalse. (Refer to the official Microsoft documentation for more details: Enable or disable authenticated client SMTP submission (SMTP AUTH) in Exchange Online.) - On the KnowledgeOwl side, provide:
- The email address that should be used--this should be the email account mentioned in step 2 above.
- The Client ID, listed as the Application or Client ID
- If you're using Azure Portal, this is the Application (client) ID listed on the App registration's Overview page.
- The Client Secret Value
- If you're using Azure Portal, you can generate this in the App registration's Certificates & secrets.
- In our testing, we were only able to have one active secret connecting to KO within the app; adding additional secrets failed.
- If using a Single Tenant app, the Tenant ID listed on the App registration's Overview page.
Sending limitations
If you're using Azure SMTP within an app, it will only send to email addresses within your Azure organization (single tenant) or with a valid Microsoft email (multitenant). This setting can be configured in Authentication > Supported account types in Azure.
KnowledgeOwl setup
Once you have the Azure app and email account set up and a client secret generated, set up your new SMTP service in KnowledgeOwl. To do so:
- Go to Account > SMTP. The Custom SMTP page opens.
- Select + Configure New Service. The Create SMTP Service page opens.
- Enter a Friendly Name for your service. This name will be displayed in SMTP dropdowns for individual features, so it should describe the SMTP service in some way.
- Enter the SMTP Host. This is the address your email server provides for the SMTP host. For Microsoft, use
smtp.office365.comunless your IT admin tells you otherwise. - Enter the Port. Unless your IT admin tells you otherwise, use
587. - Add the Send From Address. This is the email address that will show up in the "From" field for all emails sent using this SMTP service. This should be a valid email address in your Microsoft organization.
- Optional: Add a Reply To Address. This allows you to specify a Reply-to address different from the Send From Address.
- Optional: Add a Send From Name. This is the name that will show up in the "From" field for any emails sent using this SMTP service.
- In the Authentication section, select OAuth2 to configure your SMTP using OAuth2.
- Select Microsoft as the provider.
- Add the Login Email that will be used to authenticate. This needs to be an account that has permissions to send email.
- Add the Client ID from your app. In Azure Portal, this is the Application (client) ID listed on the App registration's Overview page.
- Add the Client Secret from your app. In Azure Portal, you can generate this in the App registration's Certificates & secrets page.
- If you're using a Single Tenant app, add the Tenant ID for your app. In Azure Portal, this is the Tenant ID listed on the App registration's Overview page.
DO NOT ENTER A TENANT ID IF YOU ARE USING A MULTI-TENANT APP.
- Once you've finished completing all fields, select Create.
Authorize your SMTP service
Once you have created the service, you must Authorize that service. This uses the information you previously entered to perform the OAuth2 authorization flow and get the token we need to authenticate.
Once you create the service, authorize it using these steps:
- In the Edit SMTP Service page, select Authorize:
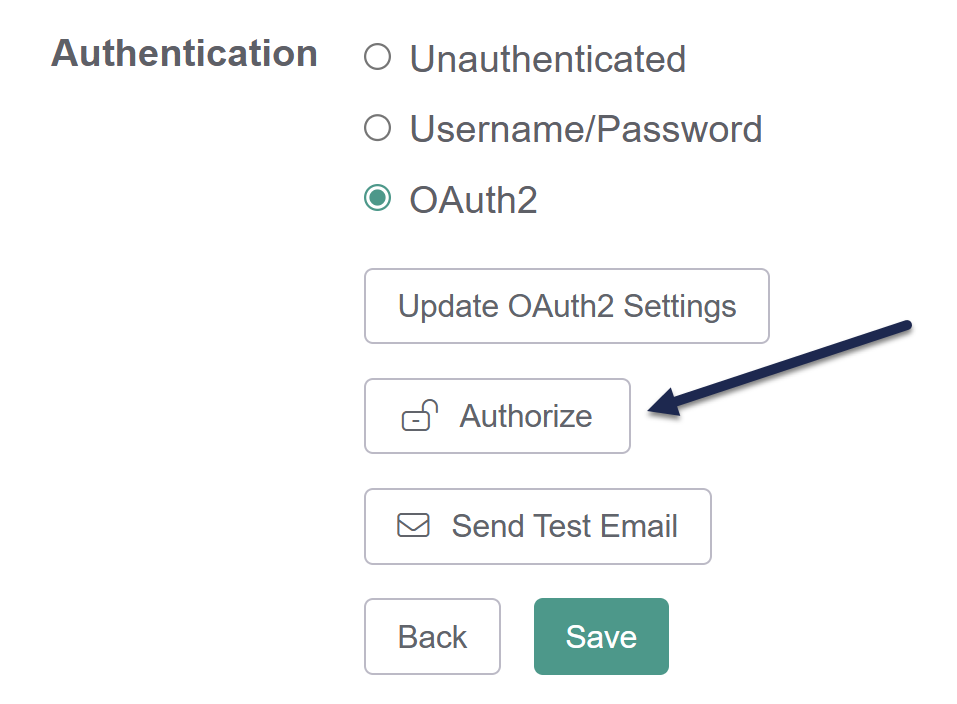 Once you've created your OAuth2 SMTP service, the Authorize button appears
- If there are any issues authorizing your SMTP service, an error message displays containing a link to the error code we received back from Microsoft. Click that link to get more details on what caused your authorization to fail. You'll want to review this error code with your IT admin.
- When the authorization completes successfully, KnowledgeOwl displays a confirmation message.

Once you get the authorization successful message, follow the next set of instructions to test your SMTP service.
Test your SMTP service
Test early and often
We strongly recommend testing the SMTP service to verify that emails are sending properly.
Once you've created your SMTP service and authorized it, we recommend testing the SMTP service. To do so:
- In the Edit SMTP Service page in the Authentication section, select Send Test Email:
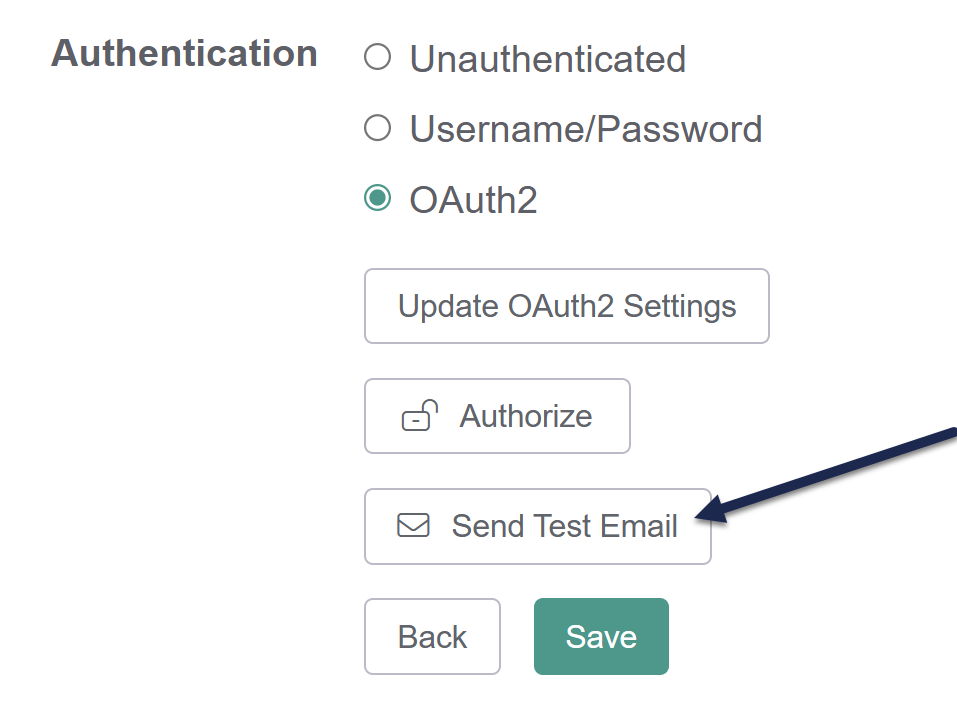 Select Send Test Email
 - For your Test recipient email address, Azure expects you to send this to an email within your own Microsoft organization. Tests to external emails will fail!
- If your authorization completed successfully, the test email should go through and show you a confirmation message. At this point, your SMTP is ready to use!
- If for any reason your test email fails:
- Try re-authorizing the service. Make sure you get a confirmation message.
- Be sure the test email you're sending to is part of your organization's Azure platform. Azure SMTP cannot be used to send emails to external services.
- Be sure that your Microsoft admin has run the Power Shell command to set the account you're authorizing the app with to have
SmtpClientAuthenticationDisabledset tofalse.

If you run into issues where the Authorize option completes but your test emails fail, refer to the instructions in Why does my SMTP OAuth2 authorization succeed but test emails still fail?.
Once you've sent a successful test email, your SMTP service should now be available for use.
You can add it to:
- Any knowledge base's Subscription settings
- Your account's Reader emails for reader welcome and password reset emails
KnowledgeOwl IP Address
If you need to set up an exception for these communications with your SMTP provider, refer to Required IP addresses for more details.