Besides adding Favorites to your table of contents, you can also add the Favorites article list to various areas of your theme using the merge code displayed on KB settings > Favorites. The list looks like this:
 Sample Favorite Articles list with See more link
This list displays up to 10 article favorites, not the full 50 that are available. A See more... link at the bottom of the list opens the Favorite Articles page, which lists all 50 (with pagination).
To add this list, you'll need to add the merge code for the list into your knowledge base's HTML somewhere.
Consider adding this merge code in one of these places:
- To the footer of all articles, similar to the Related Articles section, in Customize > Style (HTML & CSS) > Custom HTML in either the Body or the Article template.
- If your knowledge base is older and has had minimal customizations, most of your homepage likely lives in Customize > Homepage in the Custom content editor. Add a section for your Favorites here.
- If your knowledge base is from at least October 2022 and/or has had theme customizations, your homepage code likely lives in Customize > Style (HTML & CSS) > Custom HTML > Homepage. Add a section for your Favorites here.
- If your knowledge base uses an older layout that includes the Right Column, add a section to your Customize > Style (HTML & CSS) > Custom HTML > Right Column for your favorites.
Below, we'll walk through a couple of these as examples (Homepage custom content and some Customize > Style (HTML & CSS) options).
For all options, you can:
- Control the number of favorites displayed in the list. Refer to Change how many favorites are displayed for more information.
- Edit the See more... link to be more descriptive. Refer to Customize default text for information on editing Default text generally and Section breakdown: Article Lists for information on the settings available for article lists.
Add Favorites to Homepage custom content
If the body of your homepage is set in Customize > Homepage custom content, replace one of the existing article lists with the Favorites list or add the Favorites list as an additional section.
Replace existing article list with Favorites
To replace an existing article list with Favorites:
- Go to Customize > Homepage.
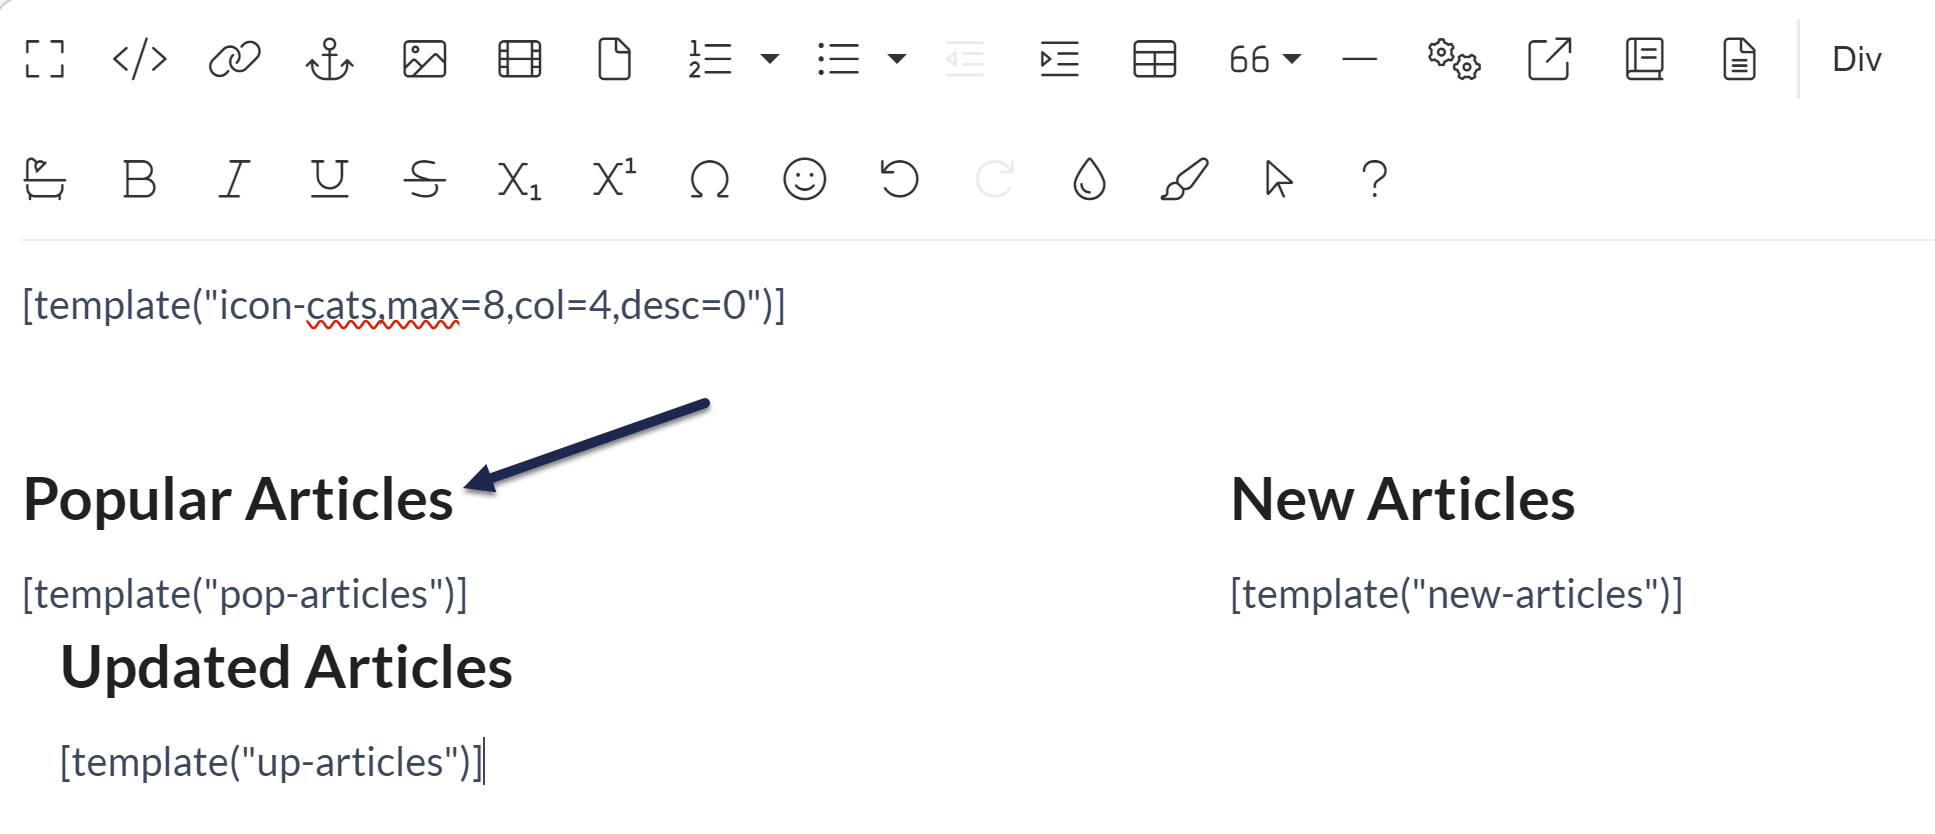
- Find the list you'd like to replace. In this example, we'll replace the Popular Articles list. Here's what that looks like before we make any changes:
 Sample homepage content before changes
 - Each pre-built article list has a template below it. For example, for the Popular Articles list, this is
[template("pop-articles")]. - Copy the merge code below and paste it in to replace the existing list merge code:
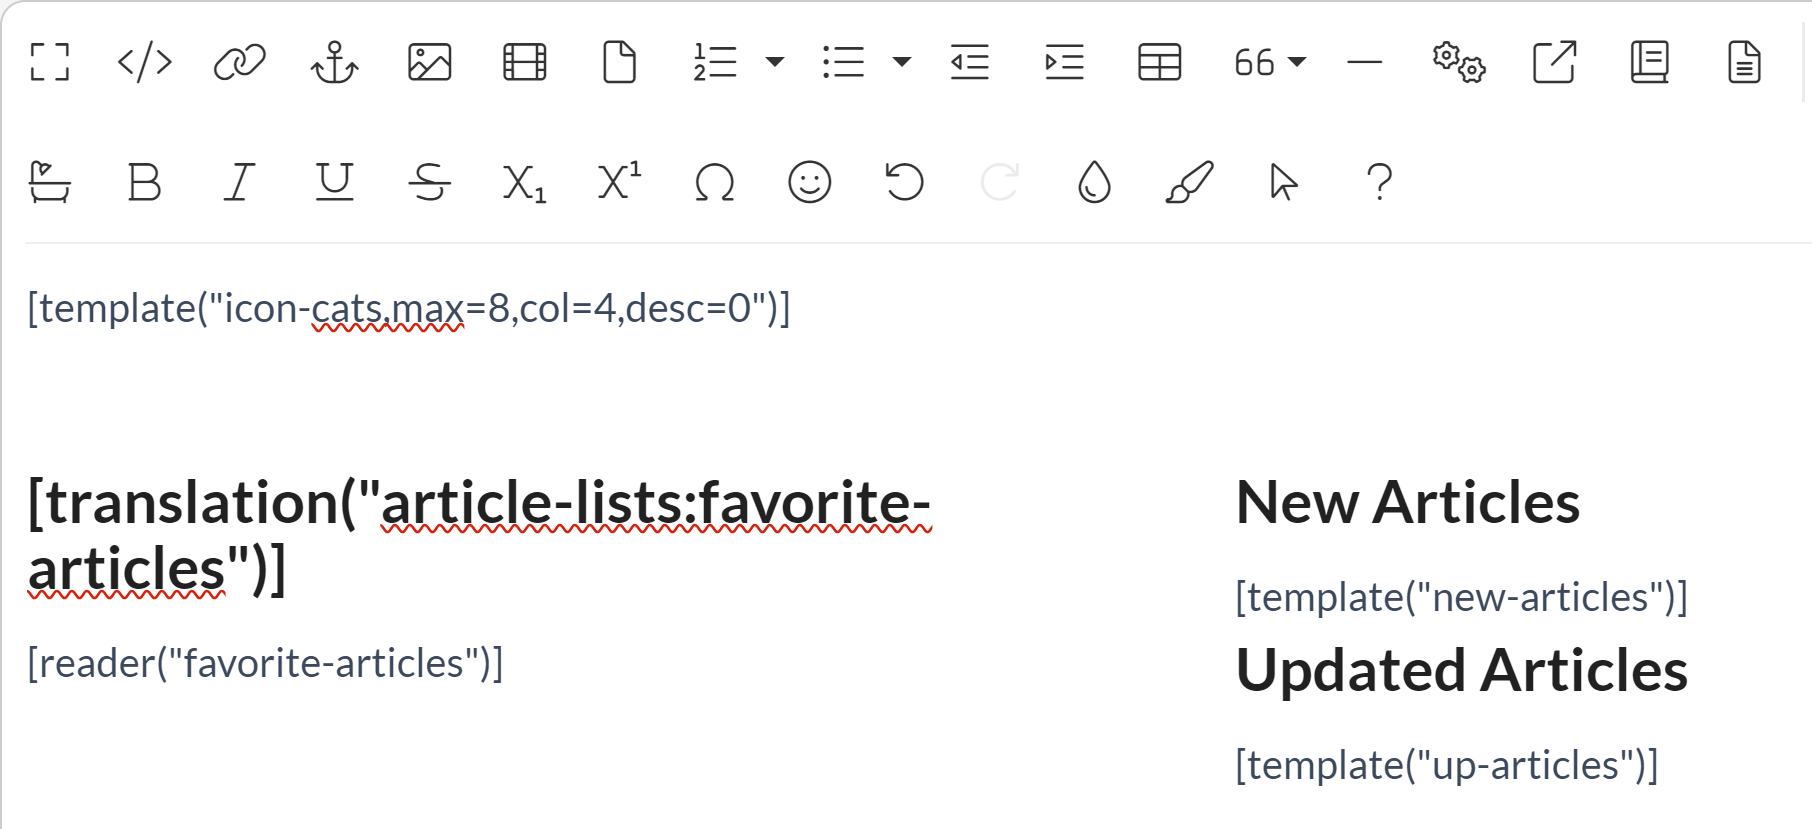
[reader("favorite-articles")] - Update the heading for the article list to use the Customize Text merge code for the Favorites list:
[translation("article-lists:favorite-articles")] - Your homepage might now look like this:
 Sample homepage content after the changes described above
 - You can Preview your changes to be sure they look good.
- Be sure to Save your changes once you're done.
Add new article list section for Favorites
To add the Favorites article list without replacing an existing article list:
- Go to Customize > Homepage.
- In the upper left of the editor, select the </> (Code View) control.
 Use the Code View button
 - The existing article lists are each within a
div class="col-md-4 col-sm-6", which helps handle the spacing. Your code should look something like this:<div>[template("icon-cats,max=8,col=4,desc=0")]</div> <div class="homepage-widgets row"> <div class="col-md-4 col-sm-6"><h3>[translation("article-lists:popular-articles")]</h3>[template("pop-articles")]</div> <div class="col-md-4 col-sm-6"><h3>[translation("article-lists:new-articles")]</h3>[template("new-articles")]</div> <div class="col-md-4 col-sm-6"><h3>[translation("article-lists:updated-articles")]</h3>[template("up-articles")]</div> </div> - Copy the code below and paste it in wherever you'd like the Favorites article list to appear:
<div class="col-md-4 col-sm-6"><h3>[translation("article-lists:favorite-articles")]</h3>[reader("favorite-articles")]</div> - For example, if you add the Favorites articles section after the other articles lists, your code might look like this once you're done:
<div>[template("icon-cats,max=8,col=4,desc=0")]</div> <div class="homepage-widgets row"> <div class="col-md-4 col-sm-6"><h3>[translation("article-lists:popular-articles")]</h3>[template("pop-articles")]</div> <div class="col-md-4 col-sm-6"><h3>[translation("article-lists:new-articles")]</h3>[template("new-articles")]</div> <div class="col-md-4 col-sm-6"><h3>[translation("article-lists:updated-articles")]</h3>[template("up-articles")]</div> <div class="col-md-4 col-sm-6"><h3>[translation("article-lists:favorite-articles")]</h3>[reader("favorite-articles")]</div> </div> - By default, this setup will bump the fourth list onto a new row. If you'd rather shrink all your lists a little so that you can fit all 4 onto a single row on medium to large screens, adjust the div class for all the article lists to
col-md-3instead ofcol-md-4, for example:<div>[template("icon-cats,max=8,col=4,desc=0")]</div> <div class="homepage-widgets row"> <div class="col-md-3 col-sm-6"><h3>[translation("article-lists:popular-articles")]</h3>[template("pop-articles")]</div> <div class="col-md-3 col-sm-6"><h3>[translation("article-lists:new-articles")]</h3>[template("new-articles")]</div> <div class="col-md-3 col-sm-6"><h3>[translation("article-lists:updated-articles")]</h3>[template("up-articles")]</div> <div class="col-md-3 col-sm-6"><h3>[translation("article-lists:favorite-articles")]</h3>[reader("favorite-articles")]</div> </div> - You can Preview your changes to see what they look like.
- Be sure to Save once you've finished making changes!
Add Favorites to Customize > Style
If your homepage code is not in Customize > Homepage, it will be in Customize > Style (HTML & CSS). If you'd like to add your Favorites section to your Right Column, you'll also head to Customize > Style (HTML & CSS).
Follow the same basic steps whether you're editing the Right Column or the Homepage, but you'd select the appropriate area in the Custom HTML dropdown.
Here, we'll walk through the Homepage:
- Go to Customize > Style (HTML & CSS).
- In the Customize HTML, CSS, and JS section, select Custom HTML.
- Select Homepage from the Select HTML section to edit dropdown.
- In this Custom HTML, you can either edit one of your existing article lists to change it to Favorites, or add a new section. The same basic steps are followed as in the Homepage instructions above, though there is no WYSIWYG in this view.
- To edit an existing article list:
- Locate the
div class="homepage-widgets", usually on or around row 9. Your code should look something like this:<div class="homepage-widgets row"> <div class="col-md-4 col-sm-6"><h3>[translation("article-lists:popular-articles")]</h3>[template("pop-articles")]</div> <div class="col-md-4 col-sm-6"><h3>[translation("article-lists:new-articles")]</h3>[template("new-articles")]</div> <div class="col-md-4 col-sm-6"><h3>[translation("article-lists:updated-articles")]</h3>[template("up-articles")]</div> </div> - Locate the article list you'd like to repurpose. Here, we'll replace Popular Articles, in row 2 of the code sample above.
- Remove the text or merge code between the
<h3>and</h3>tags that was your previous list's title. Replace it with the Customize Text merge code for the Favorites list:[translation("article-lists:favorite-articles")] - Delete the template merge code that comes after that text, beginning with the [ and ending with the ], so you should go straight from the
</h3>to the</div>:<div class="homepage-widgets row"> <div class="col-md-4 col-sm-6"><h3>[translation("article-lists:favorite-articles")]</h3></div> - Leave your cursor between the
</h3>and the</div>. - Copy this merge code and paste it in there:
[reader("favorite-articles")] - Your code should now look like this:
<div class="homepage-widgets row"> <div class="col-md-4 col-sm-6"><h3>[translation("article-lists:favorite-articles")]</h3>[reader("favorite-articles")]</div> <div class="col-md-4 col-sm-6"><h3>[translation("article-lists:new-articles")]</h3>[template("new-articles")]</div> <div class="col-md-4 col-sm-6"><h3>[translation("article-lists:updated-articles")]</h3>[template("up-articles")]</div> </div> - You can Preview your changes; just be sure to Save them once you're done!
- Locate the
- To add to your existing article lists, copy one of the full divs for an article list and paste it where you'd like to add the Favorites. Then proceed with replacing the text and merge code as in the steps above. If you already have three article lists and you're adding a fourth, you can consider adjusting all the article lists to use
col-md-3instead ofcol-md-4to get them to fit on a single row.


