
Over the years, we've worked up a few different solutions for customers who want to collapse some content by default and then expand it--an accordion structure designed to keep pages looking cleaner so readers can engage with what they are most interested in. Here are a few of the solutions we've come up with, so you can adapt them as you see fit.
Use case
Accordion-style text interaction often seems like a great way to avoid overwhelming your readers. However, we like the guidelines provided by Nielsen-Norman Group: if you're hiding content that would effectively answer your readers' questions, it's not a wise move. User experience research shows that most users prefer to scroll rather than click, which requires more interaction. (The exception to this is, of course, mobile-only or mobile-dominant interactions.) If you're going to implement accordion-style collapses, it's a great time to revisit your internal style guide to set good guidance for when and how they should be used.
Topic display categories
Topic display categories include a built-in accordion option for the articles they contain. They can often be used instead of these solutions and are much easier to set up and troubleshoot! Refer to Topic display categories for more information.
Automatically collapse all text between headers of all sizes
Implementation Method: Snippet created in Snippets; snippet merge code added to relevant articles
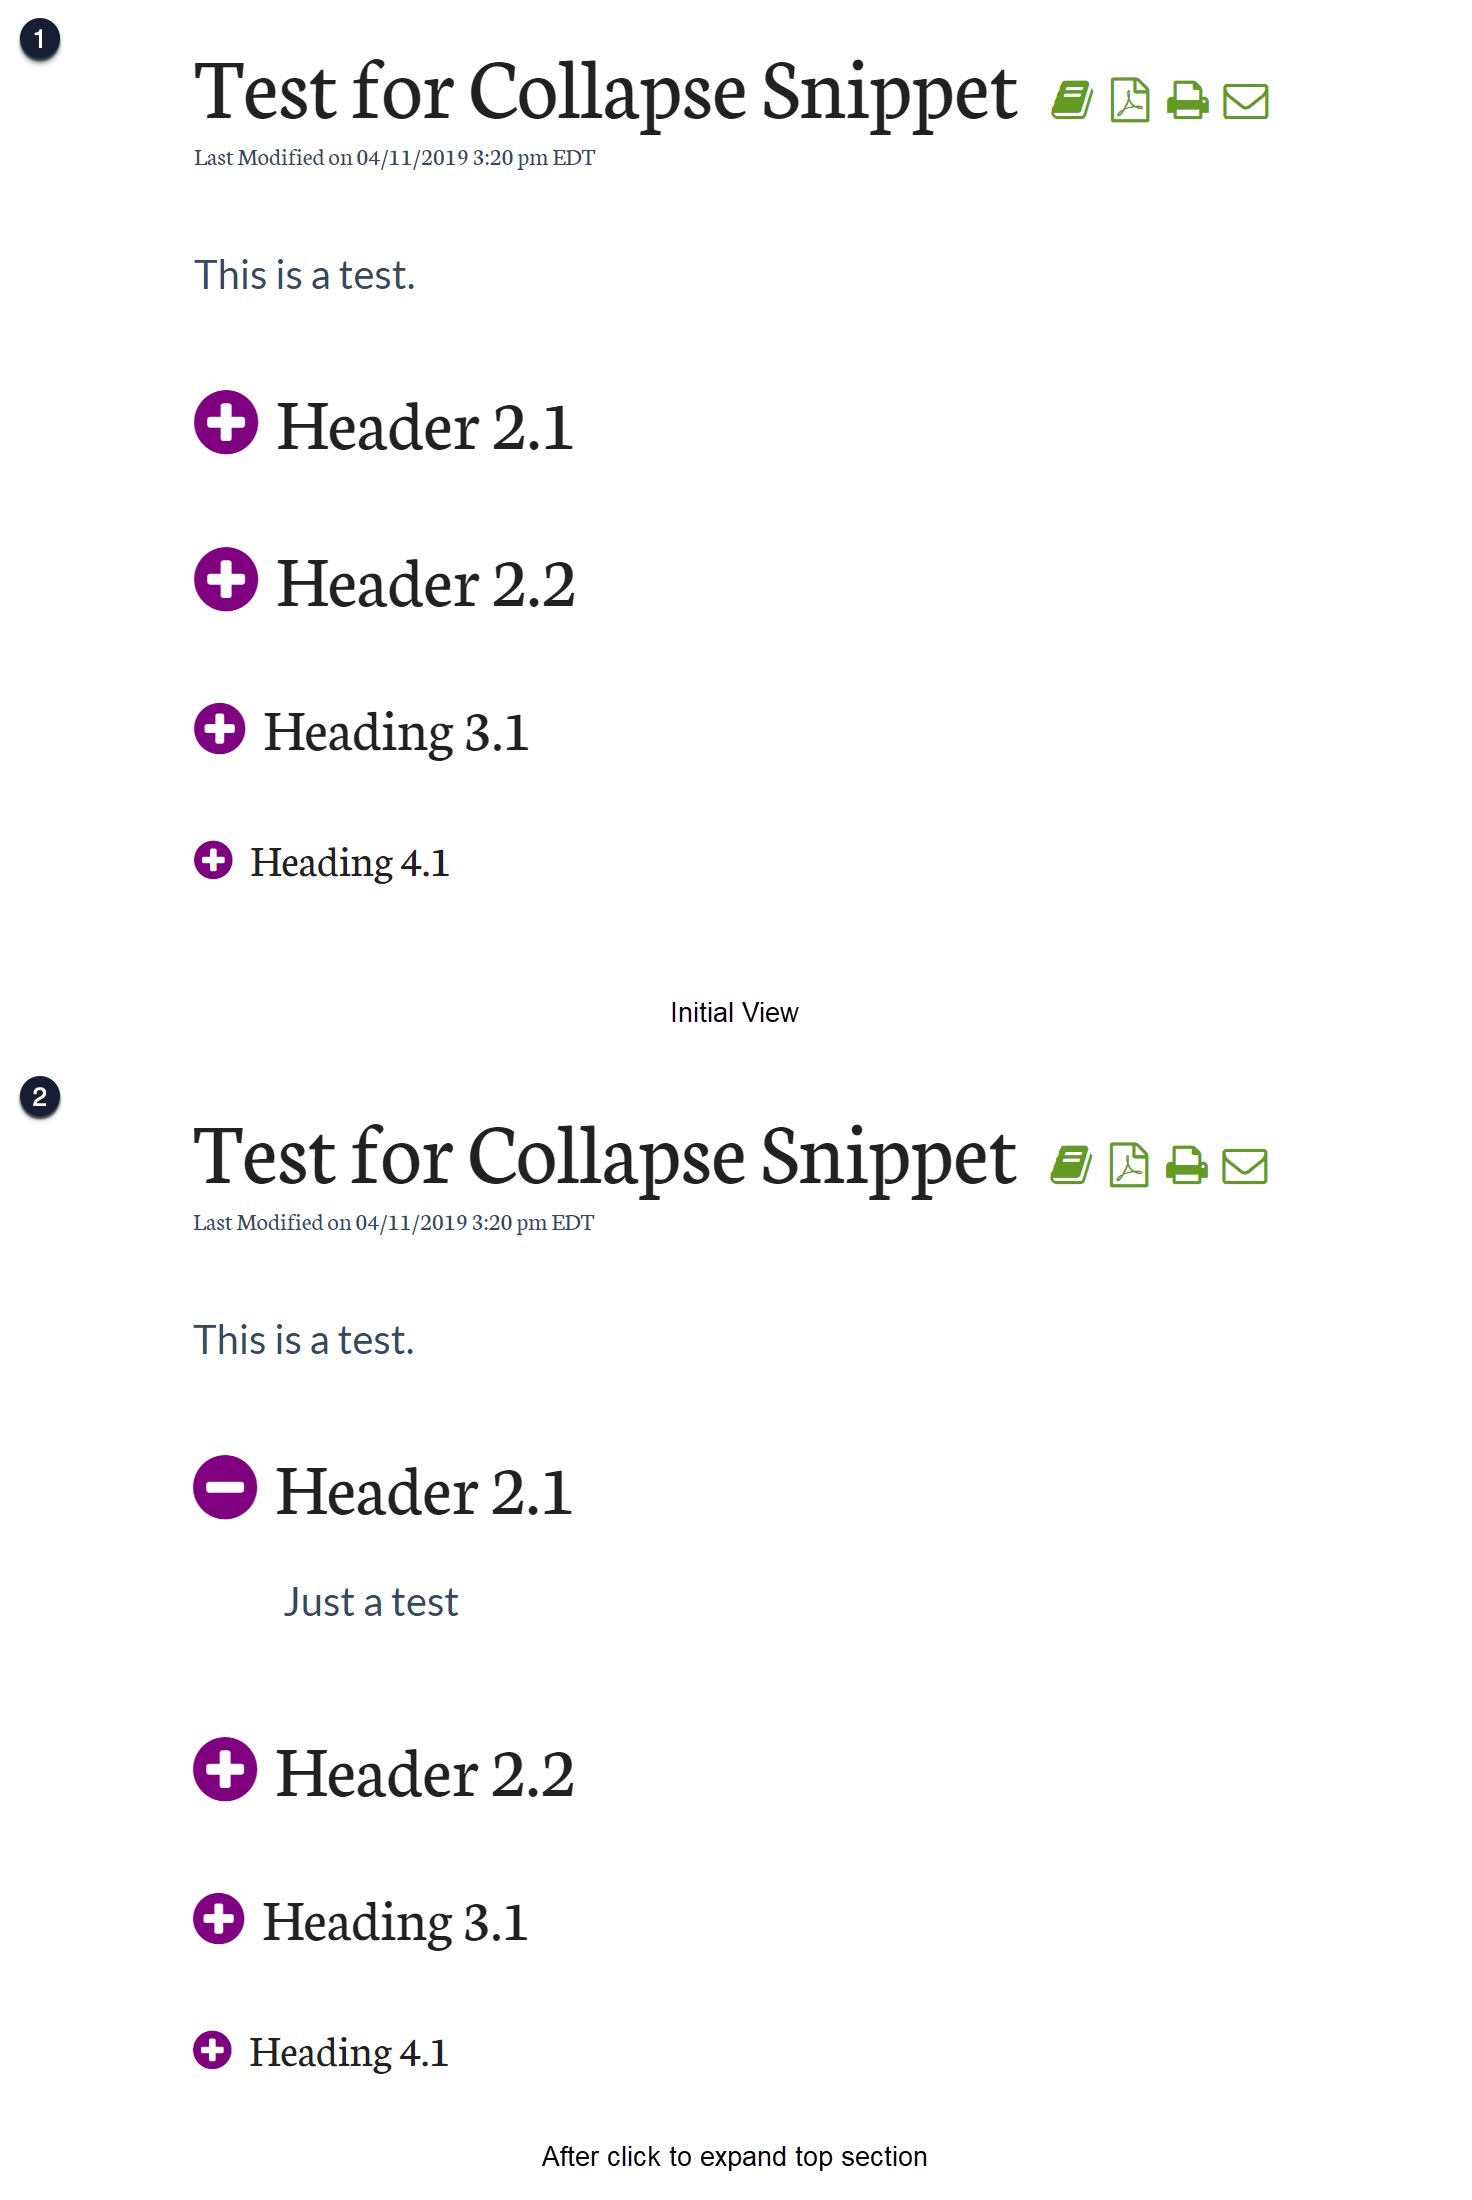
This snippet hides any text under every size heading throughout the entire article, which can then be expanded and collapsed using plus/minus toggles:
Setup and usage
To implement this functionality, create a snippet that handles the logic and styling.
- In the lefthand navigation, go to Snippets. The Snippets page opens.
- Select + Create New Snippet to create a new snippet. If you're unfamiliar with creating snippets, refer to Create a snippet for more detailed instructions.
- Enter a Snippet Name, such as
Collapse. The Merge Code Name will auto-generate from the Snippet Name, though you can also override this to something shorter. - Enter a Snippet Description, like:
This snippet hides any text under every size heading throughout the entire page, which can then be expanded with a clickable "+" icon. - Select the Snippet Content dropdown and select Code Editor:
- Copy the script below and paste it into the Code Editor:
<script> $(function(){ $('.hg-article-body :header').each(function(){ $(this).nextUntil(':header').wrapAll("<div class='collapse'></div>"); }); $( ".hg-article-body :header" ).wrap( "<div class='expand'></div>" ); $('.expand').next('.collapse').addClass('collapse-indent');; $('.expand').find(':header').prepend('<i class="fa fa-plus-circle"></i>'); $('.expand').on('click', function(){ $(this).find('i').toggleClass('fa-minus-circle').toggleClass('fa-plus-circle'); $(this).next('.collapse', ".open").slideUp(); $(this).next('.collapse').not(".open").slideDown(); $(this).next('.collapse').toggleClass('open'); }); }); </script> - In the righthand menu, check the Visibility box to Hide from PDFs. PDFs don't support expanding/collapsing content in this way. If you don't check this box, the content will be collapsed and unable to be expanded!
- Optional: If you'd like to change the color of the plus/minus toggles, copy the code below and paste it into the same Code Editor below the script in Step #6, replacing the color hex in row 4 with a color of your choice:
<style> /* Optional style section: adjust color of the background for the toggles by changing the color hex */ .hg-article-body .expand i { color: #800080; } </style> - Select Create to create your snippet.
To apply this style to an article, insert the snippet you created above following the steps in Add snippets in content.
To apply this snippet to all articles:
- Copy the snippet's Merge Code Value.
- Go to Customize > Style (HTML & CSS).
- In the Customize HTML, CSS, and JS section, select Custom HTML.
- In the Select HTML section to edit dropdown, select Article.
- Paste the snippet merge code in anywhere in this template. When in doubt, put it at the bottom.
- Save your changes.
We offer snippets like this as courtesy standalone customizations for your knowledge base. Using multiple snippets together may cause unintended consequences. Please snippet responsibly and remember that some problems are best solved by a developer!
Automatically collapse text between headers of specific sizes
Implementation Method: Snippet created in Snippets; snippet merge code added to relevant articles
This snippet will collapse all text--including smaller headings--within specific headings into accordions, using plus/minus toggles. It automatically applies to all headings of the specified levels:
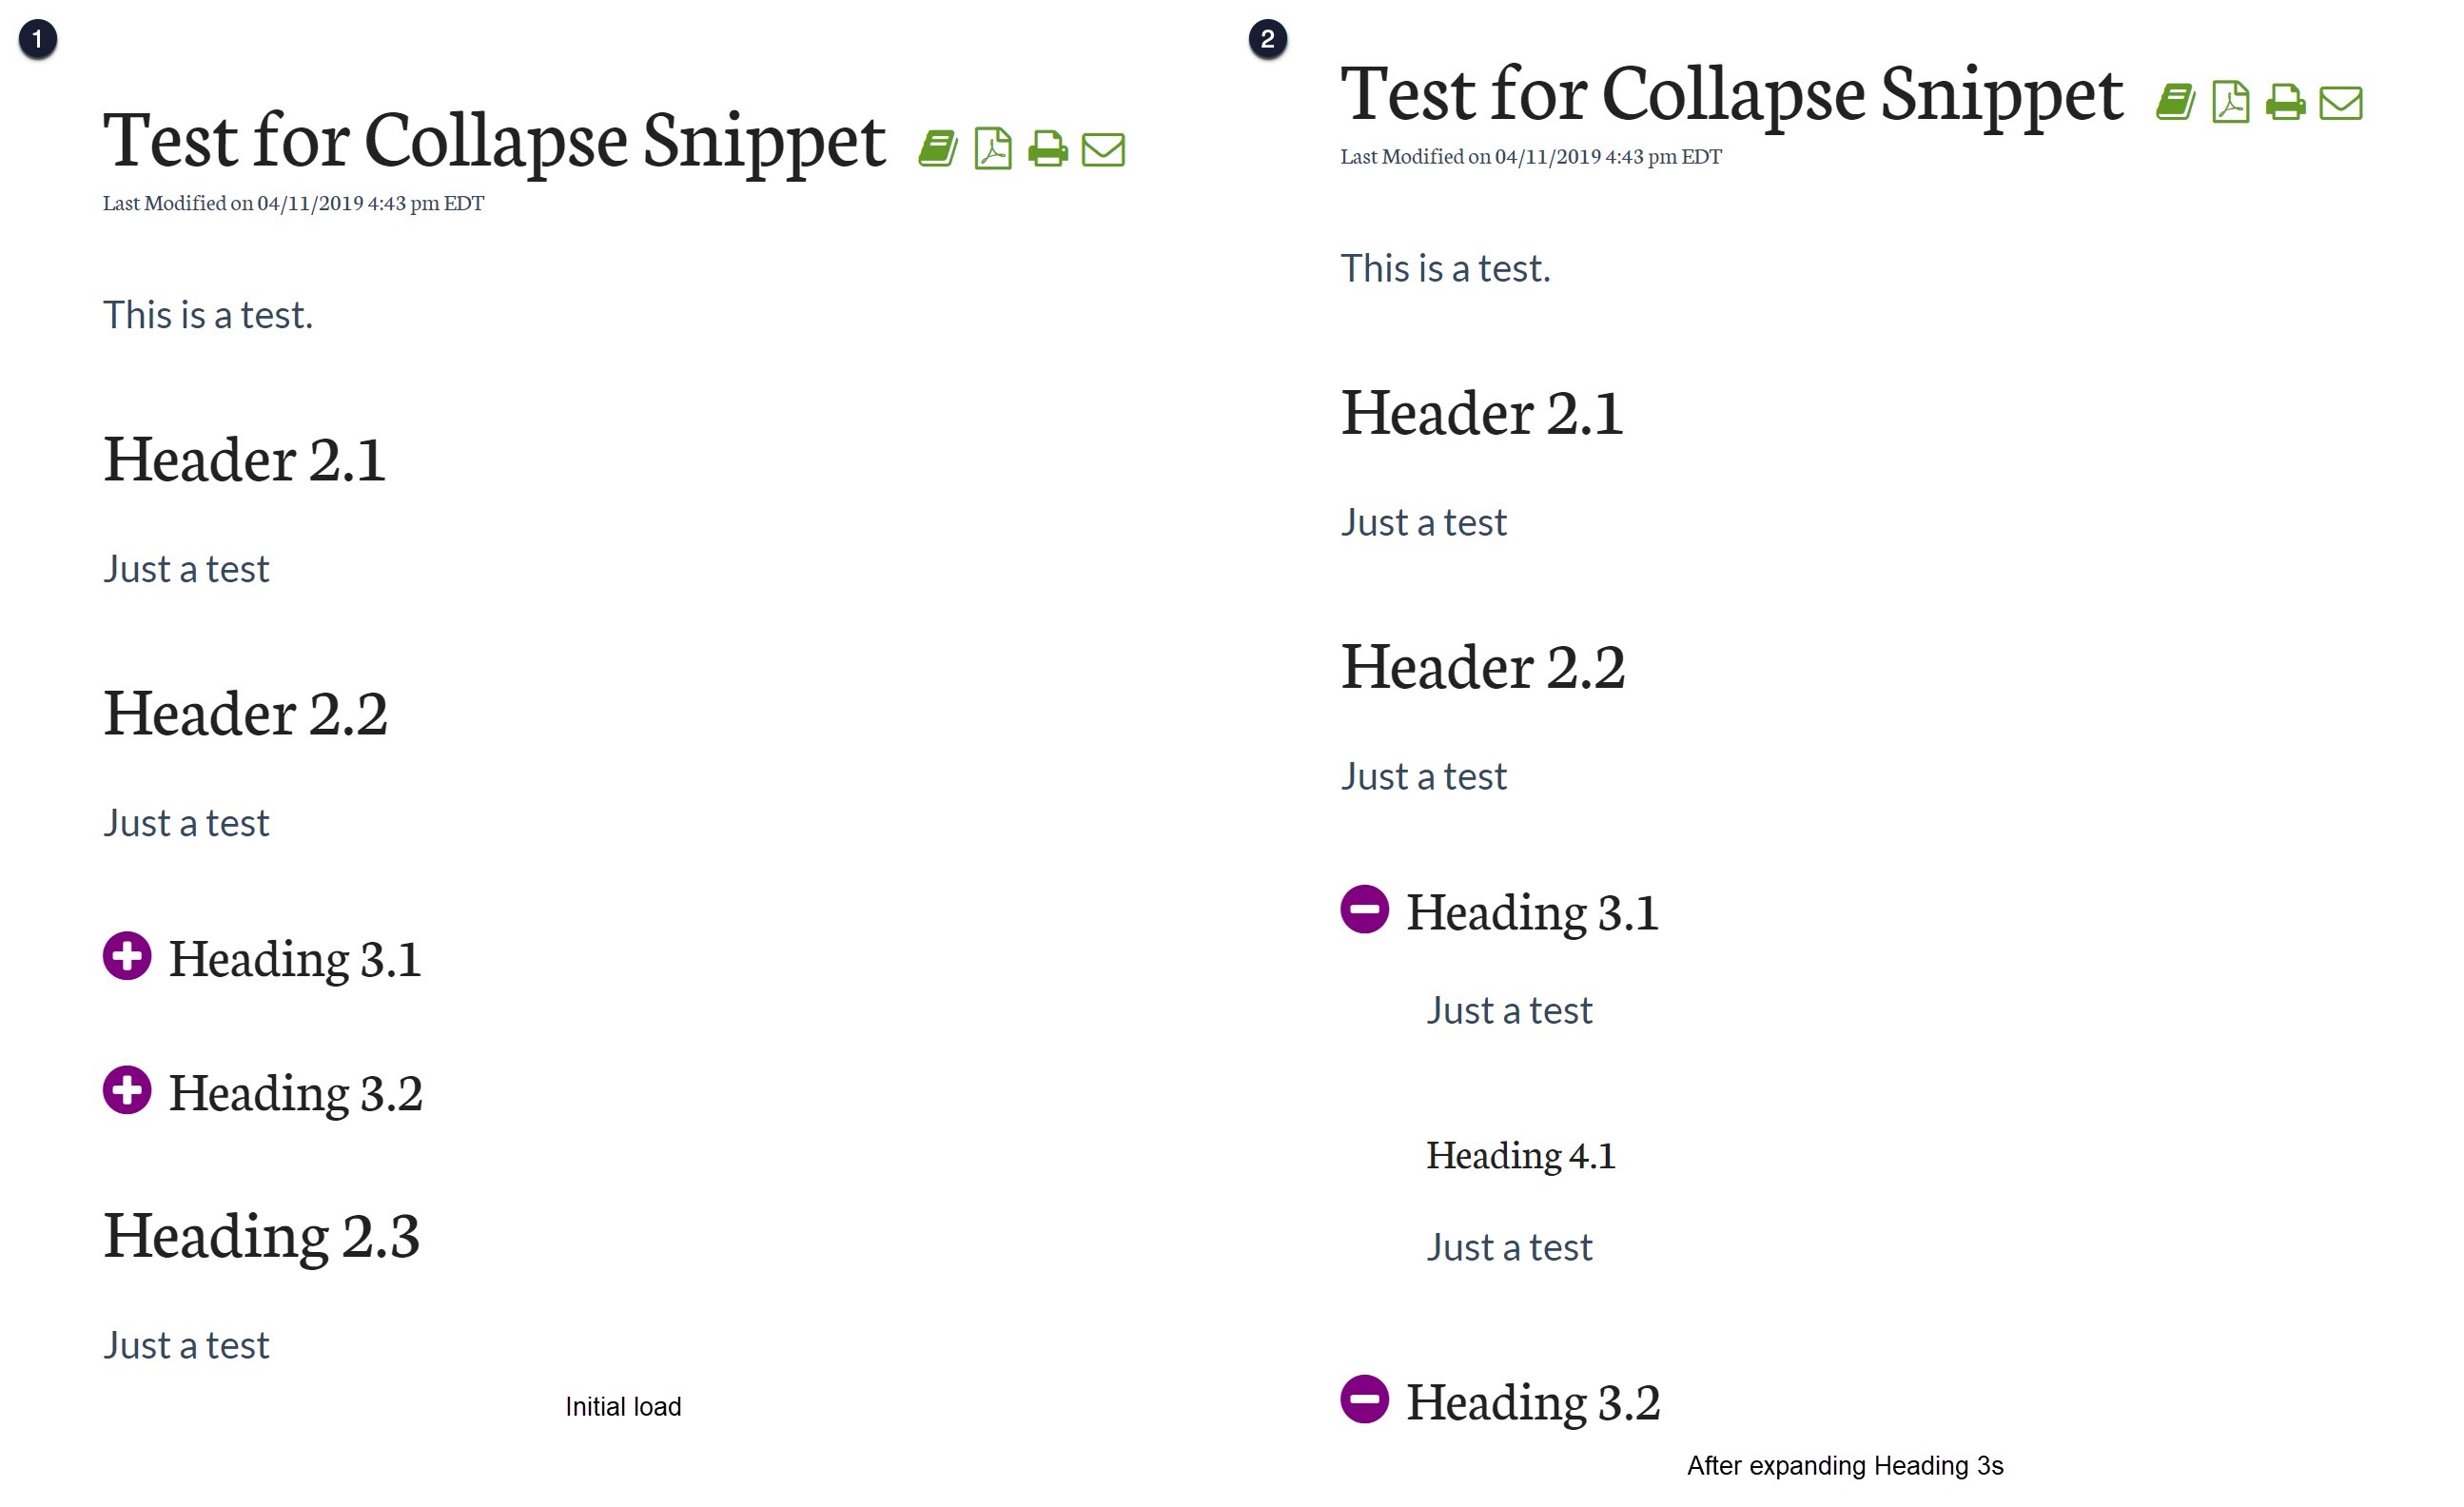
Only selected headings collapsed
This script will keep smaller headings' content within the collapsed headings as normal content (no expand/collapse), as seen with Heading 4.1 above.
Setup & Usage
To implement this functionality, create a snippet that handles the logic and styling.
- In the lefthand navigation, go to Snippets. The Snippets page opens.
- Select + Create New Snippet to create a new snippet. If you're unfamiliar with creating snippets, refer to Create a snippet for more detailed instructions.
- Enter a Snippet Name, such as
Collapse. The Merge Code Name will auto-generate from the Snippet Name, though you can also override this to something shorter. - Enter a Snippet Description, like:
This snippet hides any text under H3 headings throughout the entire page, which can then be expanded with a clickable "+" icon. - Select the Snippet Content dropdown and select Code Editor:
- Copy the script below and paste it into the Code Editor:
<script> $(function(){ if(!window.collapseHasRun) { window.collapseHasRun = true; $('.hg-article-body h3').each(function(){ $(this).nextUntil('h2, h3').wrapAll("<div class='collapse'></div>"); }); $( ".hg-article-body h3" ).wrap( "<div class='expand'></div>" ); $('.expand').next('.collapse').addClass('collapse-indent'); $('.expand').find(':header').prepend('<i class="fa fa-plus-circle"></i>'); $('.expand').on('click', function(){ $(this).find('i').toggleClass('fa-minus-circle').toggleClass('fa-plus-circle'); $(this).next('.collapse', ".open").slideUp(); $(this).next('.collapse').not(".open").slideDown(); $(this).next('.collapse').toggleClass('open'); }); } }); </script> - In the righthand menu, check the Visibility box to Hide from PDFs. PDFs don't support expanding/collapsing content in this way. If you don't check this box, the content will be collapsed and unable to be expanded!
- Optional: If you'd like to change the color of the plus/minus toggles, copy the code below and paste it into the same Code Editor below the script in Step #6. Replace the color hex in row 4 with a color of your choice:
<style> /* Optional style section: adjust color of the background for the toggles by changing the color hex */ .hg-article-body .expand i { color: #800080; } </style> - Select Create to create your snippet.
To apply this style to an article, insert the snippet you created above following the steps in Add snippets in content.
To apply this snippet to all articles:
- Copy the snippet's Merge Code Value.
- Go to Customize > Style (HTML & CSS).
- In the Customize HTML, CSS, and JS section, select Custom HTML.
- In the Select HTML section to edit dropdown, select Article.
- Paste the snippet merge code in anywhere in this template. When in doubt, put it at the bottom.
- Save your changes.
We offer snippets like this as courtesy standalone customizations for your knowledge base. Using multiple snippets together may cause unintended consequences. Please snippet responsibly and remember that some problems are best solved by a developer!
Variations
You can adjust this script so that it generates the expand/collapse for a different heading level. To do so, you'll need to update lines 4, 5, and 7 of the script.
Line 4 and line 7: change "h3" to be the heading level you'd like to see the expand/collapse icons at
$('.hg-article-body h3').each(function(){$( ".hg-article-body h3" ).wrap( "<div class='expand'></div>" );Line 5: Change the list of headings to include all higher-level headings you use before this one, so that higher-level content isn't hidden, as well as the heading level you've selected for the rest of the script:
$(this).nextUntil('h2, h3').wrapAll("<div class='collapse'></div>");Here is a sample of what an h5 version of this script looks like:
<script>
    $(function(){
        if(!window.collapseHasRun) {
            window.collapseHasRun = true;
            $('.hg-article-body h5').each(function(){
                $(this).nextUntil('h2, h3, h4, h5').wrapAll("<div class='collapse'></div>");
            });
            $( ".hg-article-body h5" ).wrap( "<div class='expand'></div>" );

            $('.expand').next('.collapse').addClass('collapse-indent');
            $('.expand').find(':header').prepend('<i class="fa fa-plus-circle"></i>');

            $('.expand').on('click', function(){
                $(this).find('i').toggleClass('fa-minus-circle').toggleClass('fa-plus-circle');
                $(this).next('.collapse', ".open").slideUp();
                $(this).next('.collapse').not(".open").slideDown();
                $(this).next('.collapse').toggleClass('open');
            });
        }
    });
</script>
Collapse/expand any chunk of text with a Read More/Read Less link
Implementation Method: Two snippets created in Snippets to begin and end the collapsed section; Custom HTML added to Customize > Style to style those; snippet merge codes added to relevant articles
The previous chunks of code all automatically collapse chunks of text. If you'd rather be able to control exactly which sections of text are expanded and collapsed, this code will work better for you. This code will work when the Begin Snippet is used on a blank line or in some type of regular paragraph text. If you'd like an expand/collapse to appear after a header, refer to the alternate version for headers below.
This is the set of snippets used just below.
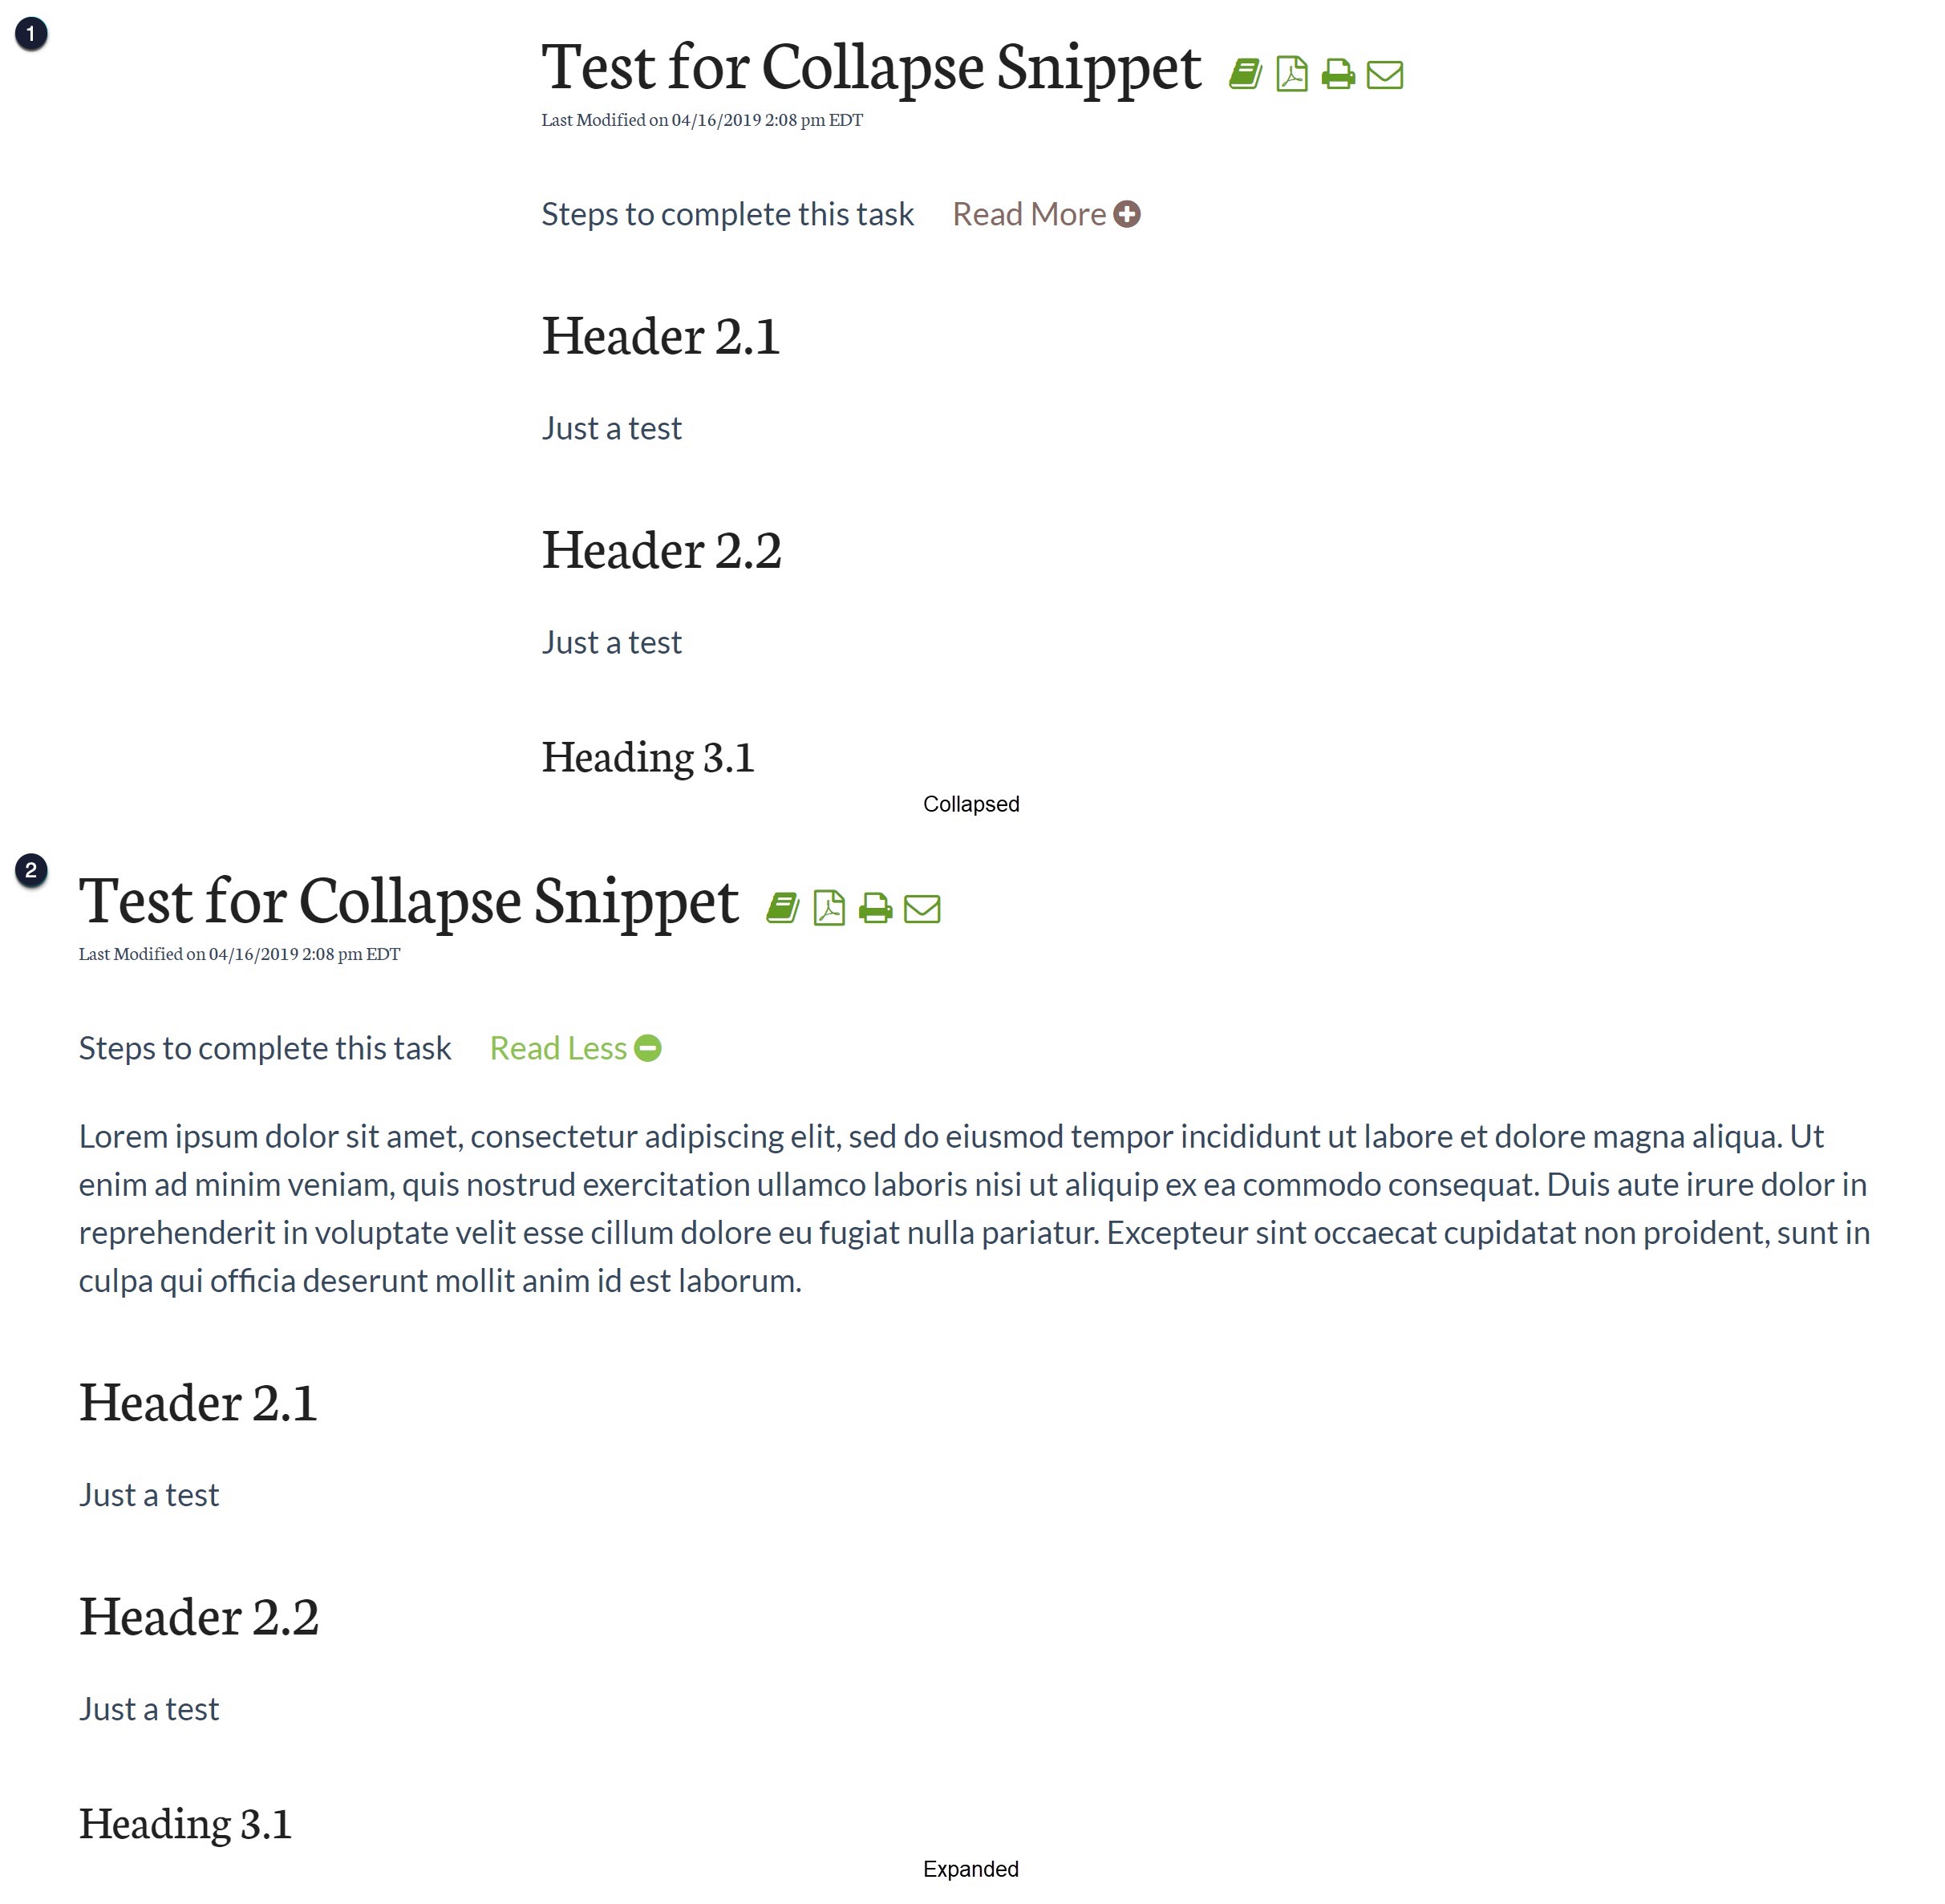
Here, we use it with the same plus and minus signs as before, but with a Read More/Read Less text:
Setup and usage
To implement this functionality, create two snippets to handle the styling and expand/collapse logic and edit Custom HTML in Customize > Style to handle the rest of the logic. Select "Read more" below to see the full steps. 😉
To apply this style to an article, insert the beginShowHideSection where you want the Read More link to display, either at the end of a line or on an empty line. Insert the endShowHideSection snippet where you want the collapsing section to end. If you're unfamiliar with adding snippets to content, follow the instructions in Add snippets in content.
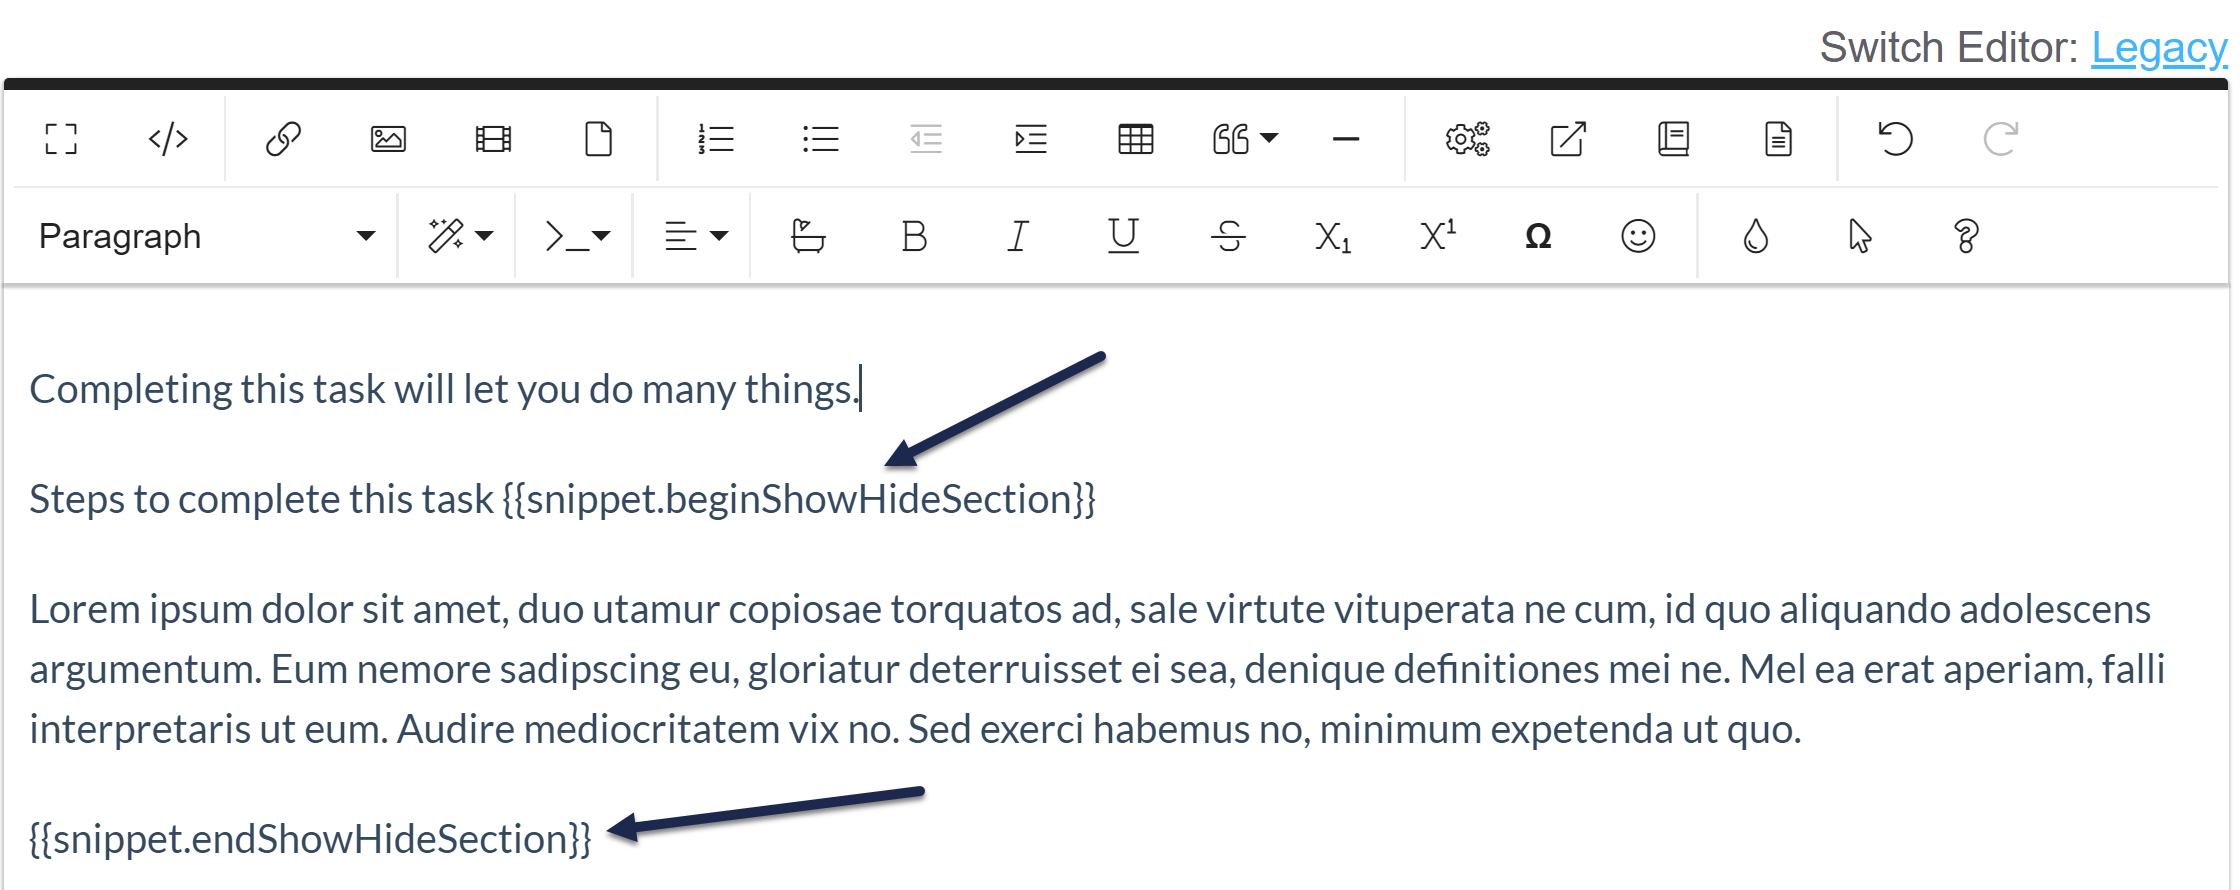 Sample usage of these snippets
We offer snippets like this as courtesy standalone customizations for your knowledge base. Using multiple snippets together may cause unintended consequences. Please snippet responsibly and remember that some problems are best solved by a developer!
Variations
You can adjust the "Read More" and "Read Less" text by updating the text used in the script added to Customize > Style, in row 8 (Read Less) and row 11 (Read More).
For example, this code replaces them with "Expand" and "Collapse":
<script>
$(function(){
    $('.toggle').each(function(){
        $(this).prev().append('<a href="javascript:void(0)" class="toggleLink">Expand <i class="fa fa-plus-circle"></i></a>');
    });
      $('.toggleLink').click(function(){
          if($(this).hasClass('toggle-open') == false){
            $(this).html('Collapse <i class="fa fa-minus-circle"></i>').addClass('toggle-open');
              $(this).parent().next('.toggle').show();
        }else{
            $(this).html('Expand <i class="fa fa-plus-circle"></i>').removeClass('toggle-open');
              $(this).parent().next('.toggle').hide();
        }
    });
});
</script>
You can change the plus and minus icons by adding different icons into rows 8 and 11. For example, this code changes them to a right arrow and an up arrow:
<script>
$(function(){
    $('.toggle').each(function(){
        $(this).prev().append('<a href="javascript:void(0)" class="toggleLink">Read More <i class="fa fa-arrow-right"></i></a>');
    });
      $('.toggleLink').click(function(){
          if($(this).hasClass('toggle-open') == false){
            $(this).html('Read Less <i class="fa fa-arrow-up"></i>').addClass('toggle-open');
              $(this).parent().next('.toggle').show();
        }else{
            $(this).html('Read More <i class="fa fa-arrow-right"></i>').removeClass('toggle-open');
              $(this).parent().next('.toggle').hide();
        }
    });
});
</script>
Icon usage
These examples use Font Awesome icons. You can use other Font Awesome icons or upload your own icons, too.
Collapse/expand text after a header with a +/- option next to the header
Implementation Method: Two snippets created in Snippets to begin and end the collapsed section; Custom HTML added to Customize > Style to style those; snippet merge codes added to relevant articles
This code works much like the Read More/Read Less code above, except it can be used to place a + or - on the same line as a header:
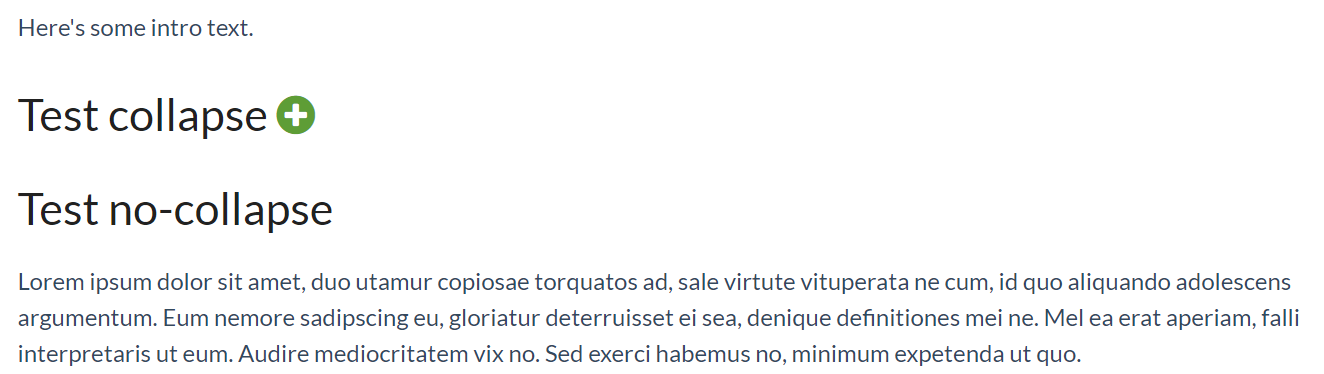 Initial state; collapsed with + icon
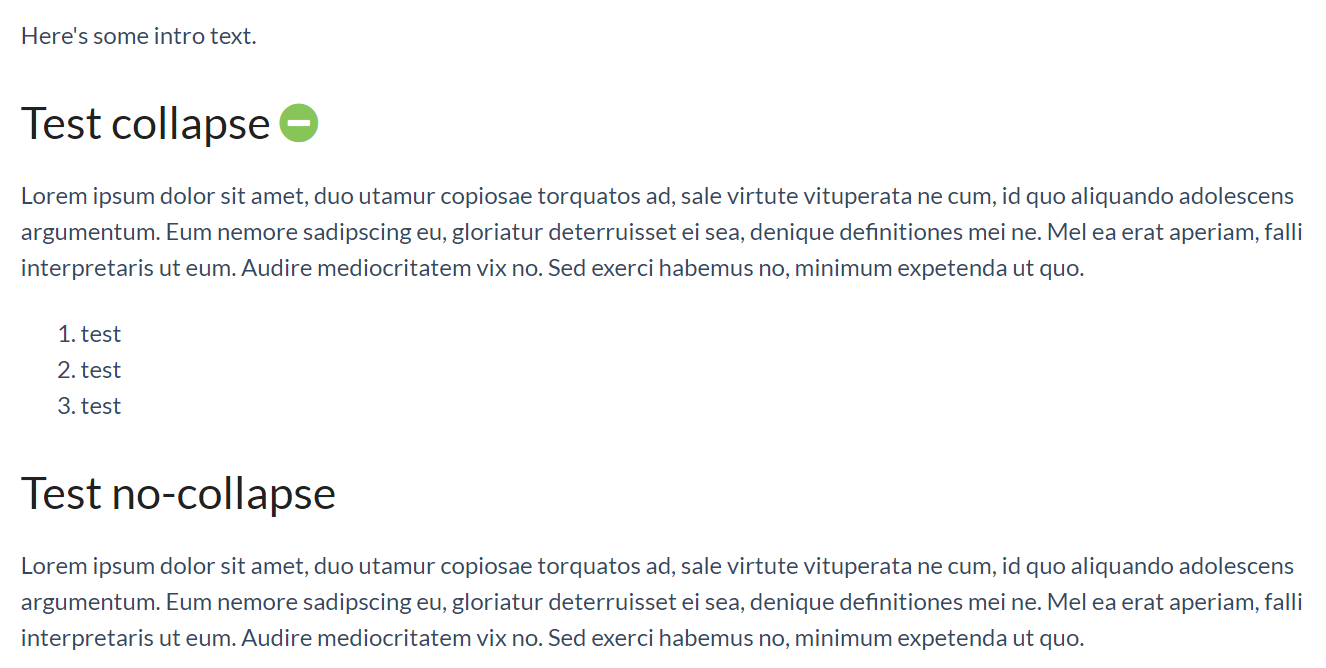 Once clicked to expand, it shows all text and a "-" to collapse again
Limitations
The begin snippet is actually placed on the line before the section you want to have expand/collapse, and the code will look for the children of that section and collapse them. This is specifically for use with headers, and you can't combine this method with the other expand/collapse mentioned above.
Setup and usage
We offer snippets like this as courtesy standalone customizations for your knowledge base. Using multiple snippets together may cause unintended consequences. Please snippet responsibly and remember that some problems are best solved by a developer!
To implement this functionality, create two snippets to handle the styling and expand/collapse logic and edit Custom HTML in Style > Settings to handle the rest of the logic.
Create first snippet
- In the lefthand navigation, go to Snippets. The Snippets page opens.
- Select + Create New Snippet to create a new snippet. If you're unfamiliar with creating snippets, refer to Create a snippet for more detailed instructions.
- Enter a Snippet Name, such as
Begin Show/Hide Section. The Merge Code Name will auto-generate from the Snippet Name, though you can also override this to something shorter. - Enter a Snippet Description, like:
Put this snippet before a section of text you want to hide with a "+" expanding section. Note: you'll need to place the separate snippet "End Show/Hide" at the end of the section of text in order to have this snippet work correctly.. - Select the Snippet Content dropdown and select Code Editor:
- Copy the script below and paste it into the Code Editor:
<div class="toggle"> - In the righthand menu, check the Visibility box to Hide from PDFs. PDFs don't support expanding/collapsing content in this way. If you don't check this box, the content will be collapsed and unable to be expanded!
- Select Create to create your snippet.
Create second snippet
- Create another new snippet.
- Enter a Snippet Name, such as
End Show/Hide Section. The Merge Code Name will auto-generate from the Snippet Name, though you can also override this to something shorter. - Enter a Snippet Description, like:
Put this snippet at the end of a section you want to hide with a "+" expanding section. Note: you'll need to place the separate "BeginShowHide" snippet at the beginning of the section you want to be expanded/collapsed for this snippet to work correctly. - Select the Snippet Content dropdown and select Code Editor:
- Copy the script below and paste it into the Code Editor:
</div> - In the righthand menu, check the Visibility box to Hide from PDFs. PDFs don't support expanding/collapsing content in this way. If you don't check this box, the content will be collapsed and unable to be expanded!
- Select Create to create your snippet.
Add the script to your Custom HTML
- Go to Customize > Style (Custom HTML & CSS). The Style Settings page opens.
- In the Customize HTML, CSS, and JS section, select Custom HTML.
- In the Select HTML section to edit dropdown, select Article.
- Paste this script into the bottom of the Custom HTML editor:
<script> //Expand/collapse functionality for use with Begin Show/Hide and End Show/Hide snippets $(function(){ $('.toggle').each(function(){ var $this = $(this); $this.children().addClass('toggleItem'); $this.find(':eq(1)').removeClass('toggleItem').addClass('toggleLink').append('<a href="javascript:void(0)"> <i class="fa fa-plus-circle"></i></a>'); $this.find('.toggleItem').hide(); $this.find('.toggleLink').click(function () { if($(this).hasClass('toggle-open') == false){ $(this).addClass('toggle-open').find('.fa').removeClass('fa-plus-circle').addClass('fa-minus-circle'); }else{ $(this).removeClass('toggle-open').find('.fa').addClass('fa-plus-circle').removeClass('fa-minus-circle'); } $(this).parent().find('.toggleItem').toggle(); }); }); }); </script> - Be sure to Save your changes.
To apply this style to an article, insert the beginShowHideSection snippet before the header whose content you'd like to collapse, and the endShowHideSection snippet at the end of the line where you want the collapsing section to end. If you're unfamiliar with adding snippets to content, follow the instructions in Add snippets in content.
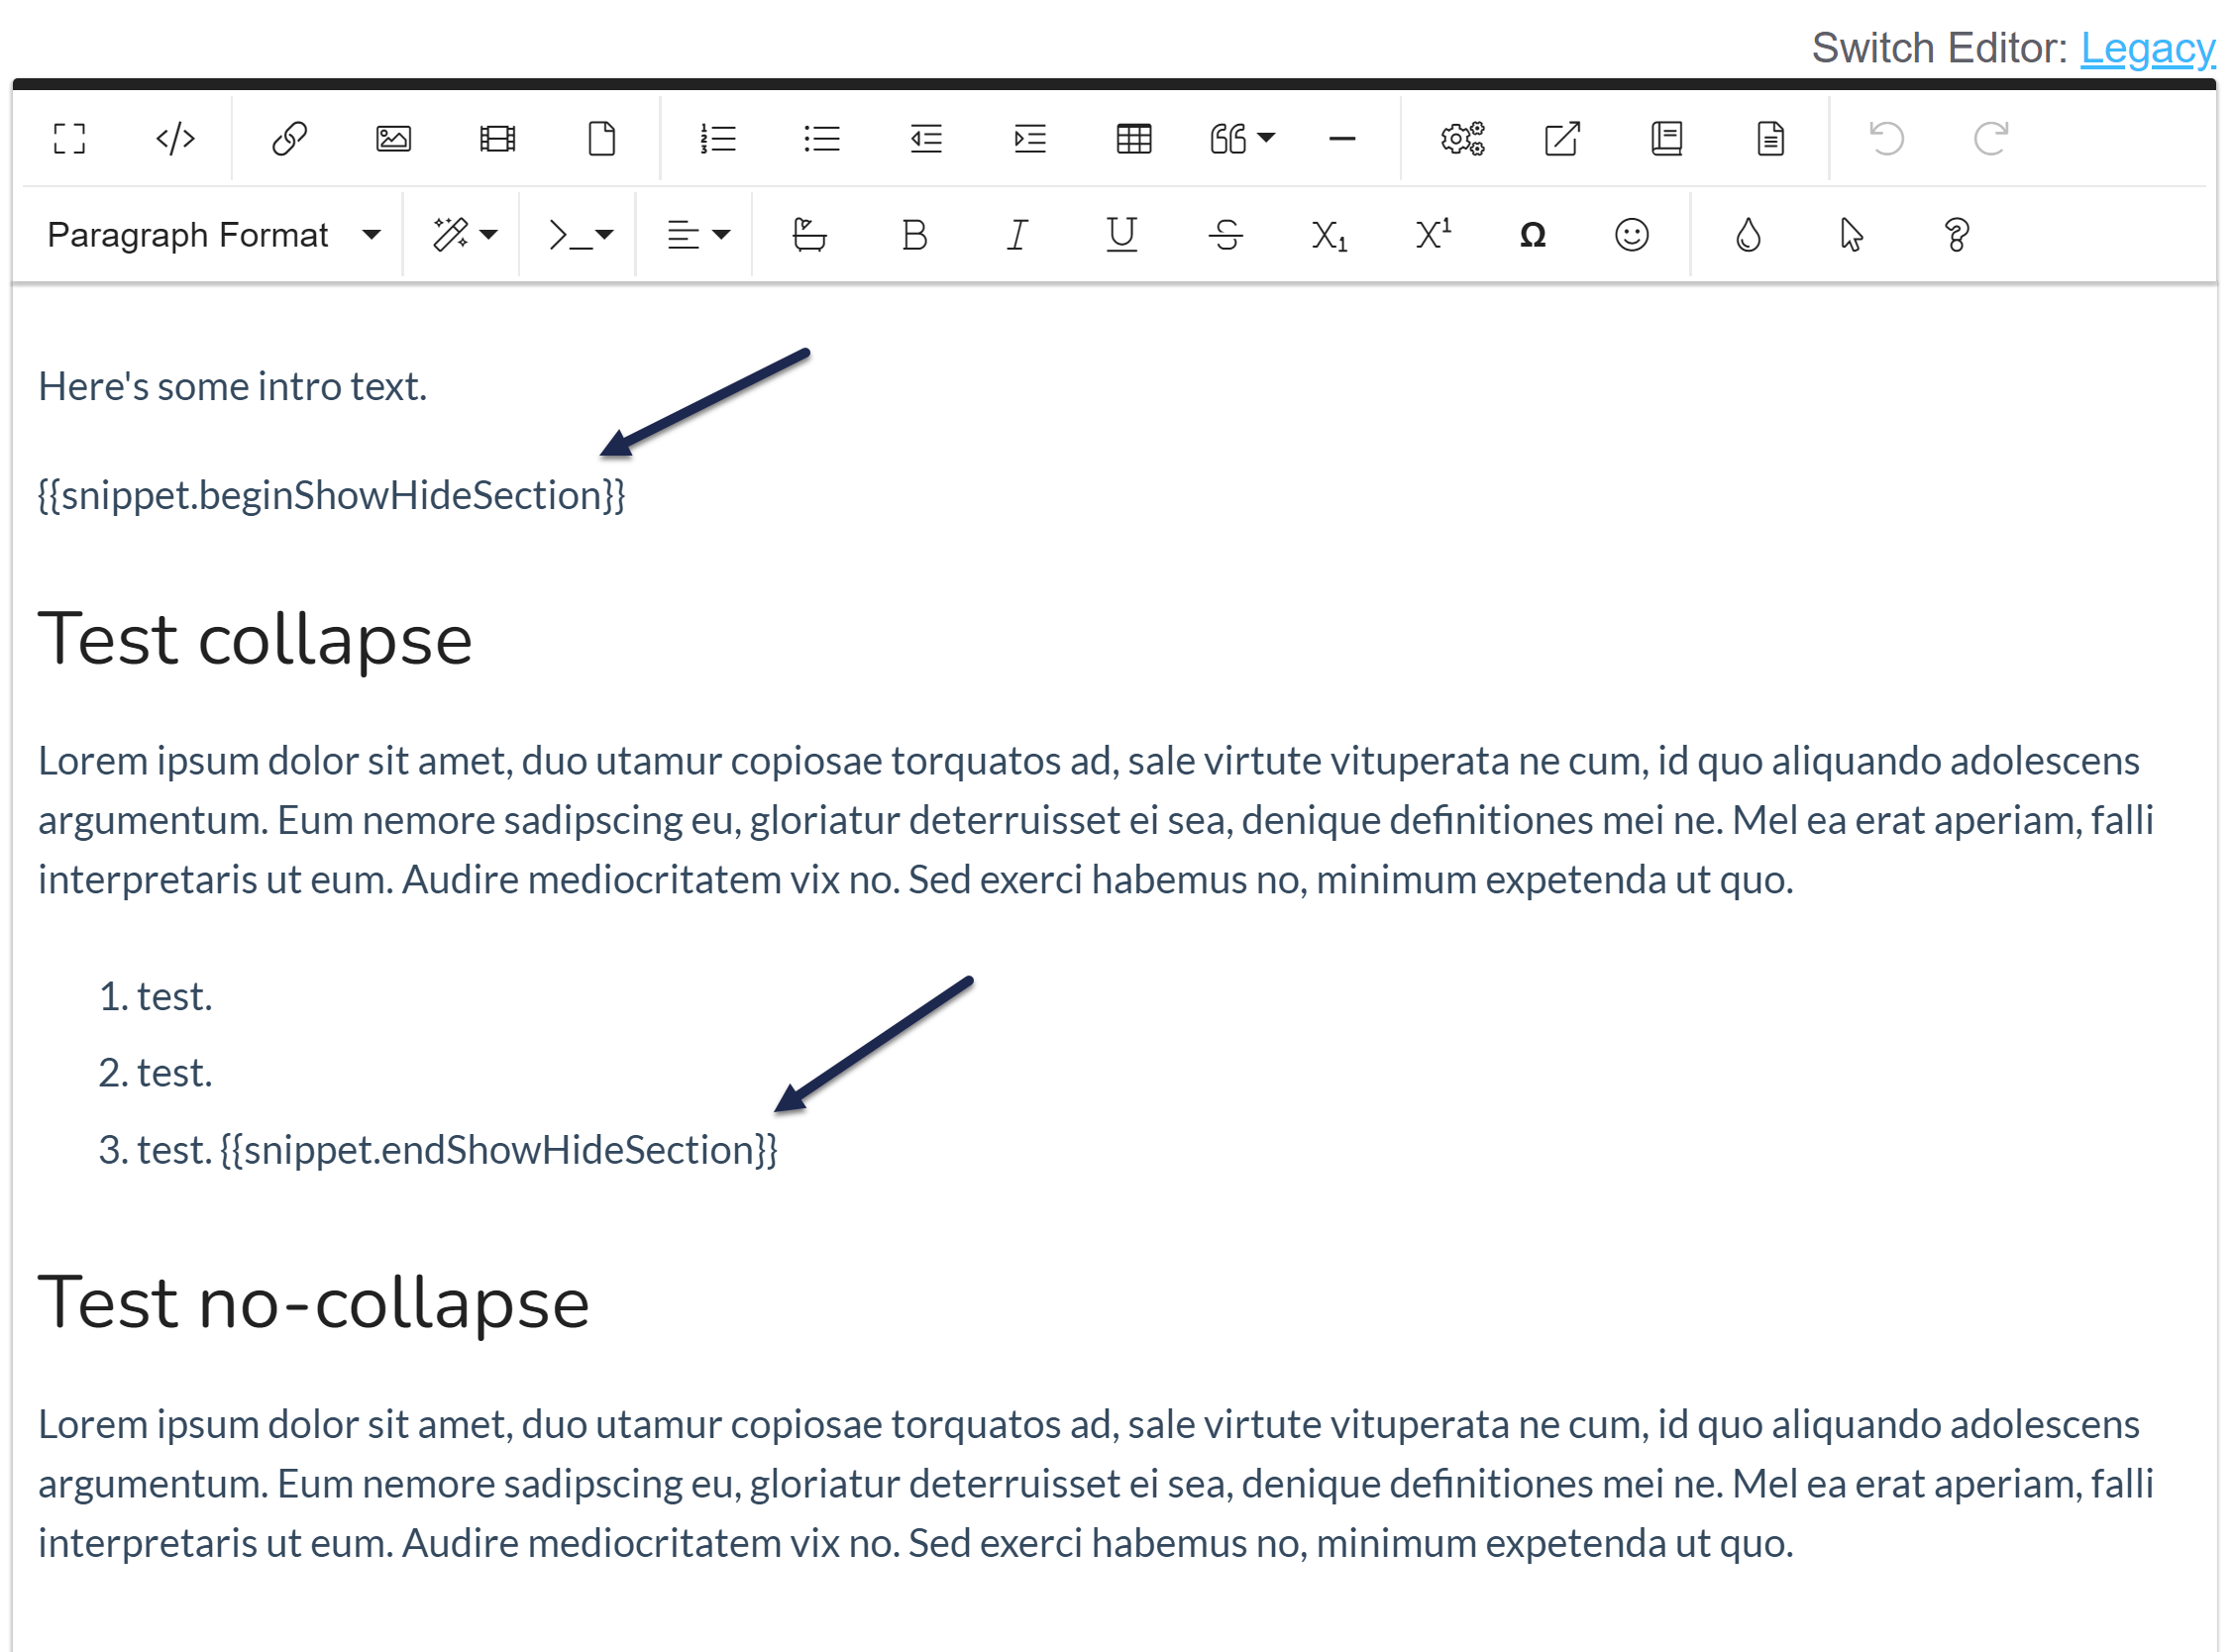 Sample usage of these snippets
The above layout will produce:
Sample end result