
If you already have a list of terms you'd like to add to your glossary, you can import those terms in bulk, saving you time from having to create them each individually. (You can also export from one knowledge base to import into another!)
You can import glossary terms at any time, even if you have existing terms.
Prerequisites
To import your terms, you'll need the terms in a CSV file that includes columns for:
- The glossary term: The word or phrase you want to define. Terms can only contain letters, numbers, spaces, dashes, underscores, and apostrophes.
- A display title: An optional field that can contain punctuation and characters prohibited from the term. Refer to
- The term's definition. If you want to include text formatting like bold, italics, underline, and hyperlinks, definitions should be formatted within valid HTML. It's often easier to add this formatting after the import.
To help you get started, download a sample file:
- In the left navigation, go to Glossary. The Glossary page opens.
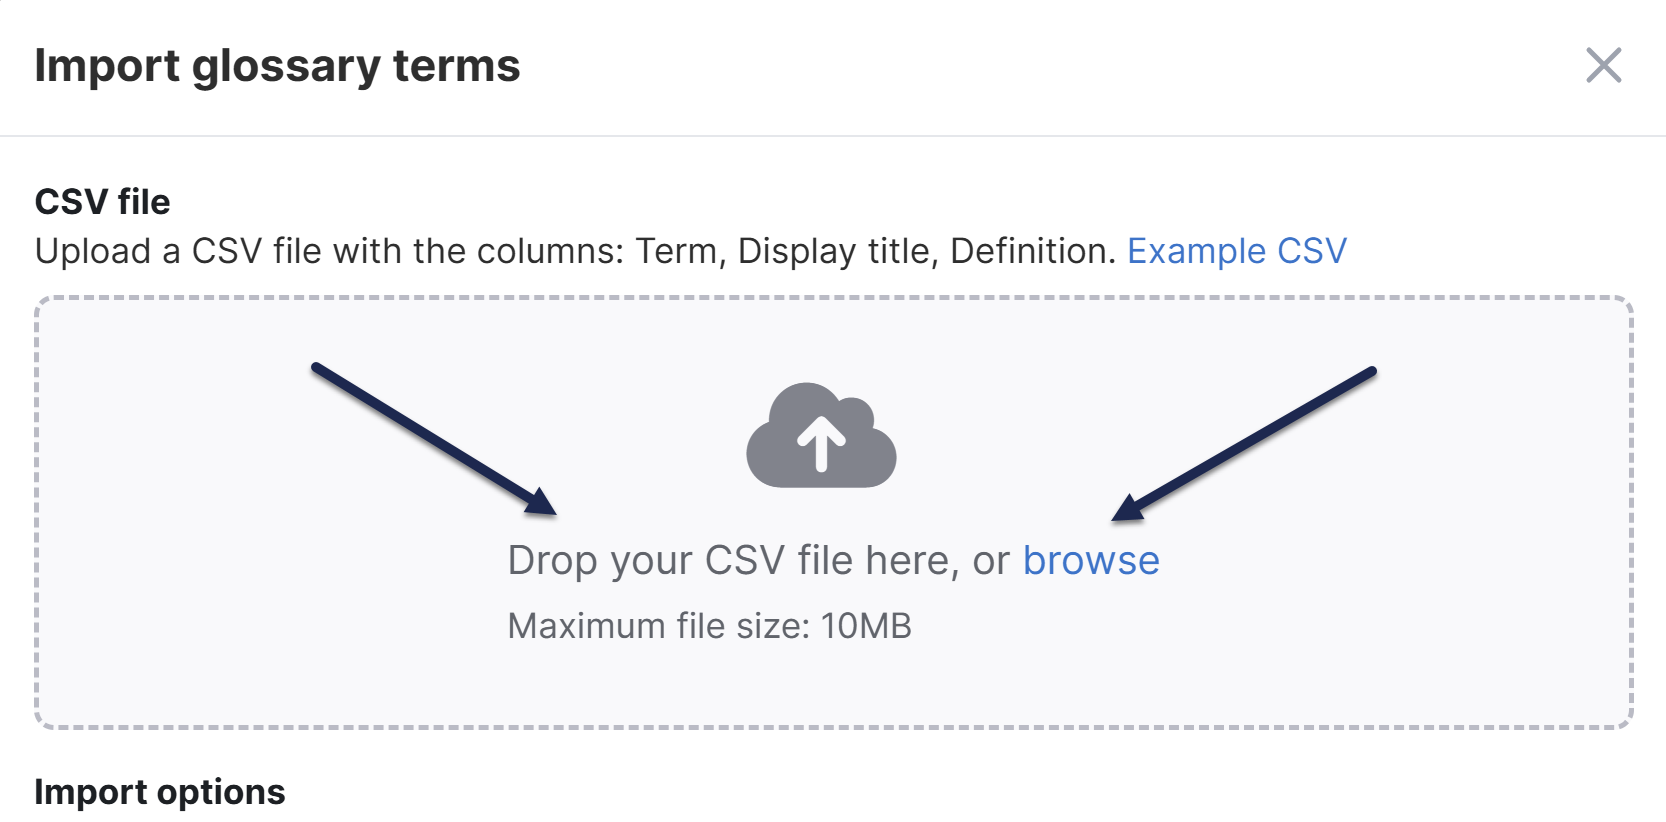
- Select Import from CSV. The Import glossary terms modal opens.
- Select the Example CSV link to download a sample file you can use as a template.
Replace the terms, display titles, and definitions there with your own and save the file. You're now ready to import!
Don't begin with empty rows
Be sure that the first two rows of your CSV aren't empty. (If they are, the importer won't "see" any data and won't import anything!)
Import terms
Once you have your CSV formatted and saved, import it:
- In the left navigation, go to Glossary. The Glossary page opens.
- Select Import from CSV. The Import glossary terms modal opens.
- Add your file to the CSV file section. You can either drag and drop the file from your computer into the window or select Browse to find the file and select it.
- Once you choose your file, the modal updates to display the file name:
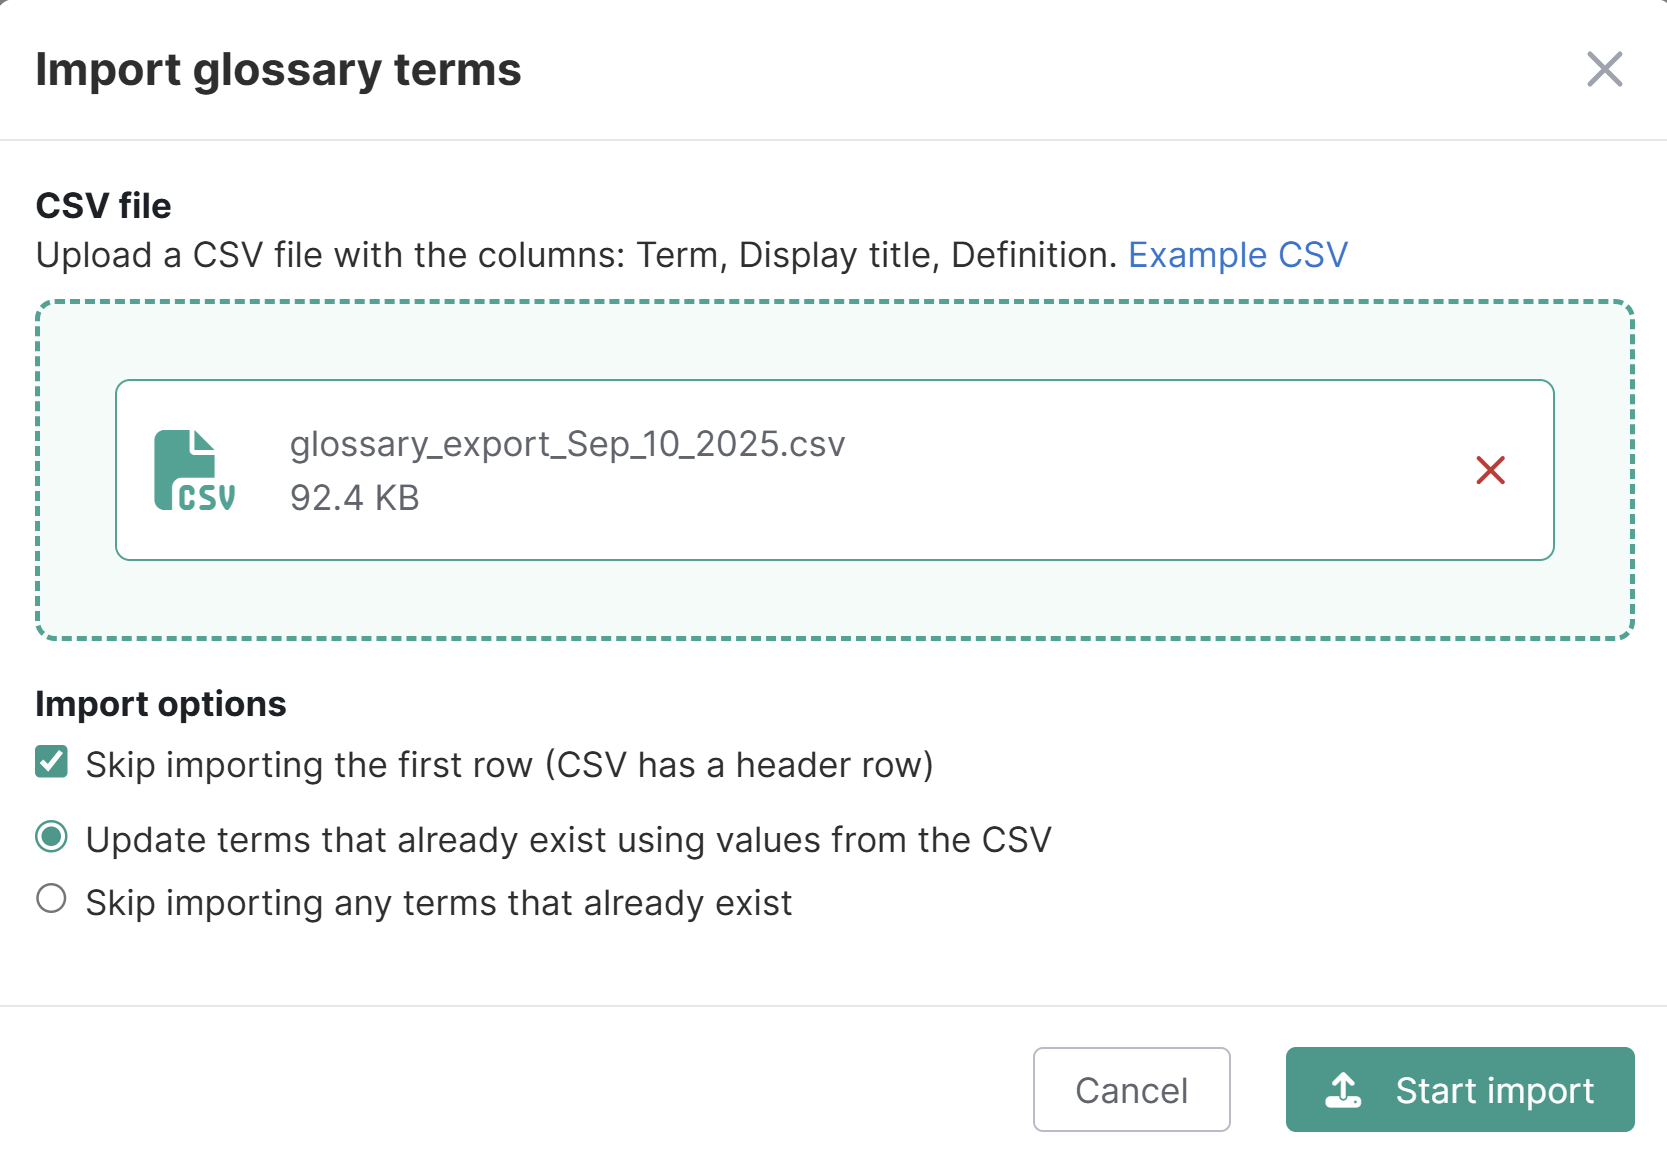
- If your CSV contains a header row, like our sample CSV file, check the Import options box to Skip importing the first row (CSV has a header row). If your CSV file has no header row, make sure this box is unchecked.
- If this is your first time adding terms, go to the next step. If you already have glossary terms, you'll need to tell the importer how it should handle cases where the CSV contains terms that you already have:
- Select Update terms that already exist using values from the CSV to overwrite the term's existing definition or display title with the term's information in your CSV file. Use this option if it your CSV file contains updates to existing terms you want to save.
- Select Skip importing any terms that already exist to keep the existing definition you have for the term. Use this option if your CSV doesn't include any updates for existing terms or you want to manually review them and make changes yourself.
- Note that both options will fully import new terms that don't already exist in your Glossary.
- Once you've made your selections, select Start import.
- If we're unable to import your glossary terms due to an unsupported character, we'll display an error message. If you receive this message, refer to Troubleshooting glossary term imports for more help fixing it.
- If all terms contain valid characters, a progress bar displays while the import processes. Depending on the size of your glossary, this may appear briefly or up to a minute.
- Once the progress bar disappears and redirects you back to the Glossary page, your terms have been imported.

Glossary terms will automatically display in alphabetical order, with terms beginning with numbers appearing first. As your glossary gets larger, use the search feature to quickly find a term.