
Below are instructions for setting up SAML SSO using a generic identity provider. This feature is available on select plans. We have specific instructions for our most popular identity providers:
Step 1: Add the KnowledgeOwl SP info to your IdP
Generally speaking, when adding an SP to your IdP, there are four pieces of information that you need about the SP.
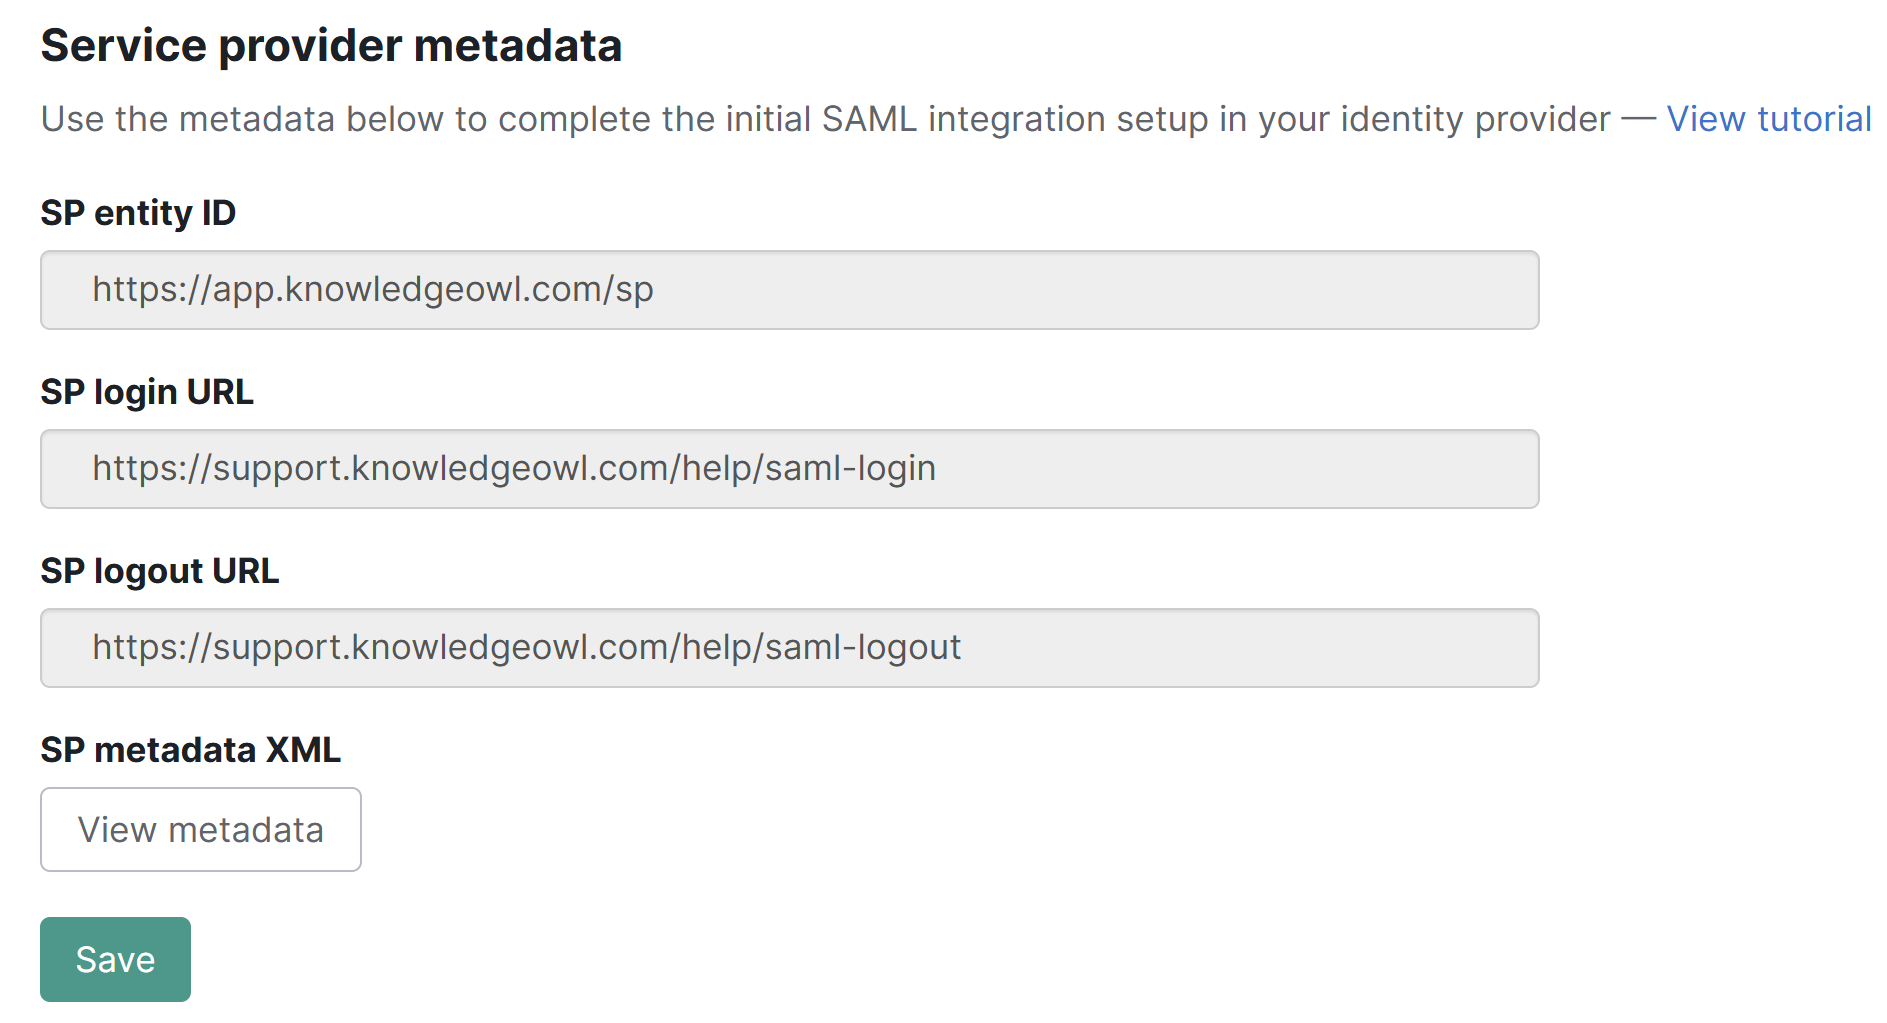
- SP Entity ID
- SP Login URL — sometimes referred to as a "sign on URL"
- SP Logout URL — not all systems ask for this
- Name ID Format — some systems do not ask for this. If yours needs it, you should set it to
Unspecifiedor, if you need the long version:urn:oasis:names:tc:SAML:1.1:nameid-format:unspecified.
To get the information for the SP Entity ID, SP Login URL, and SP Logout URL from KnowledgeOwl:
- For the fields you need, go to Security and access > Single sign-on.
- Be sure you're in the SAML Settings tab.
- Copy the information you need from the Service provider metadata section and enter it in your IdP.
 Copy the information you need from the Service provider metadata section

Step 2: Add your IdP info to KnowledgeOwl
Once you have entered those pieces of information into your IdP, the IdP should provide you with the same three pieces of information as above, but for the IdP side of the connection:
- IdP Entity ID
- IdP Login URL — sometimes referred to as a "sign on URL"
- IdP Logout URL — if the IdP does not provide this, use the login URL
Add this information into the appropriate fields in KnowledgeOwl:
- Go to Security and access > Single sign-on.
- Be sure you're in the SAML Settings tab.
- Enter the information into the fields in the Identity provider metadata section.
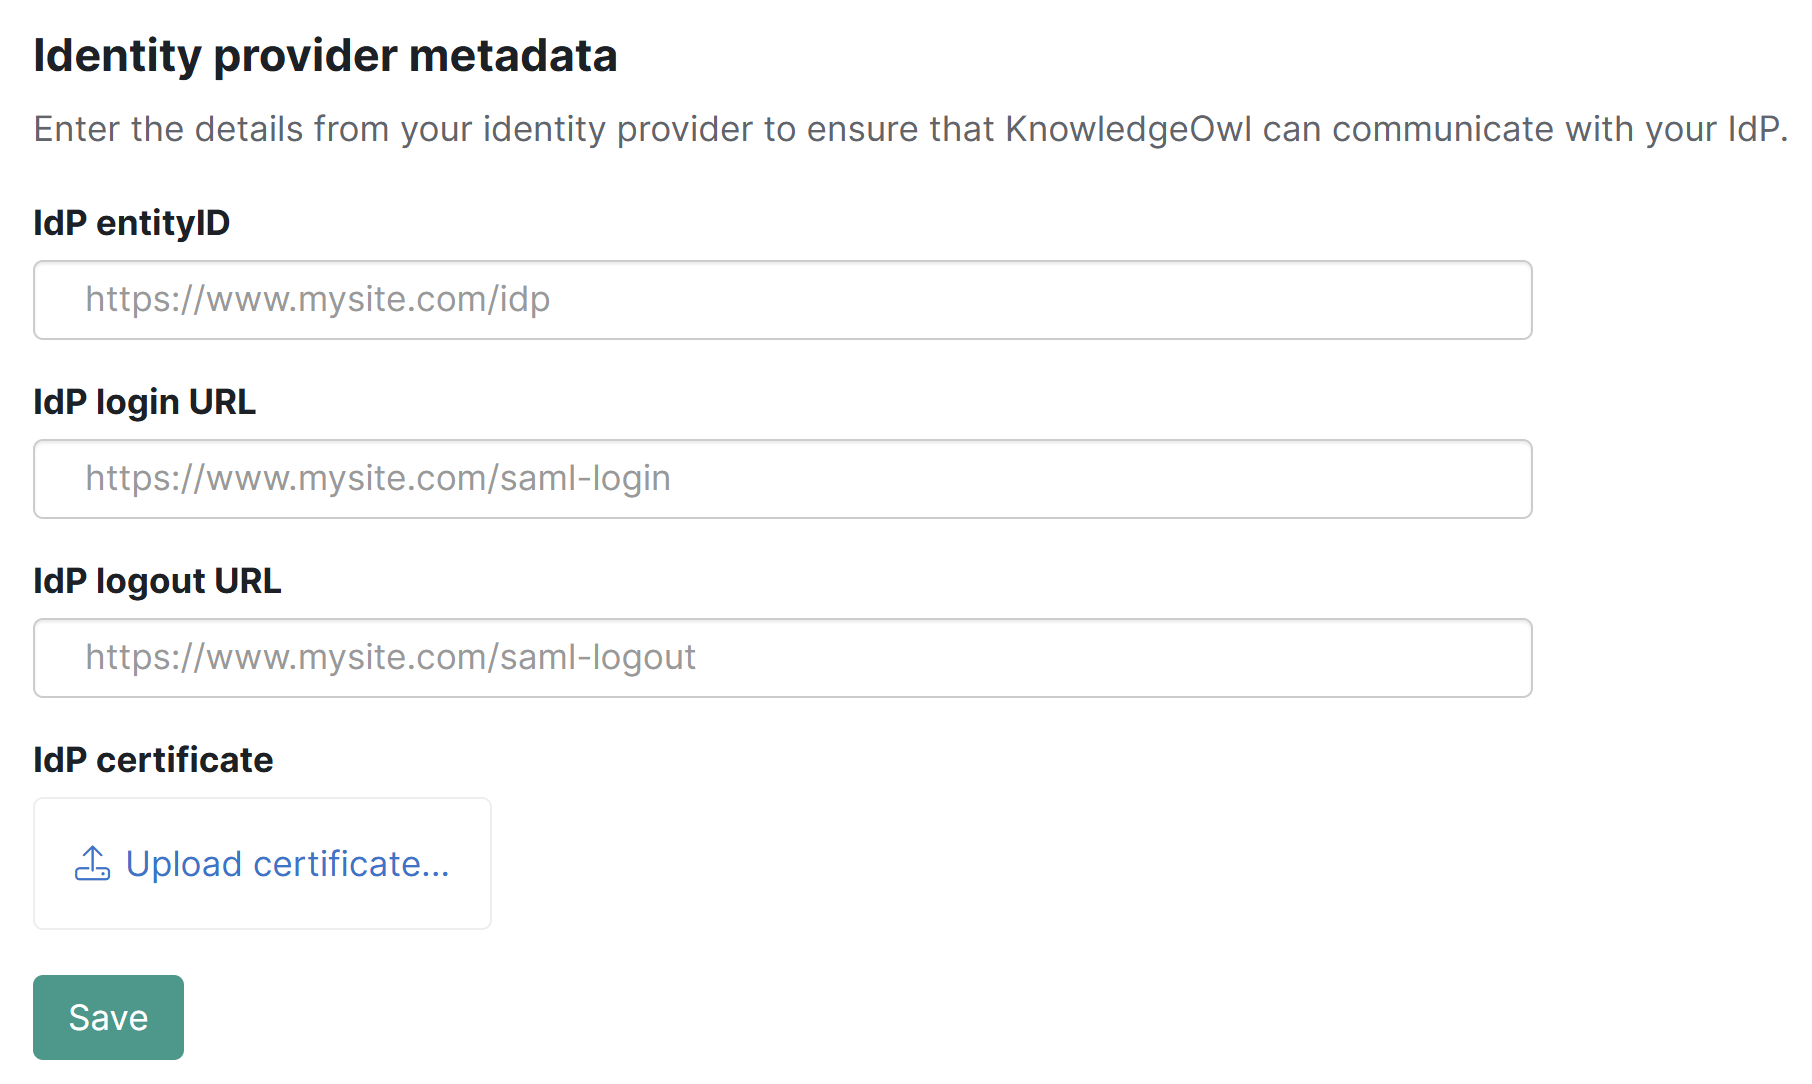 Enter the IdP information in the Identity provider metadata section
 - Be sure to Save your changes if you aren't ready to upload your certificate yet.

Step 3: Upload the IdP certificate to KnowledgeOwl
The IdP should also provide a public certificate. You will need to download the certificate and then upload it into KnowledgeOwl.
.crt file format required
KnowledgeOwl expects a file formatted as .crt. If you are using Okta or another provider which saves the certificate as a .cert file, you'll need to resave it as .crt.
Once you have your certificate in .crt format:
- Go to Security and access > Single sign-on.
- Be sure you're in the SAML Settings tab.
- In the Identity provider metadata section, select the Upload certificate option in the IdP certificate subsection, located just under the IdP URL fields:
 Select the Upload certificate option
 - The link will open a file browsing window where you can select the .crt file to upload. Once you upload, a modal confirms if the certificate was updated successfully.
- Once you select OK to close that modal, the IdP certificate section displays the certificate's details. For example:
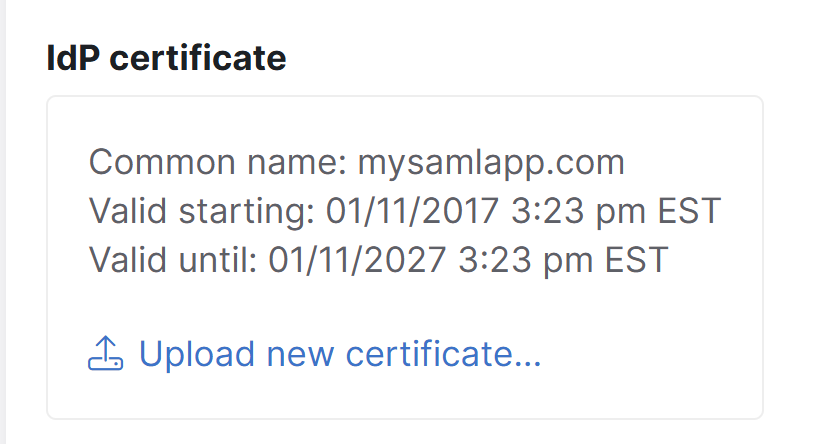 Sample IdP certificate details


Step 4: Enable SAML SSO
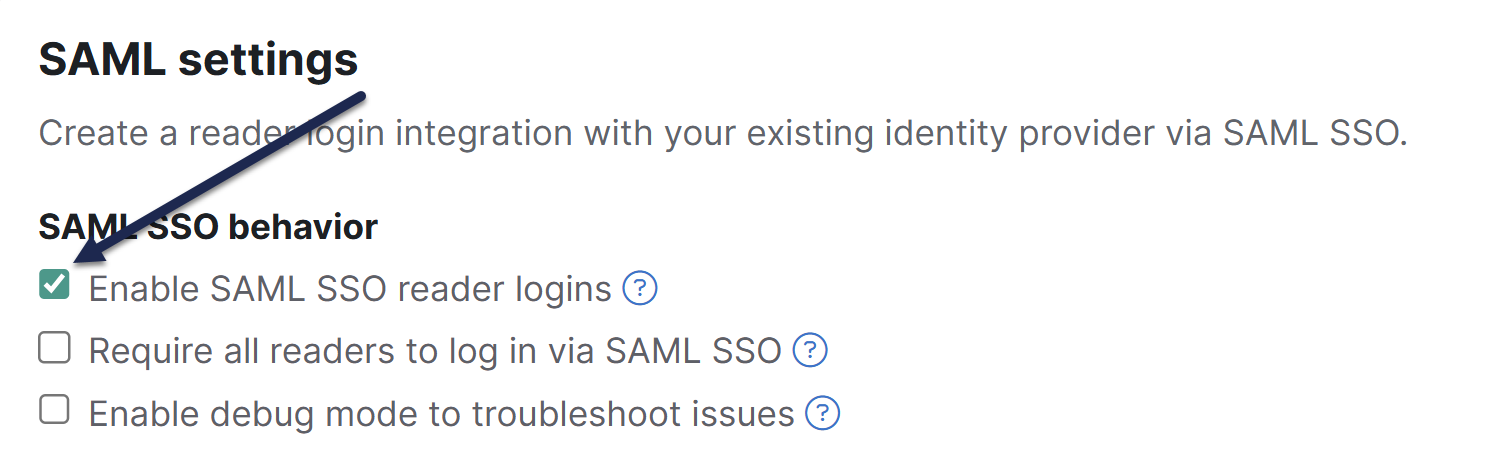
Once you have entered the three IdP fields and have uploaded the IdP certificate into KnowledgeOwl, enable SAML SSO:
- Go to Security and access > Single sign-on.
- Be sure you're in the SAML Settings tab.
- In the SAML settings section, select Enable SAML SSO reader logins.
 Select Enable SAML SSO reader logins
 - Be sure to Save your changes.

Step 5: Add the KnowledgeOwl x509 certificate to your IdP
If your IdP requires it, you can access the x509 certificate in KnowledgeOwl:
- Go to Security and access > Single sign-on.
- Be sure you're in the SAML Settings tab.
- In the Service provider metadata section, under SP metadata XML, select View metadata. The KnowledgeOwl metadata modal opens to display your metadata.
- If you aren't seeing any metadata, make sure you completed Step 4 and saved.
- Select anywhere in the Service provider metadata for knowledge base text box to highlight the full XML contents.
- Copy the text and paste into a text editor or, if your IdP supports it, directly into a field within your IdP.
- Check your IdP's requirements for file format and how to upload the certificate.
Step 6: Map SAML attributes to fields in KnowledgeOwl
Now that the IdP URLs have been added to your knowledge base settings and vice versa with the SP URLs into your IdP, you will need to configure your IdP to pass over identifying information about the readers logging in so that we can create / update them within your KnowledgeOwl account.
These mappings are configured in Security and access > Single sign-on in the SAML attribute map tab.
SSO ID and email address are required
To successfully log a reader in through SAML SSO, you must map a unique ID (SSO ID) and an email address. The reader's email address can be used as both the SSO ID and their email address.
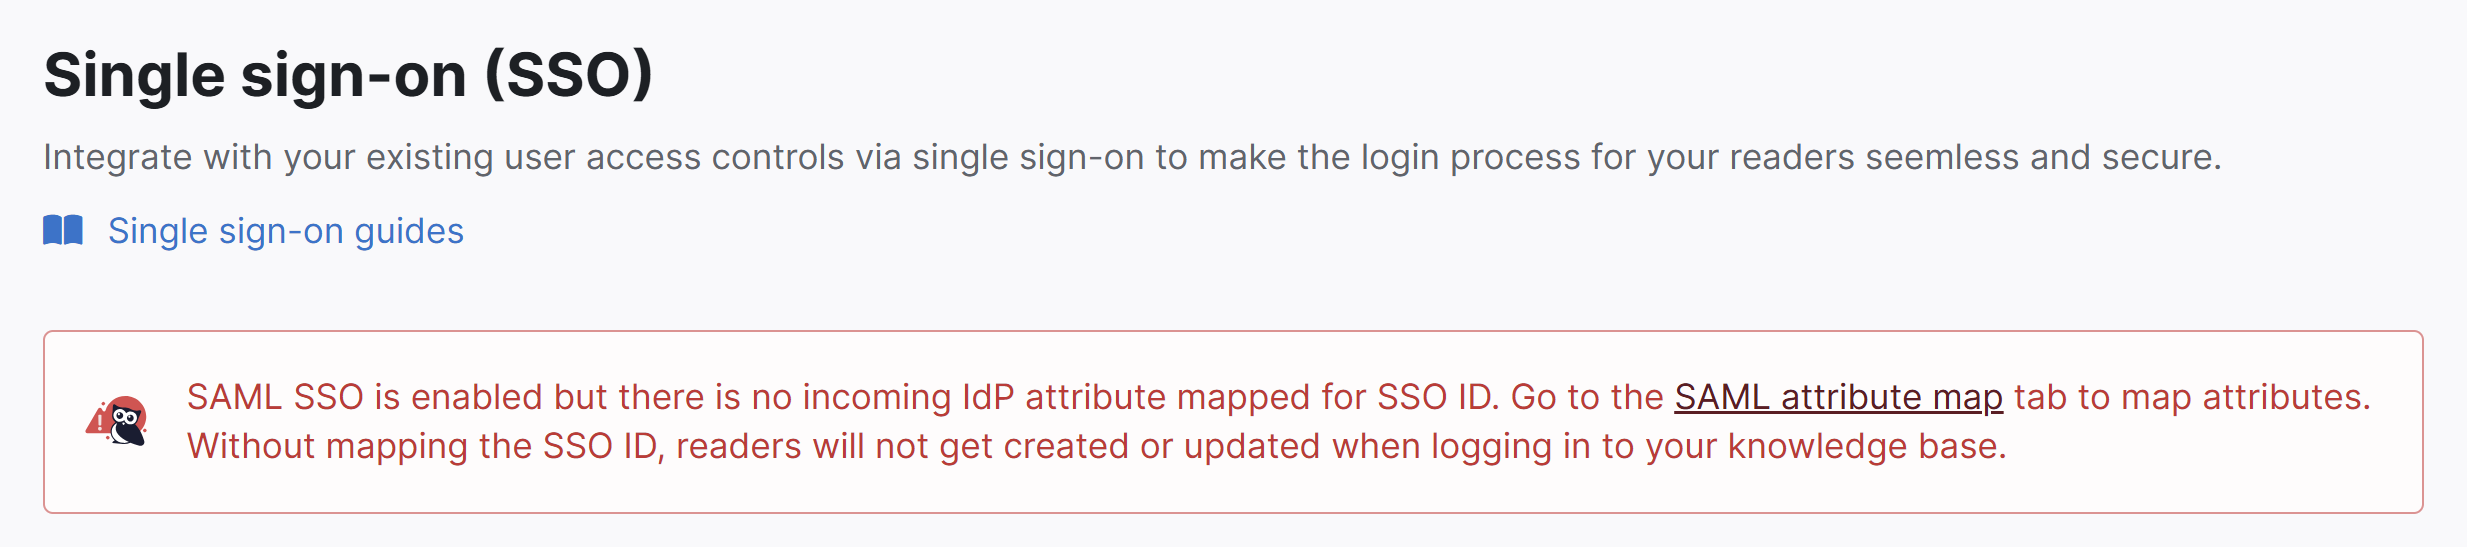
If you don't have a mapping set up for the SSO ID, you'll see a warning above the tabs of Security and access > Single sign-on warning you that "SAML SSO is enabled but there is no incoming IdP attribute mapped for SSO ID":
 Sample warning when no incoming IdP attributes have been mapped.
In the IdP, there should be a mechanism to add outgoing attributes where you can choose a name and select the appropriate field from the IdP's database.
Add the reader's email and any other information you would like to the outgoing attributes. Choose names that make sense for these attributes, such as "email", "firstName", and so on.
- In KnowledgeOwl, go to Security and access > Single sign-on.
- Select the SAML Attribute Map tab.
- Paste the names of the outgoing IdP attributes that correspond to the KnowledgeOwl reader attributes in the SAML attribute map section.
- If you cannot directly map an IdP attribute to a KnowledgeOwl reader attribute, use Custom attribute map rules to do some mappings or logic for you.
- Once you're done adding attribute mappings, Save.
If everything has been done correctly up to this point, you should be able to open a new incognito or private browser window and log into your knowledge base by accessing the SP Login URL.
Step 7: Optional settings
With your SAML SSO login working, you can now review three additional options:
- To make it so that SAML SSO is the only access method for your knowledge base, go to Security and access > Single sign-on > SAML settings tab, select Require all readers to log in via SAML SSO, and Save. This overrides the Content authentication selection in Security and access > Security settings. Refer to SSO options for different knowledge base setups for more information.
- If you'd like to use the SAML SSO as your only or primary reader authentication mechanism, go to Security and access > Security settings. In the Unauthenticated access behavior subsection, select Redirect them to your SAML login URL and Save. Refer to SSO options for different knowledge base setups for more information.
- If you'd like to use SAML SSO for your authors, refer to Set up SAML SSO for authors.
Troubleshooting
If you try to open the SP Login URL and the resulting page does not resolve, make sure that the IdP Login URL is correct, that it is using HTTPS, and that you can resolve the page by going to the IdP login URL directly.
If you are able to successfully log into your IdP but you get redirected to your knowledge base No Access page:
- Go to Security and access > Single sign-on.
- In the SAML settings tab, in the SAML settings section, select Enable debug mode to troubleshoot issues.
- Save those settings.
- Now open the SP Login URL again.
- If you receive an error on the resulting debug page after logging in:
- You may have an issue with the IdP certificate you uploaded, or
- Your IdP may require one of the Advanced Options to be enabled in the SAML Settings tab.
- If you don't receive an error on the debug page after logging in:
- Make sure that the IdP attribute names listed on the debug page match the values listed on the SAML Attribute Map tab.
- Make sure that the SSO ID and Username / Email fields have values entered in the SAML Attribute Map tab.
- If you receive an error on the resulting debug page after logging in:
- Once you're done troubleshooting, be sure to uncheck the Enable debug mode to troubleshoot issues and Save the SAML settings.
- If you're still having trouble after trying all of the above steps, contact our support team and we will try to help figure out what the issue is.