
Manage Articles includes eight standard filters, which are generally based on Publishing Status:
- All Non-Deleted: displays all articles without a Deleted status
- Published: displays all articles with a Published status
- Draft: displays all articles with a Draft status
- Rejected Draft: displays all articles with a Rejected Draft status
- Ready to Publish: displays all articles with a Ready to Publish status
- Needs Review: displays all articles with a Needs Review status
- Archived: displays all articles with an Archived status
- Deleted: displays all articles with a Deleted status in your knowledge base
- Out of Date: displays all Published or Needs Review articles that haven't been modified in the last six months
To apply one of these filters:
- In the top section of the lefthand navigation, select Manage.
- Click the filter selector and click the filter you'd like applied.
 The Standard filters appear first in the filter dropdown list
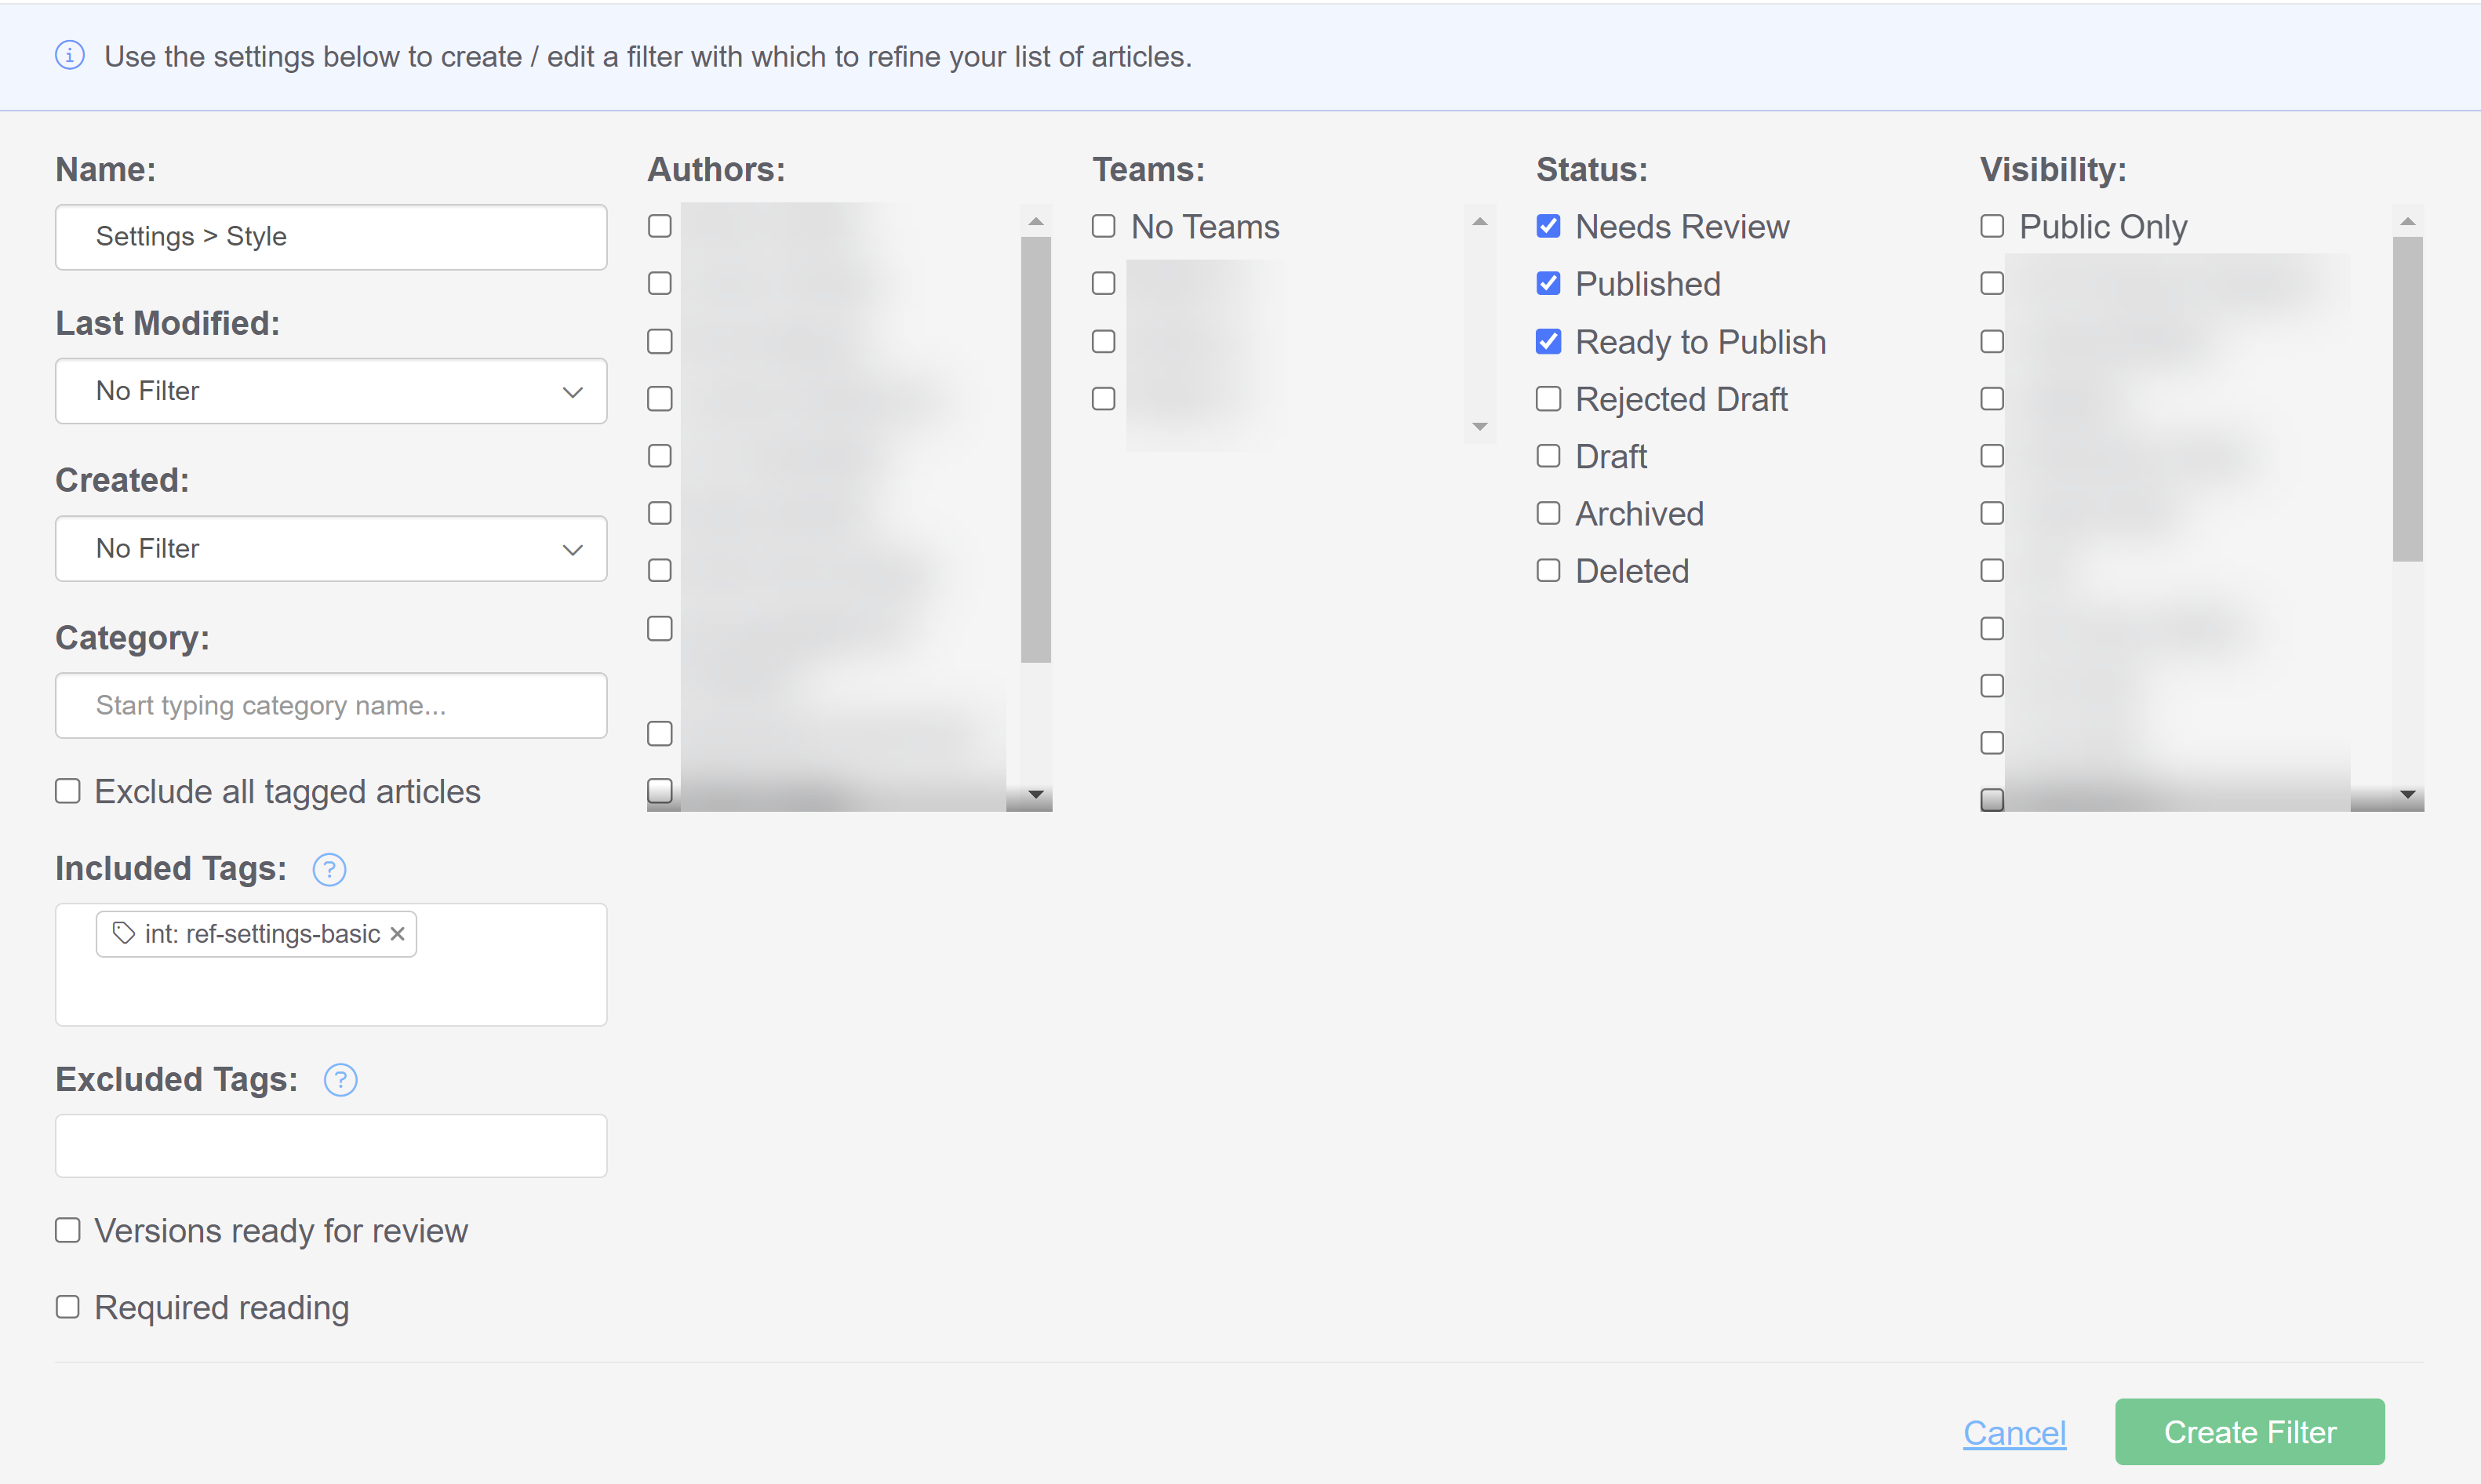
In addition to the Standard Manage filters, you can also create your own custom Manage filters. To do so:
- In the top section of the lefthand navigation, select Manage.
- Select the Create New Filter button next to the filter selector.
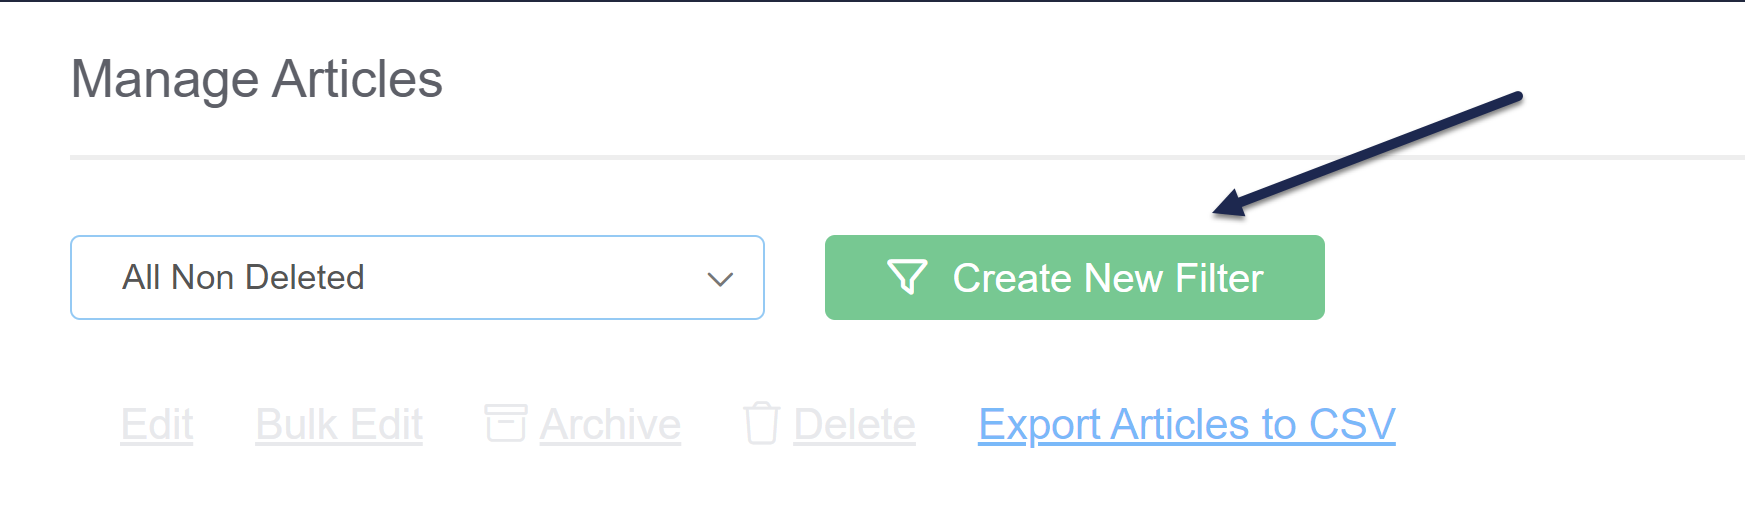
- This will open a pop-up where you can select the filter parameters you'd like to use:
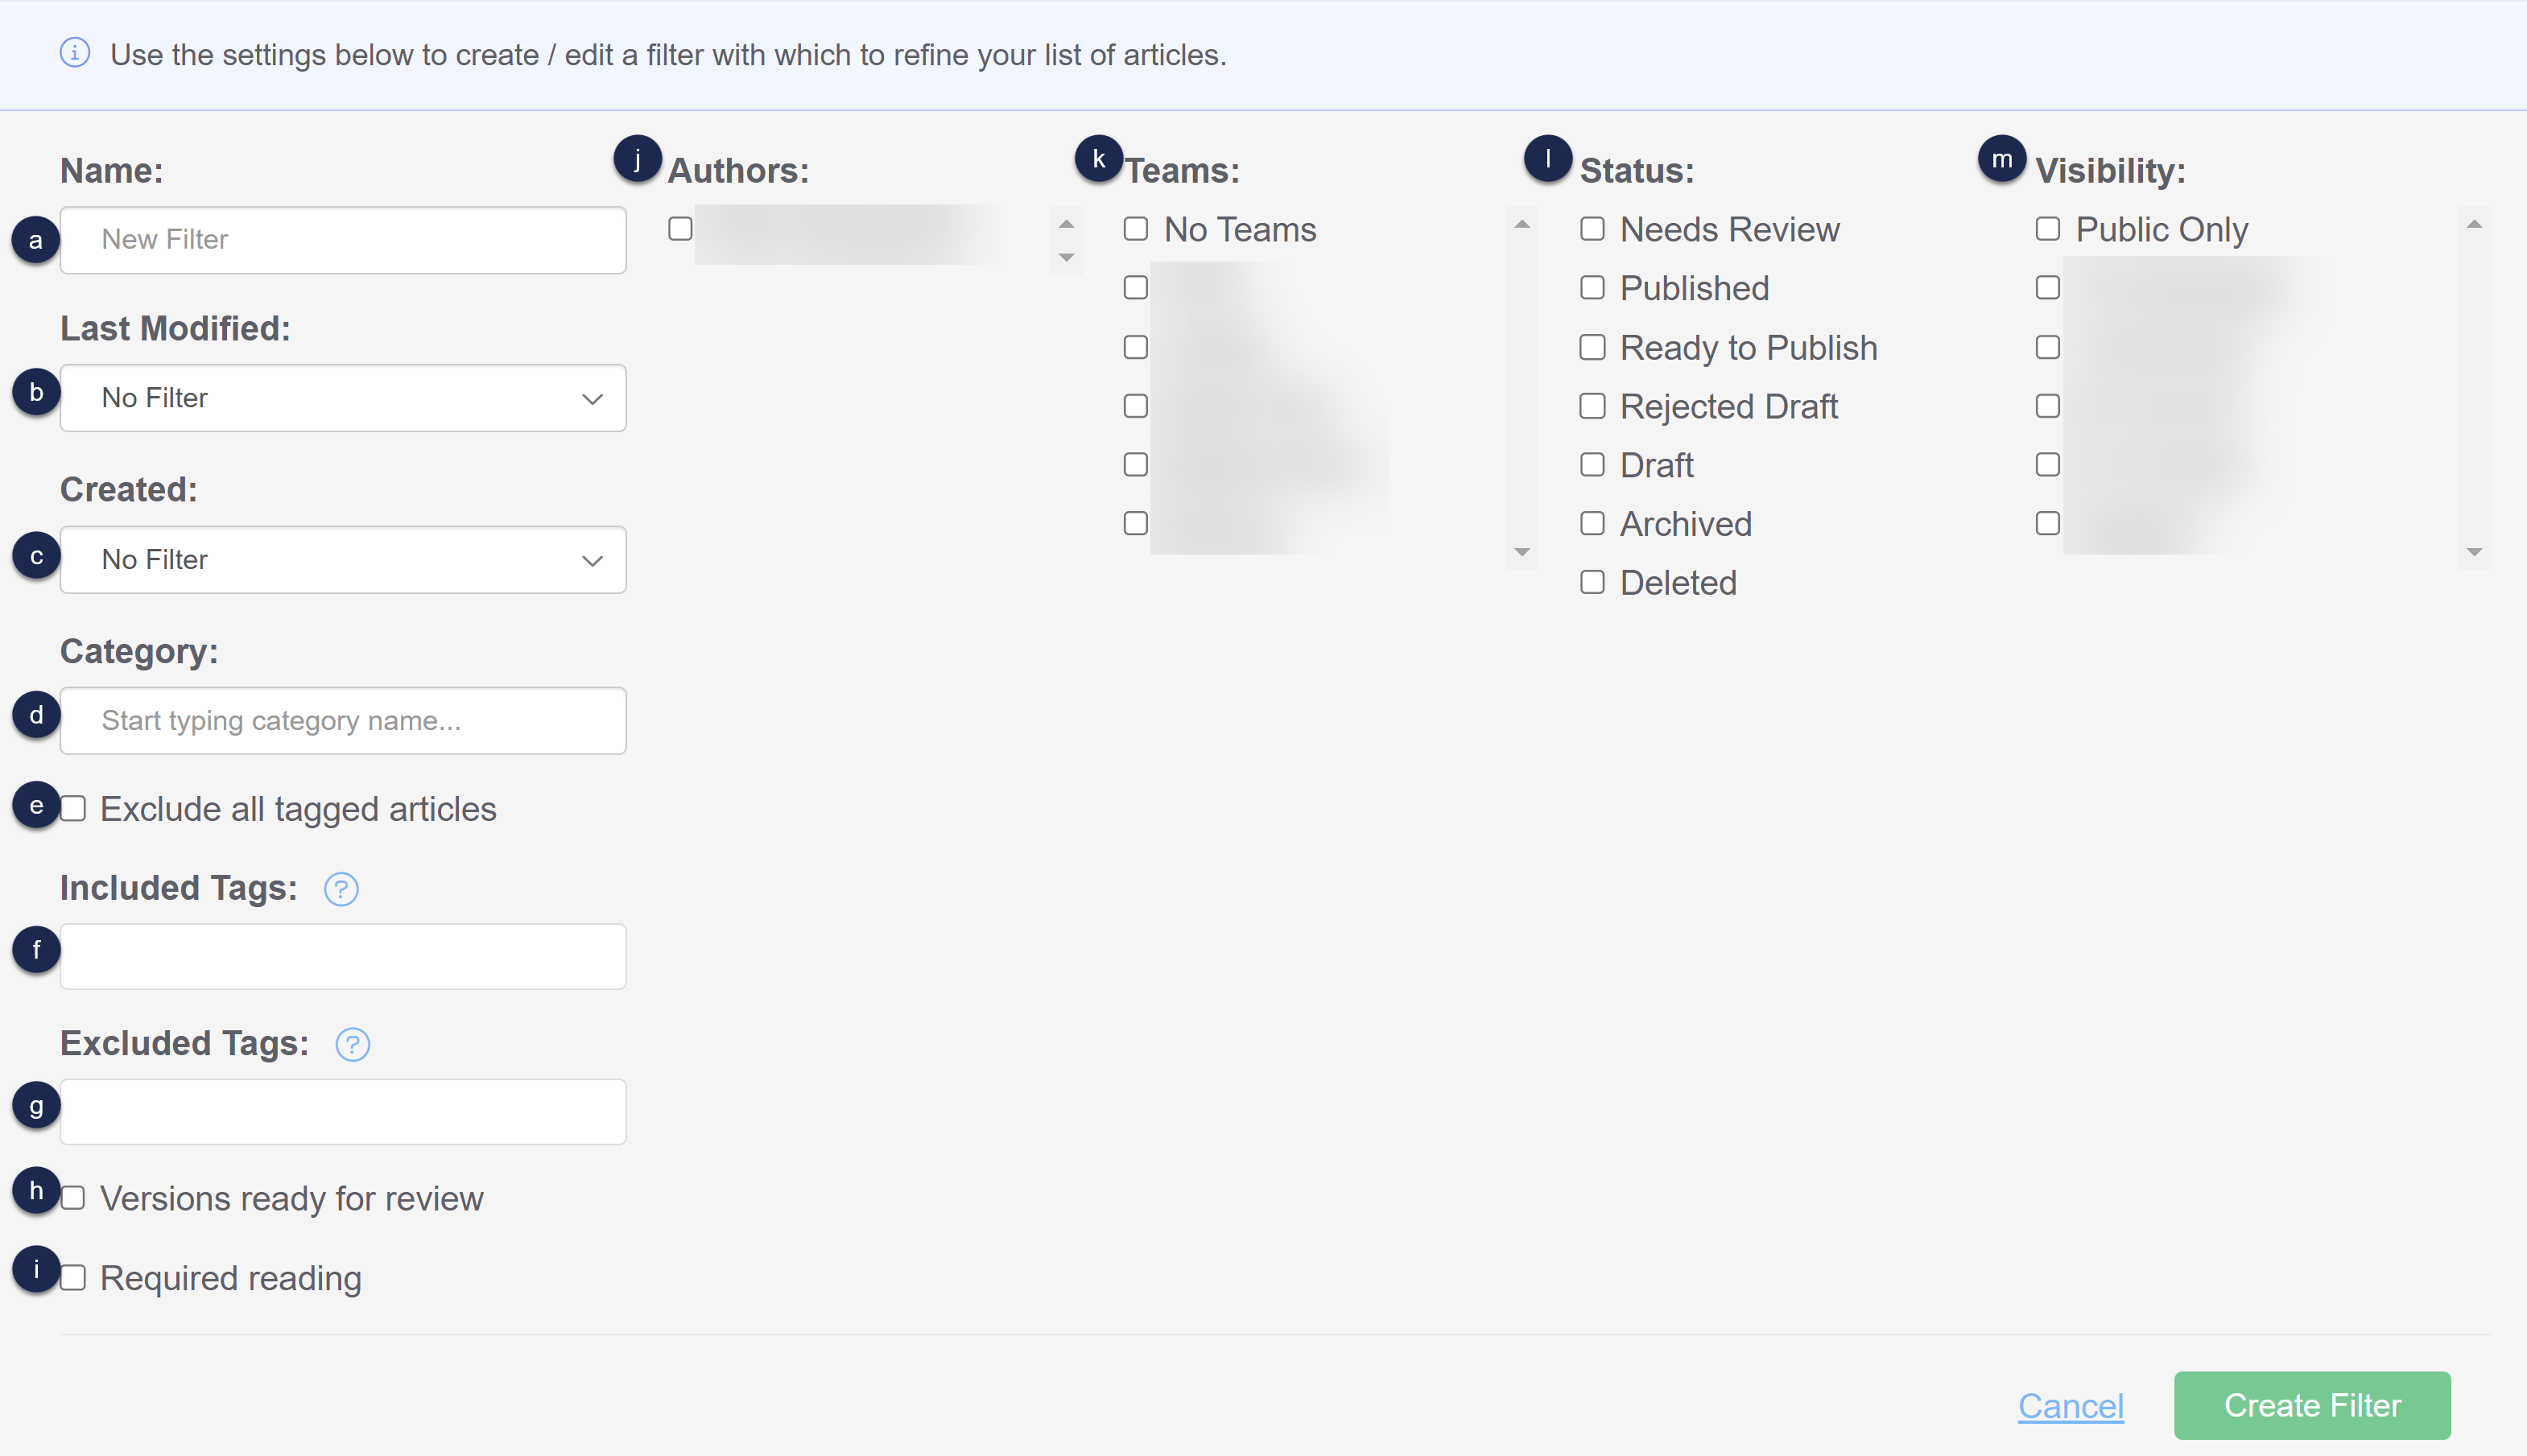
- The Name you enter is the label that will appear in the filter selector dropdown.
- Use the Last Modified filter to display articles last edited or modified within a particular time range.
- Use the Created filter to display articles created within a particular time range.
- Display articles from a specific category only using the Category filter. This will include all articles directly within the category or within any subcategories of that category.
- Display articles that don't have any tags by checking the Exclude all tagged articles box. This is a great way to identify articles that don't have any tags! Once you check this box, the Included Tags and Excluded tags filters disappear.
- Display articles that have specific tags using the Included Tags filter. These work great if you've used concepts, subject areas, etc., as article tags.
- Display articles that do not have specific tags by adding those tags to the Excluded Tags filter. These work great if you want to find all articles that don't have a "version 1.1" tag, for example.
- If you are using article versions, you can check the Versions ready for review checkbox to show only articles that have versions with a ready for review status.
- If you are using Required Reading, check the Required reading checkbox to show only articles that are marked as required.
- By default, the filter will include articles authored by anyone. You can limit it to articles authored by a specific person or people using the Authors checkboxes.
- By default, the filter will include articles restricted to specific author teams or no author teams. You can limit it to articles restricted to specific author teams using the Teams checkboxes.
- By default, the filter will include all articles regardless of Publishing Status. You can limit it to specific publishing status(es) using the Status checkboxes.
- By default, the filter will include all articles available to all readers and any reader group. You can limit it to articles viewable to only specific reader groups using the Visibility checkboxes.
- Public Only will show only articles that have no reader group restrictions whatsoever.
- Once you have made your selections, select the Create Filter button in the lower right to create the filter and view its results.


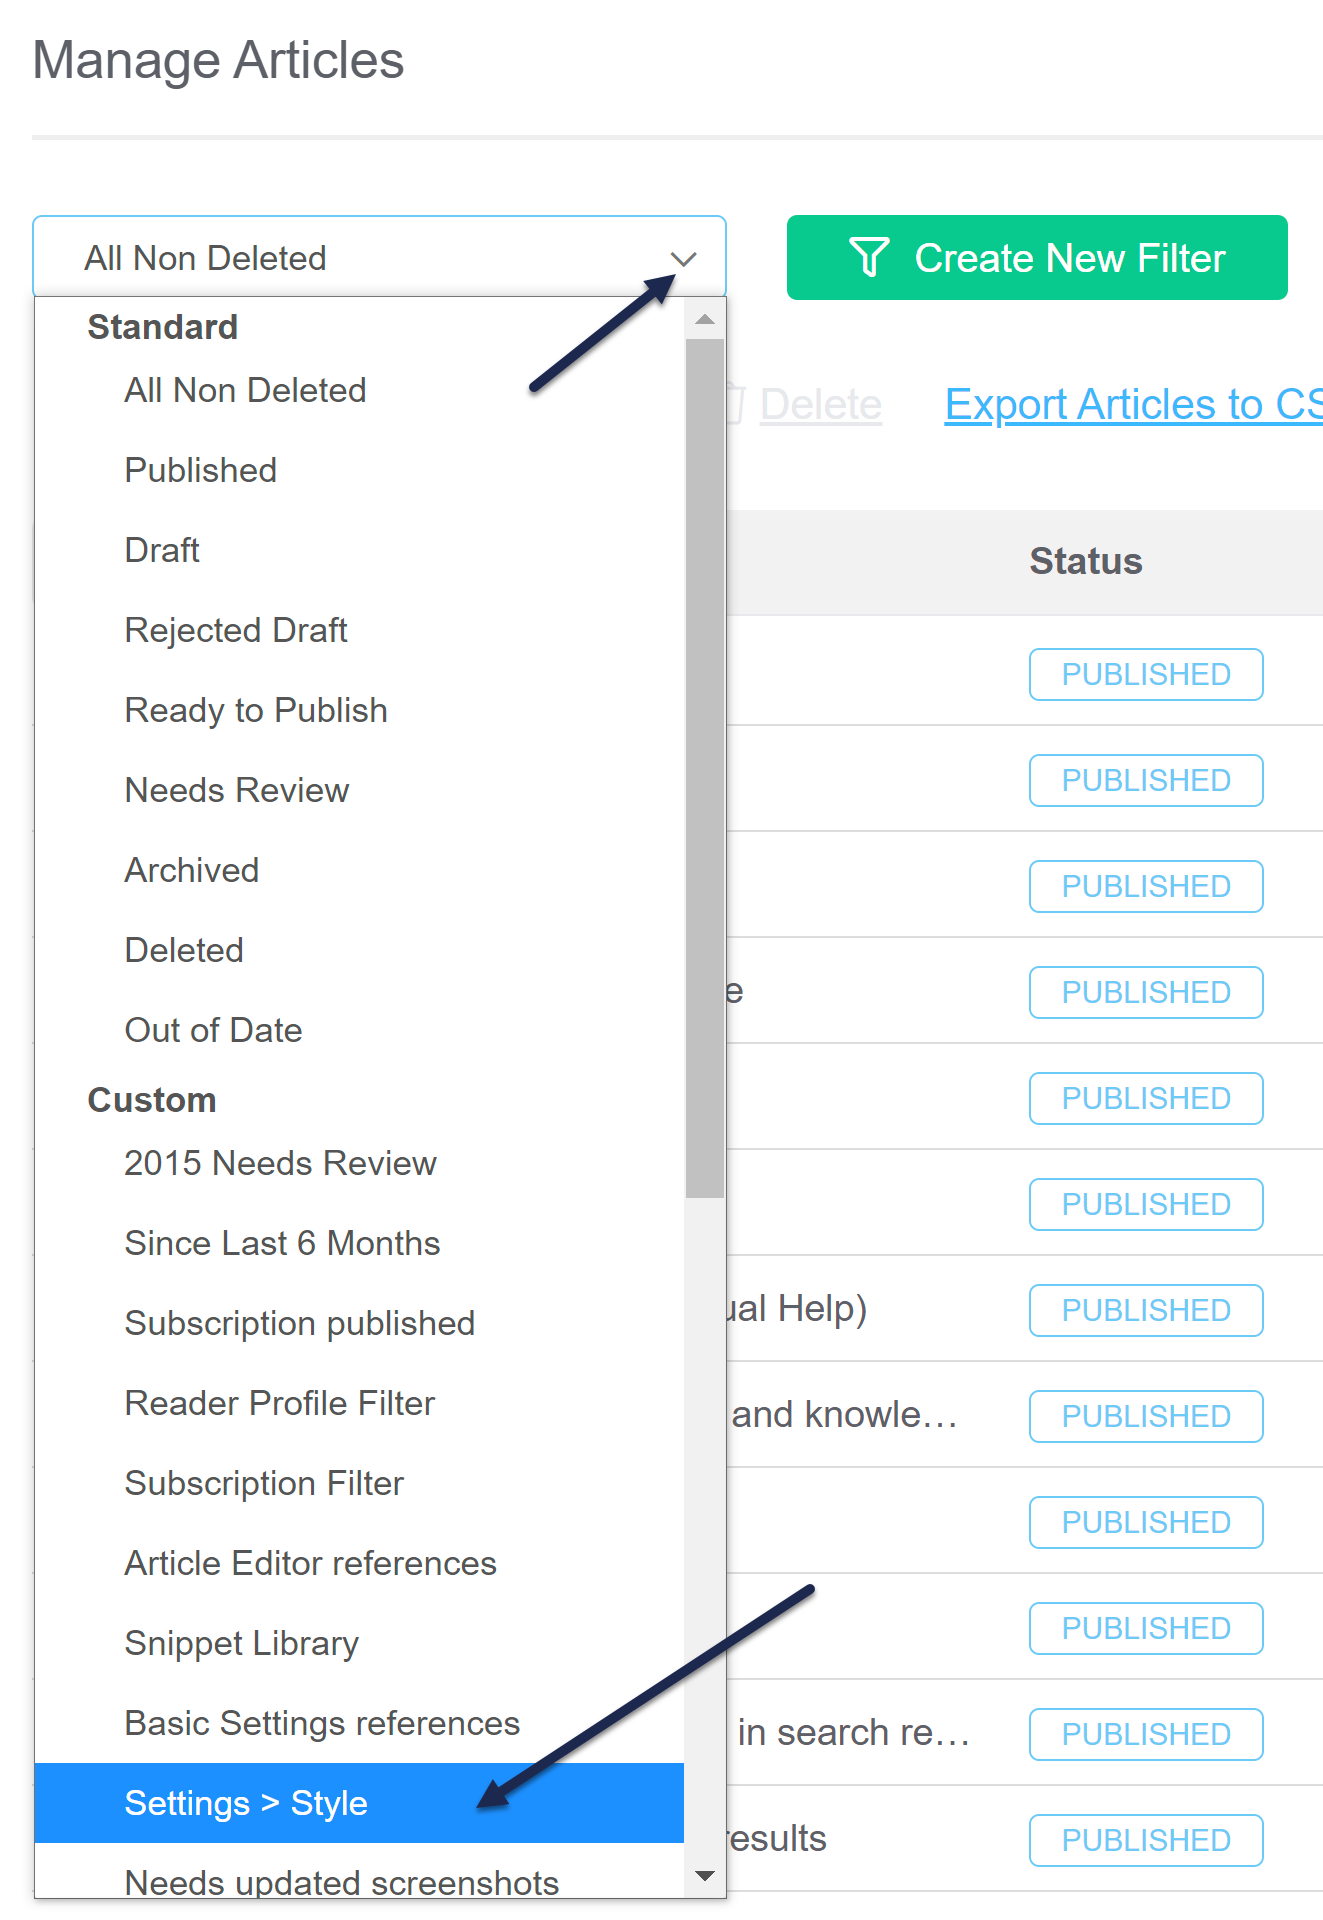
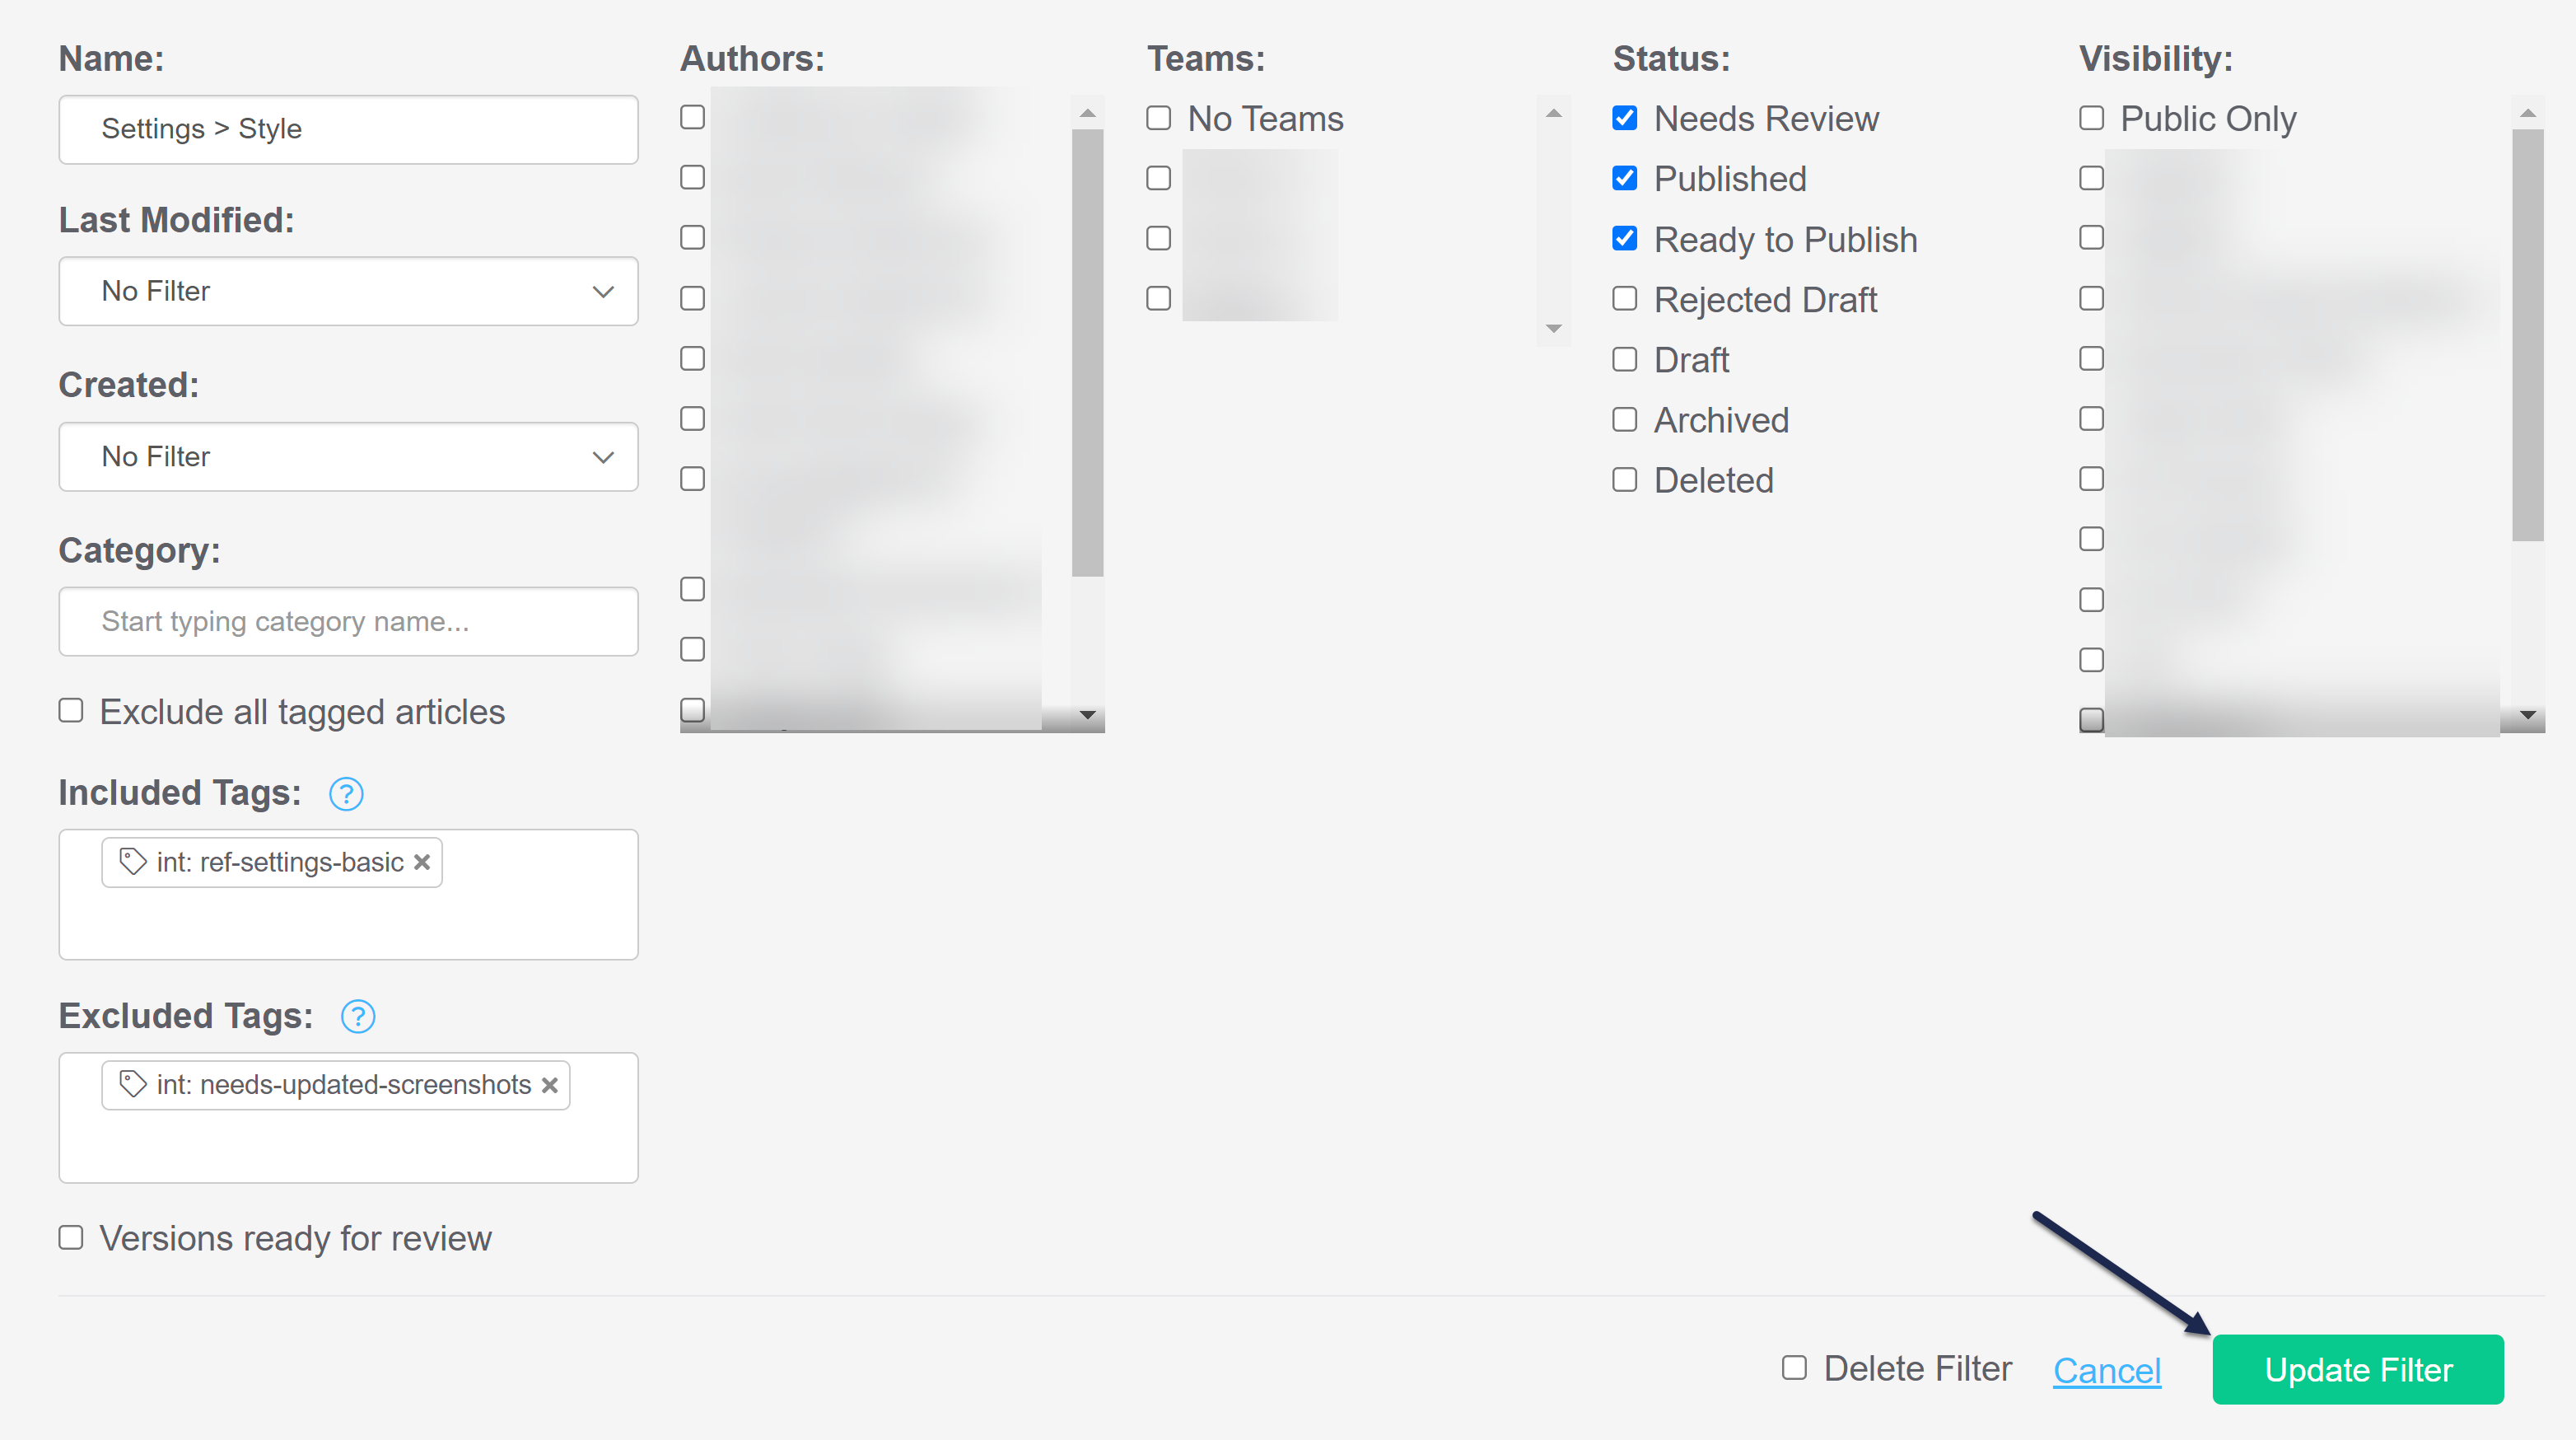
Here is a sample custom filter called Settings > Style which will produce a list of all Published, Needs Review, and Ready to Publish articles that have been assigned the "int: ref-settings-basic" tag and do not have the "int: needs-updated-screenshots" tag:

To view the details of an existing custom filter or edit it:
- In the top section of the lefthand navigation, select Manage.
- Select the filter from the filter dropdown.
- Select the Edit Filter button that appears to the right of the filter dropdown.
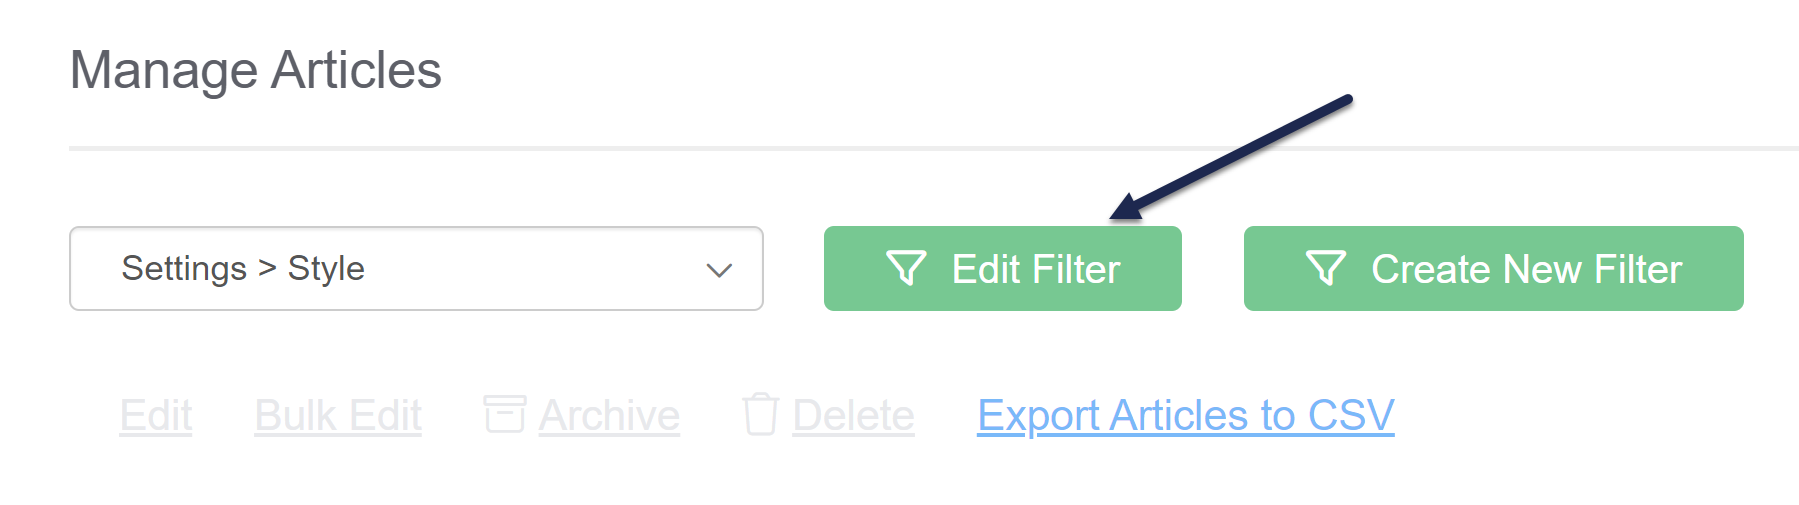
- Make the changes in the filter's details and then select the Update Filter button.


When you're creating or editing a Manage filter, there are two options for tag filters:
- Included Tags
- Excluded Tags
The Included Tags filter makes sure that the filter returns only articles that have (or include) the selected tags. For example, if I add the Included Tag for "subscriptions", I'll get a list of all articles with the subscriptions tag.
The Excluded Tags filter will remove (or exclude) articles that have the selected tags. For example, if I add the Excluded Tag of "settings", I will get all articles that do not have the settings tag.
For both filters, multiple tags are treated as "or" filters:
- 2 or more tags in Included Tags will give you all articles that have any one of the tags. For example, if I add Included Tags for "subscriptions" and "settings", I'll get all articles that have either (or both) of those tags.
- 2 or more tags in Excluded Tags will exclude articles that have any one of the tags. For example, if I add Excluded Tags for "needs-updated-screenshots" and "needs content review", I will get all articles that don't have either of those tags.
These two filters are incredibly powerful if you use them together.
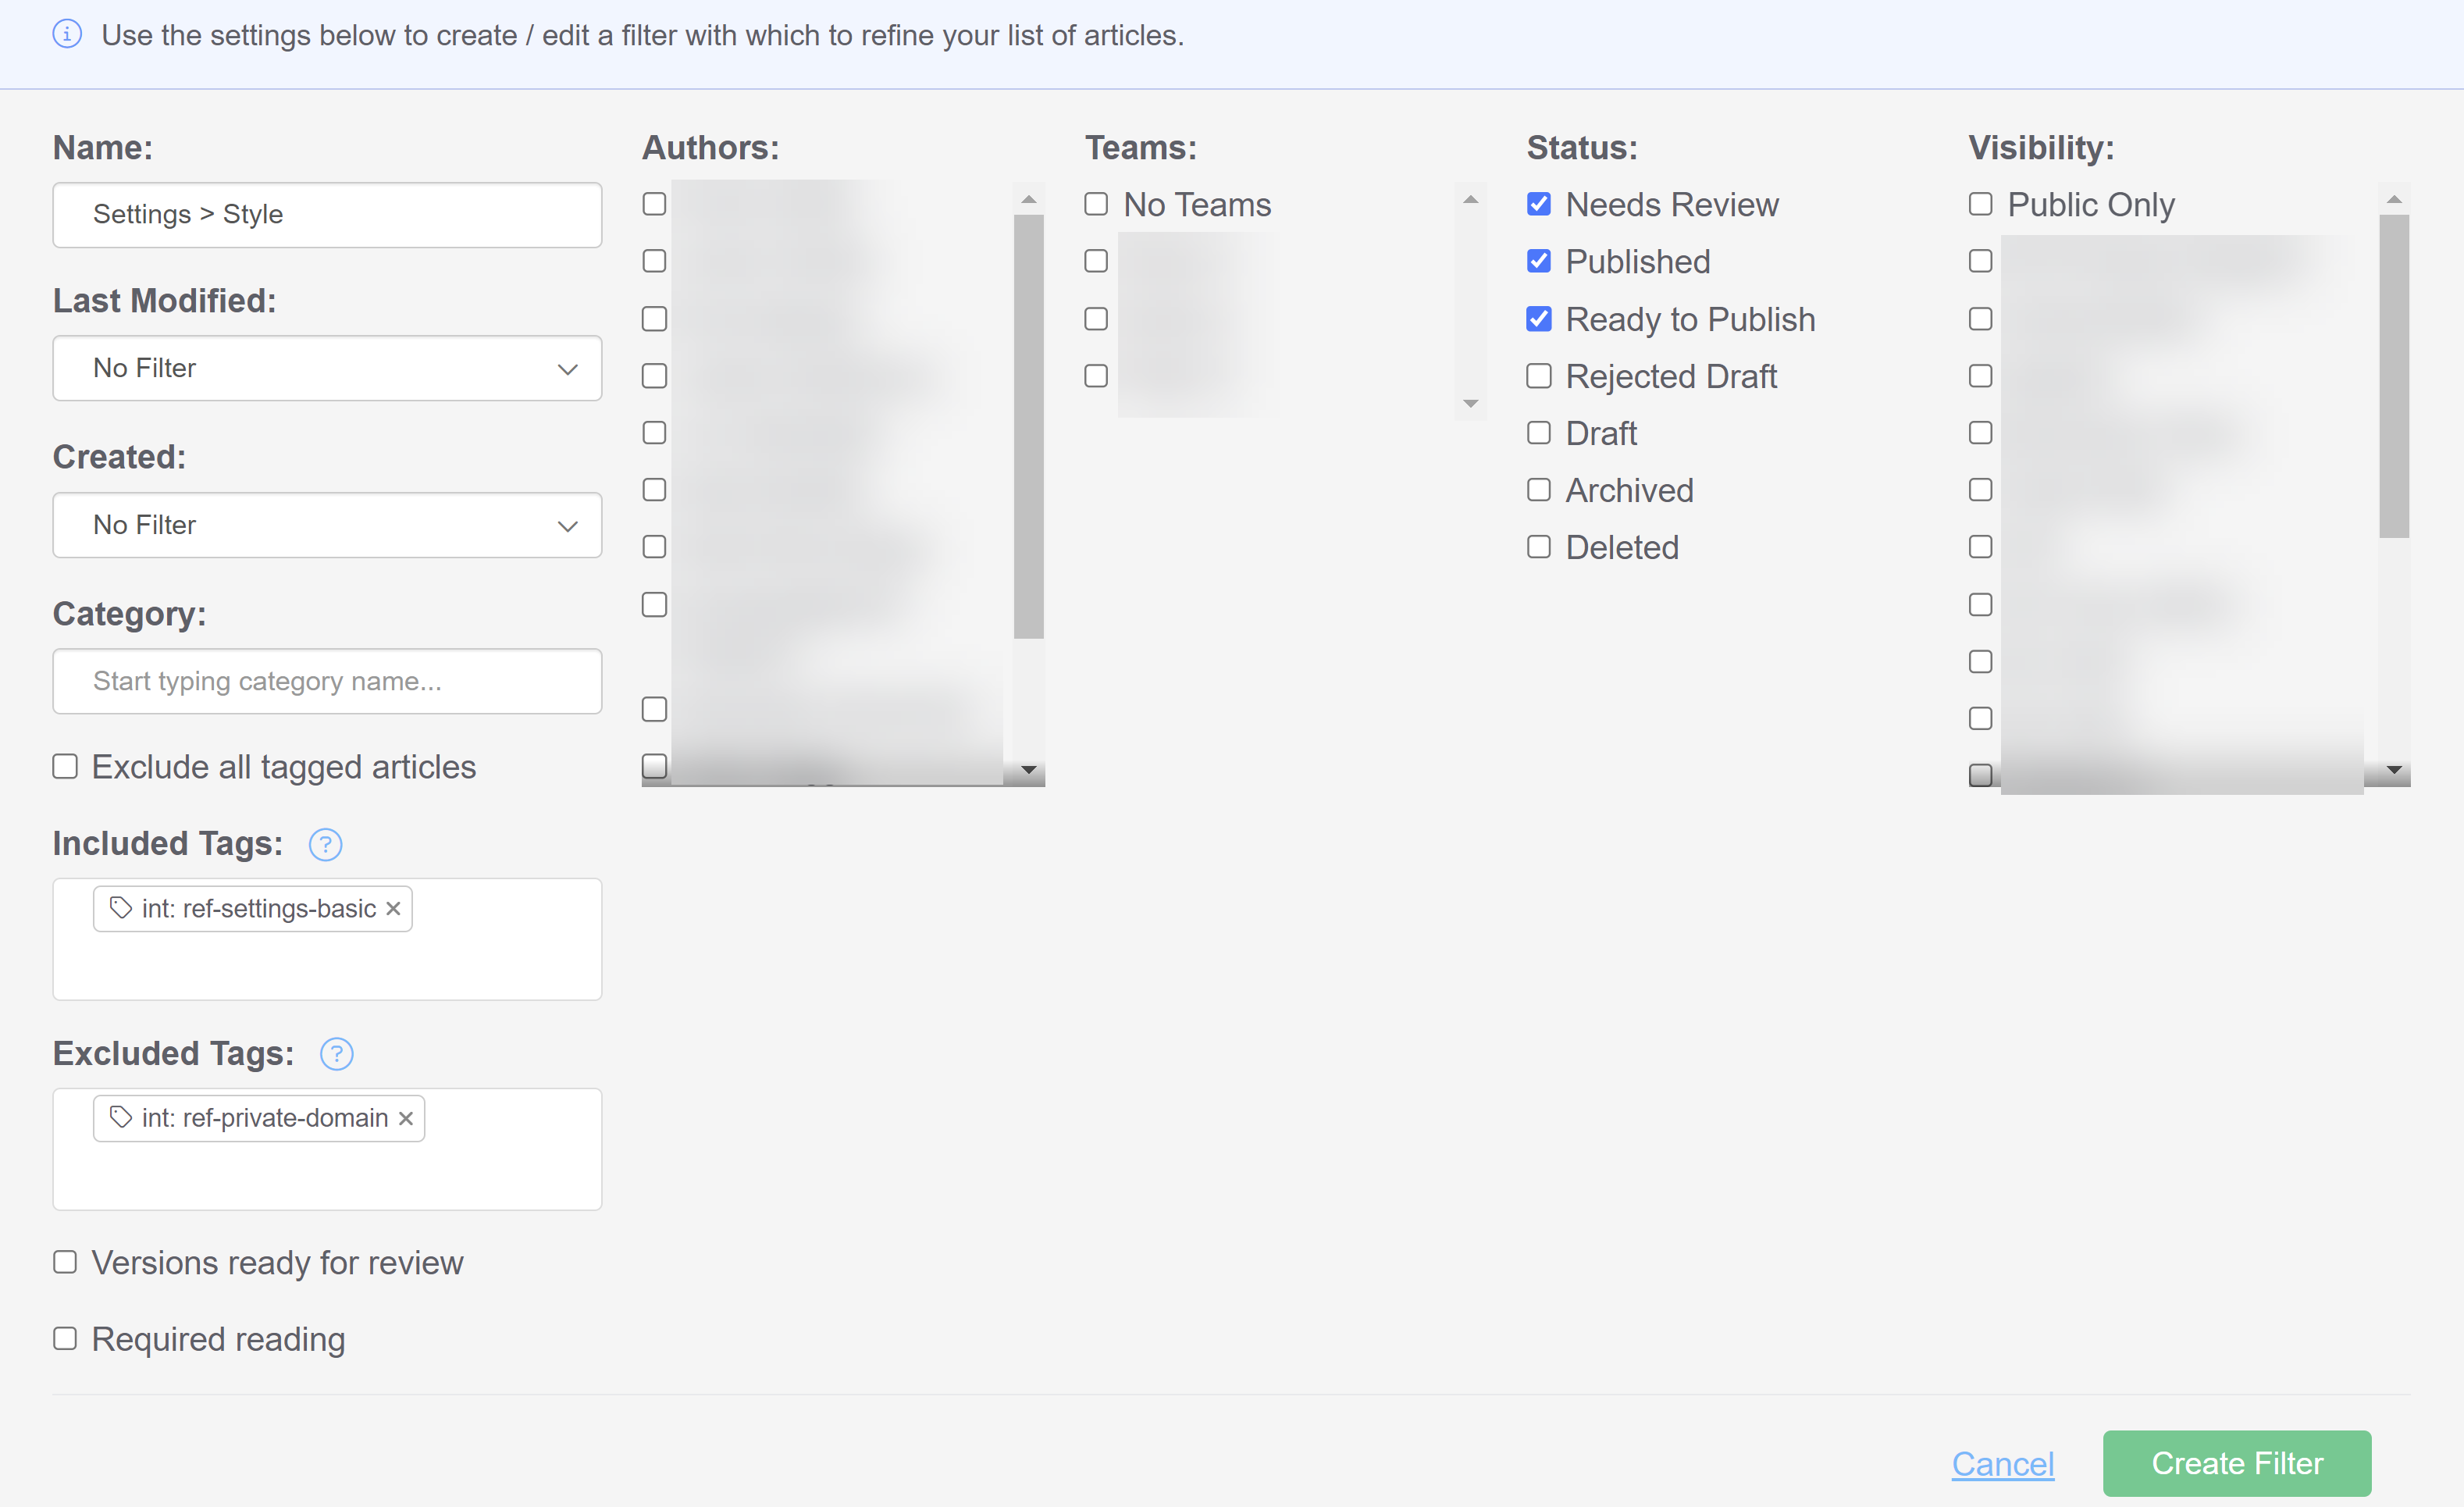
For example, let's say that we've made updates to our Basic Settings page. We have a tag in our content for that page ("int: ref-settings-basic"), so I can start off my filter by adding that tag as an Included Tag, to get a list of all articles that reference this page:
 Sample filter with single Included TagThis filter basically says: pull all articles with the "int: ref-settings-basic" tag with a status of Needs Review, Published, or Ready to Publish.
It returns 23 articles.
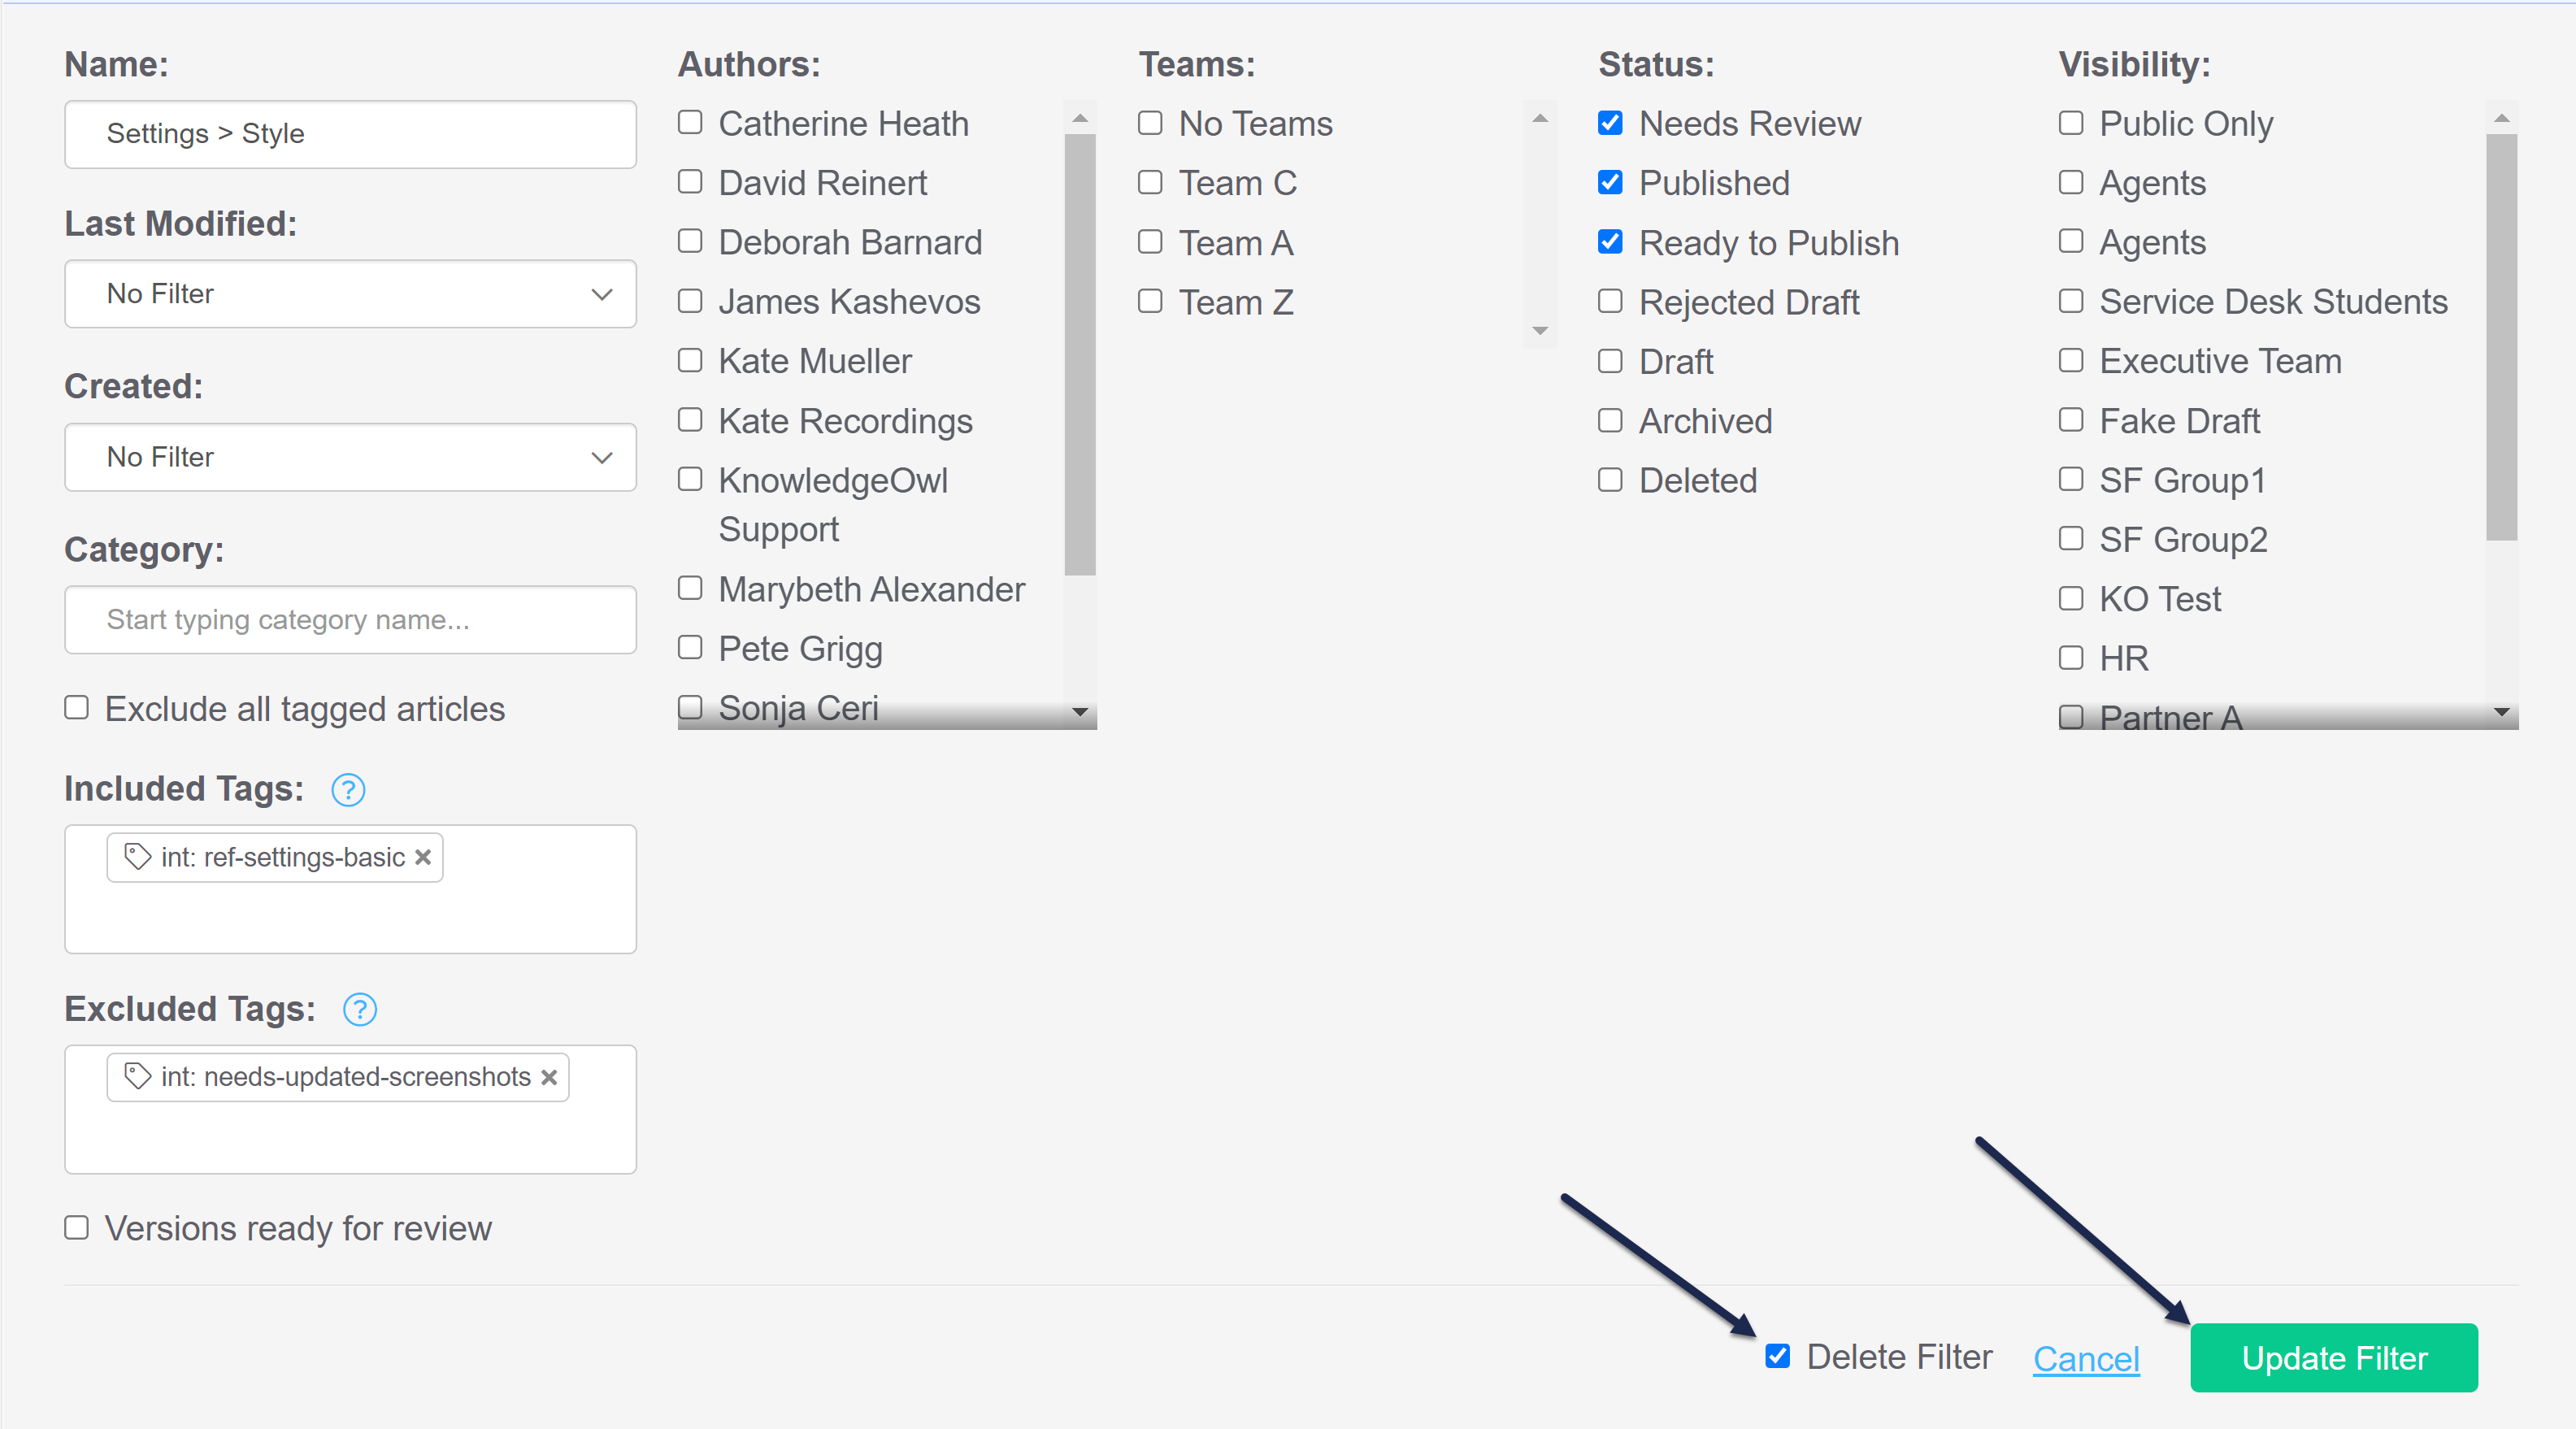
A lot of our content on Basic Settings talks about setting up a private domain, which we use a separate tag for ("int: ref-private-domain"). If we haven't made updates to that functionality, I'd like to filter out all content that references the private domain setup. I can add that tag as an Excluded Tag:
 Sample filter with Included Tag and Excluded Tag
This filter now says: pull all articles with the "int: ref-settings-basic" tag, that don't have the "int: ref-private-domain" tag, with a status of Needs Review, Published, or Ready to Publish.
This narrows my list of articles down to 18, which means my content audit can go a lot faster.
I could further refine this to exclude additional tags.
Recommended uses
The Included Tags and Excluded Tags filters become more powerful the more consistently you use tags. They can be a valuable auditing tool if you're using tags for things like:
- Product version/release information - If you add tags for each version or release, you can pull documentation specific to some versions and not others
- Policy/procedure version information - If you add tags for specific policies and procedures (or revisions of those policies and procedures), you can pull documentation specific to certain versions of policies or procedures
- Reviewer/Subject Matter Export (SME) information - If you add tags for designated reviewers or SMEs, you can pull documentation relevant to a specific reviewer or SME
Deleting a filter will not delete any of the articles in the filter. If you'd like to delete articles, use the checkboxes next to the articles and the Delete option near the top.
To delete a custom Manage filter:
- In the top section of the lefthand navigation, select Manage.
- Select the filter you'd like to delete from the dropdown.
- Select the Edit Filter button.
- In the filter details screen, check the box next to Delete Filter.
- Then select the Update Filter button.

Your filter will be deleted.