
If you're already using Zendesk, set up your contact form and Contextual Help Widget (2.0) to automatically create tickets in your Zendesk account. The contact form will then create tickets via the API as your specified user and include some helpful metadata in a private comment.
Prerequisites
Before you begin, you'll need this information from Zendesk:
- Your Zendesk domain: Your domain appears before zendesk.com when you set up your account. It's also viewable in Zendesk through Admin > Account > Branding in the Subdomain section.
- Your Zendesk username: What you use to log in to Zendesk with.
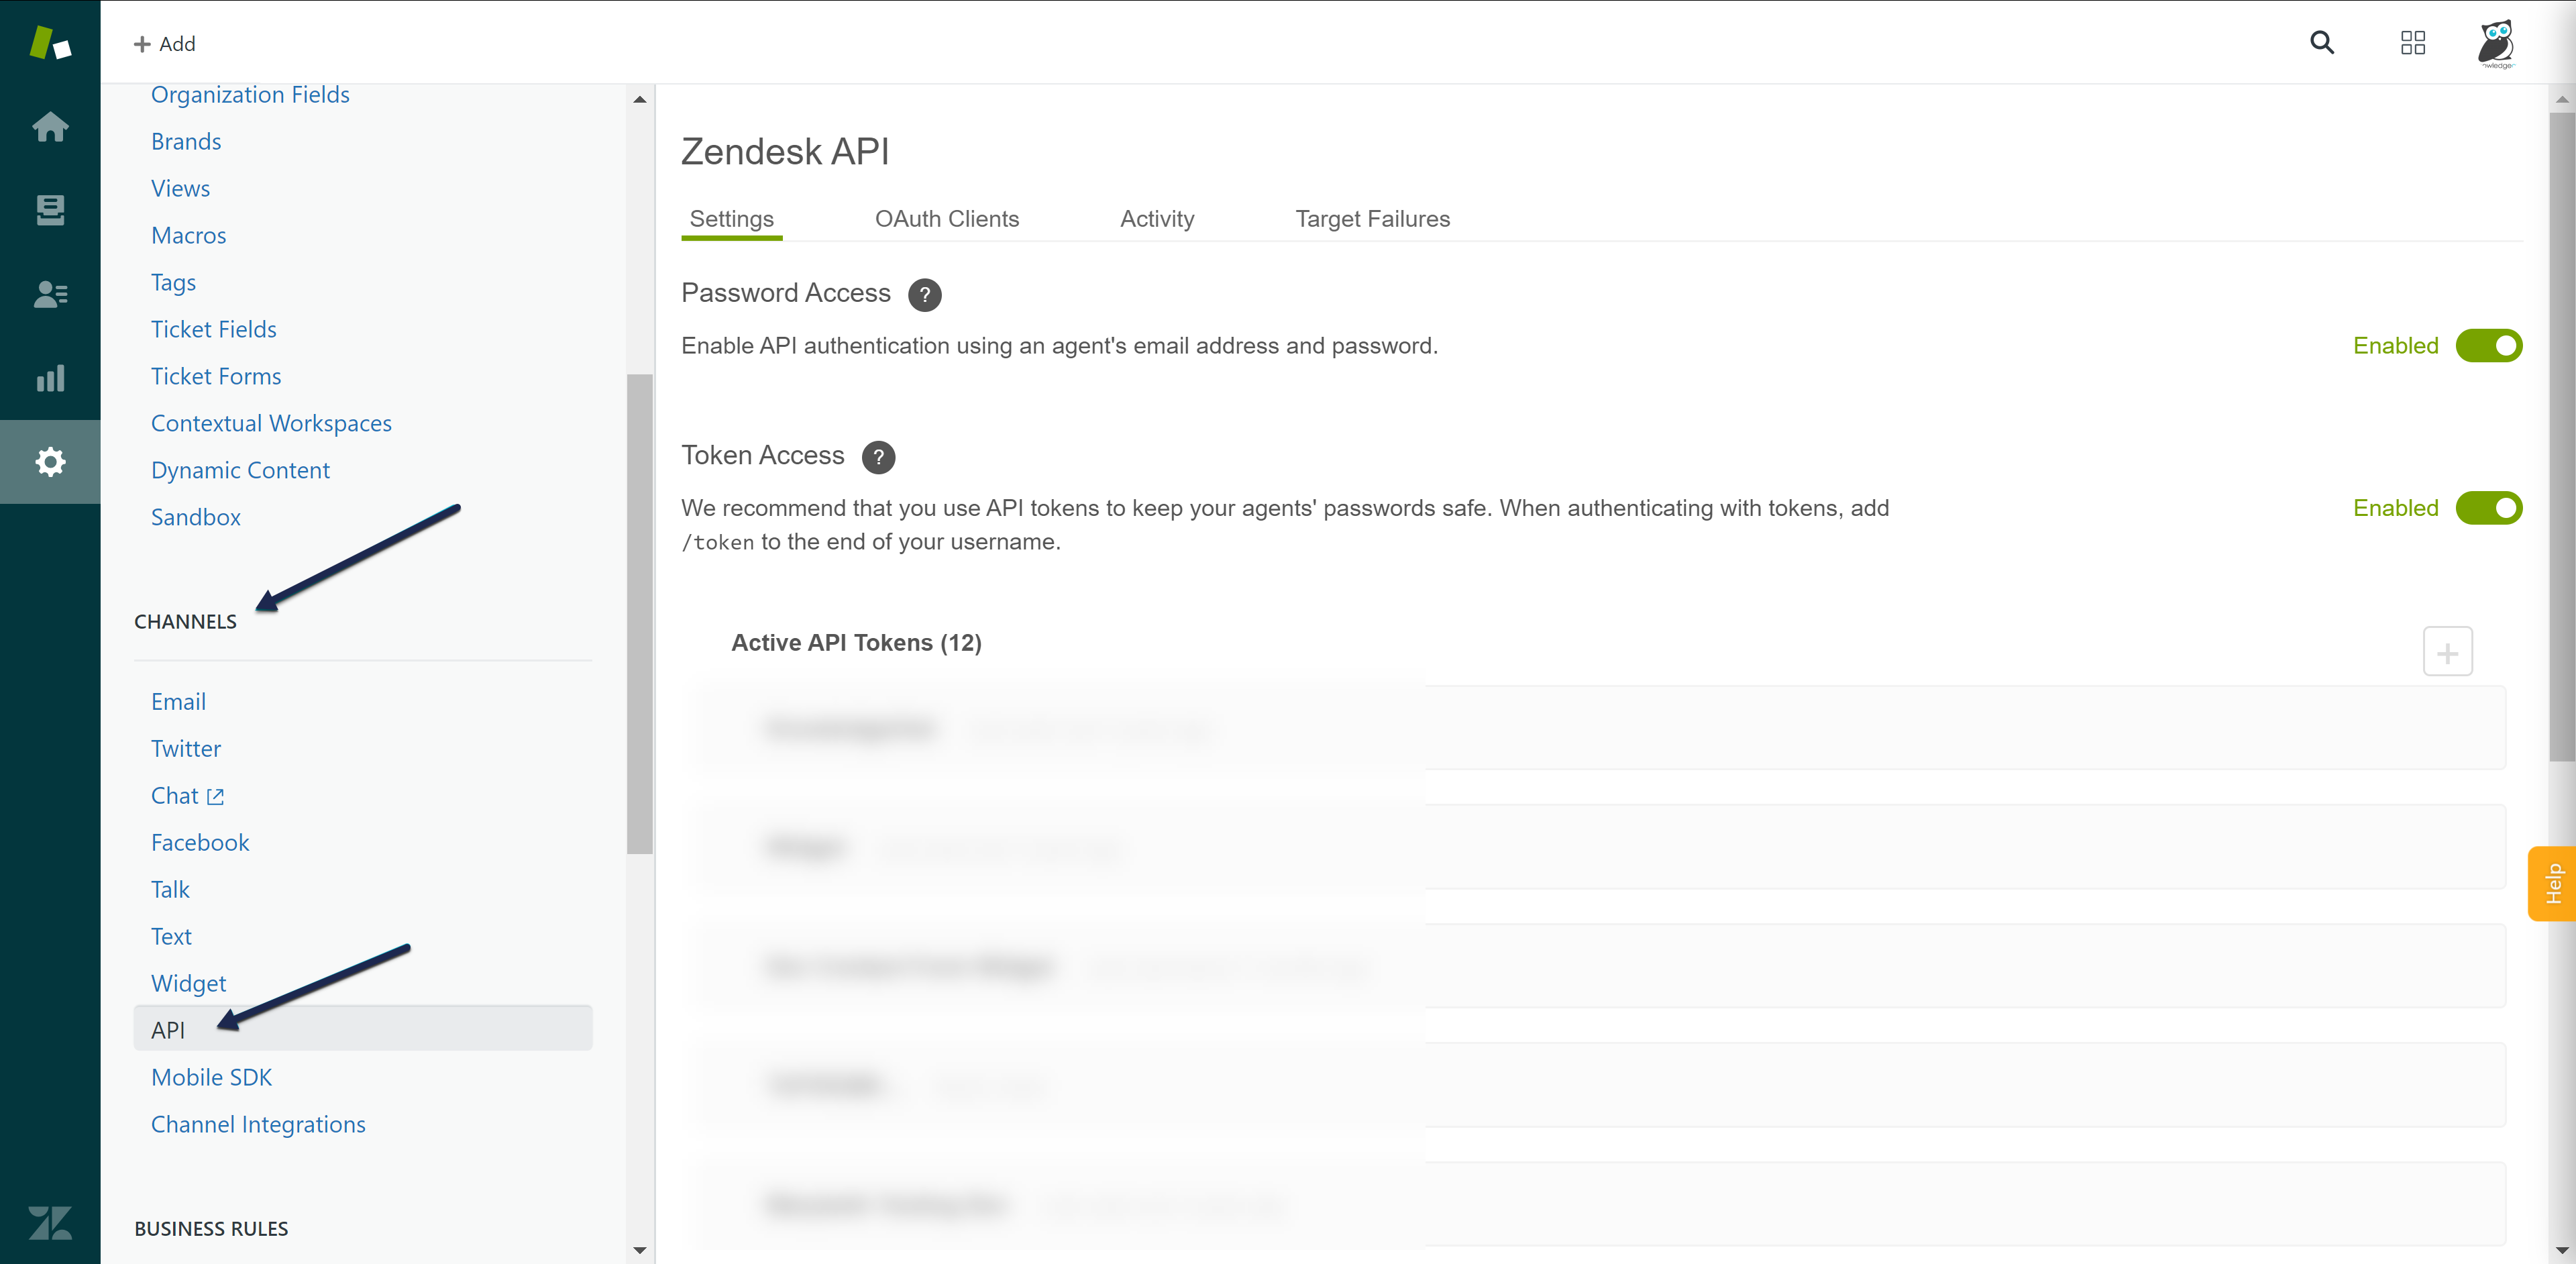
- A Zendesk API key: Create one through Admin > Channels > API:

KnowledgeOwl setup
Once you have this information in hand, you can set up your KnowledgeOwl Contact Form to use Zendesk:
- Go to Customize > Contact form.
- Check the box next to Enable Contact Form.
- Optional: If you don't want KnowledgeOwl to store any of your contact form submission details, check the box next to Do not store any collected ticket information within KnowledgeOwl. Refer to What data is collected in the Contact Form? for more information.
- Optional, Recommended: If your knowledge base is public in any way, we recommend checking the box to Use spam protection on ticket submissions to try to prevent spam/bot submissions. This setting will add whichever spam protection method is set in Security and access > Spam protection.
- Optional, Recommended: Add a Backup email. If the Zendesk API integration isn't working for any reason, we will email contact form submissions to this backup email account.
- Choose Zendesk as your Send Method.
- Add your Zendesk domain, username, and API key.
- Optional: If you'd like to include the Zendesk Priority field in your KnowledgeOwl contact form, check the box next to Enabled. You can make it Required by checking that box, too.
- Optional: If you're using custom fields in Zendesk that you want included in your contact form, add them into the Custom Fields section:
- The label specifies how the field will be labeled in the contact form.
- The Type defines what kind of data it should accept.
- The ID is the ID as it appears in your Zendesk configuration.
Widget compatibility issue
Zendesk custom fields are not compatible with Contextual Help Widget (2.0).
- Be sure to Save your changes.
Your Contact Form is live at /contact-us! You can Update wording in the Contact Form and/or Customize Contact Form Link to make it even more your own.
A completed setup might look like this:
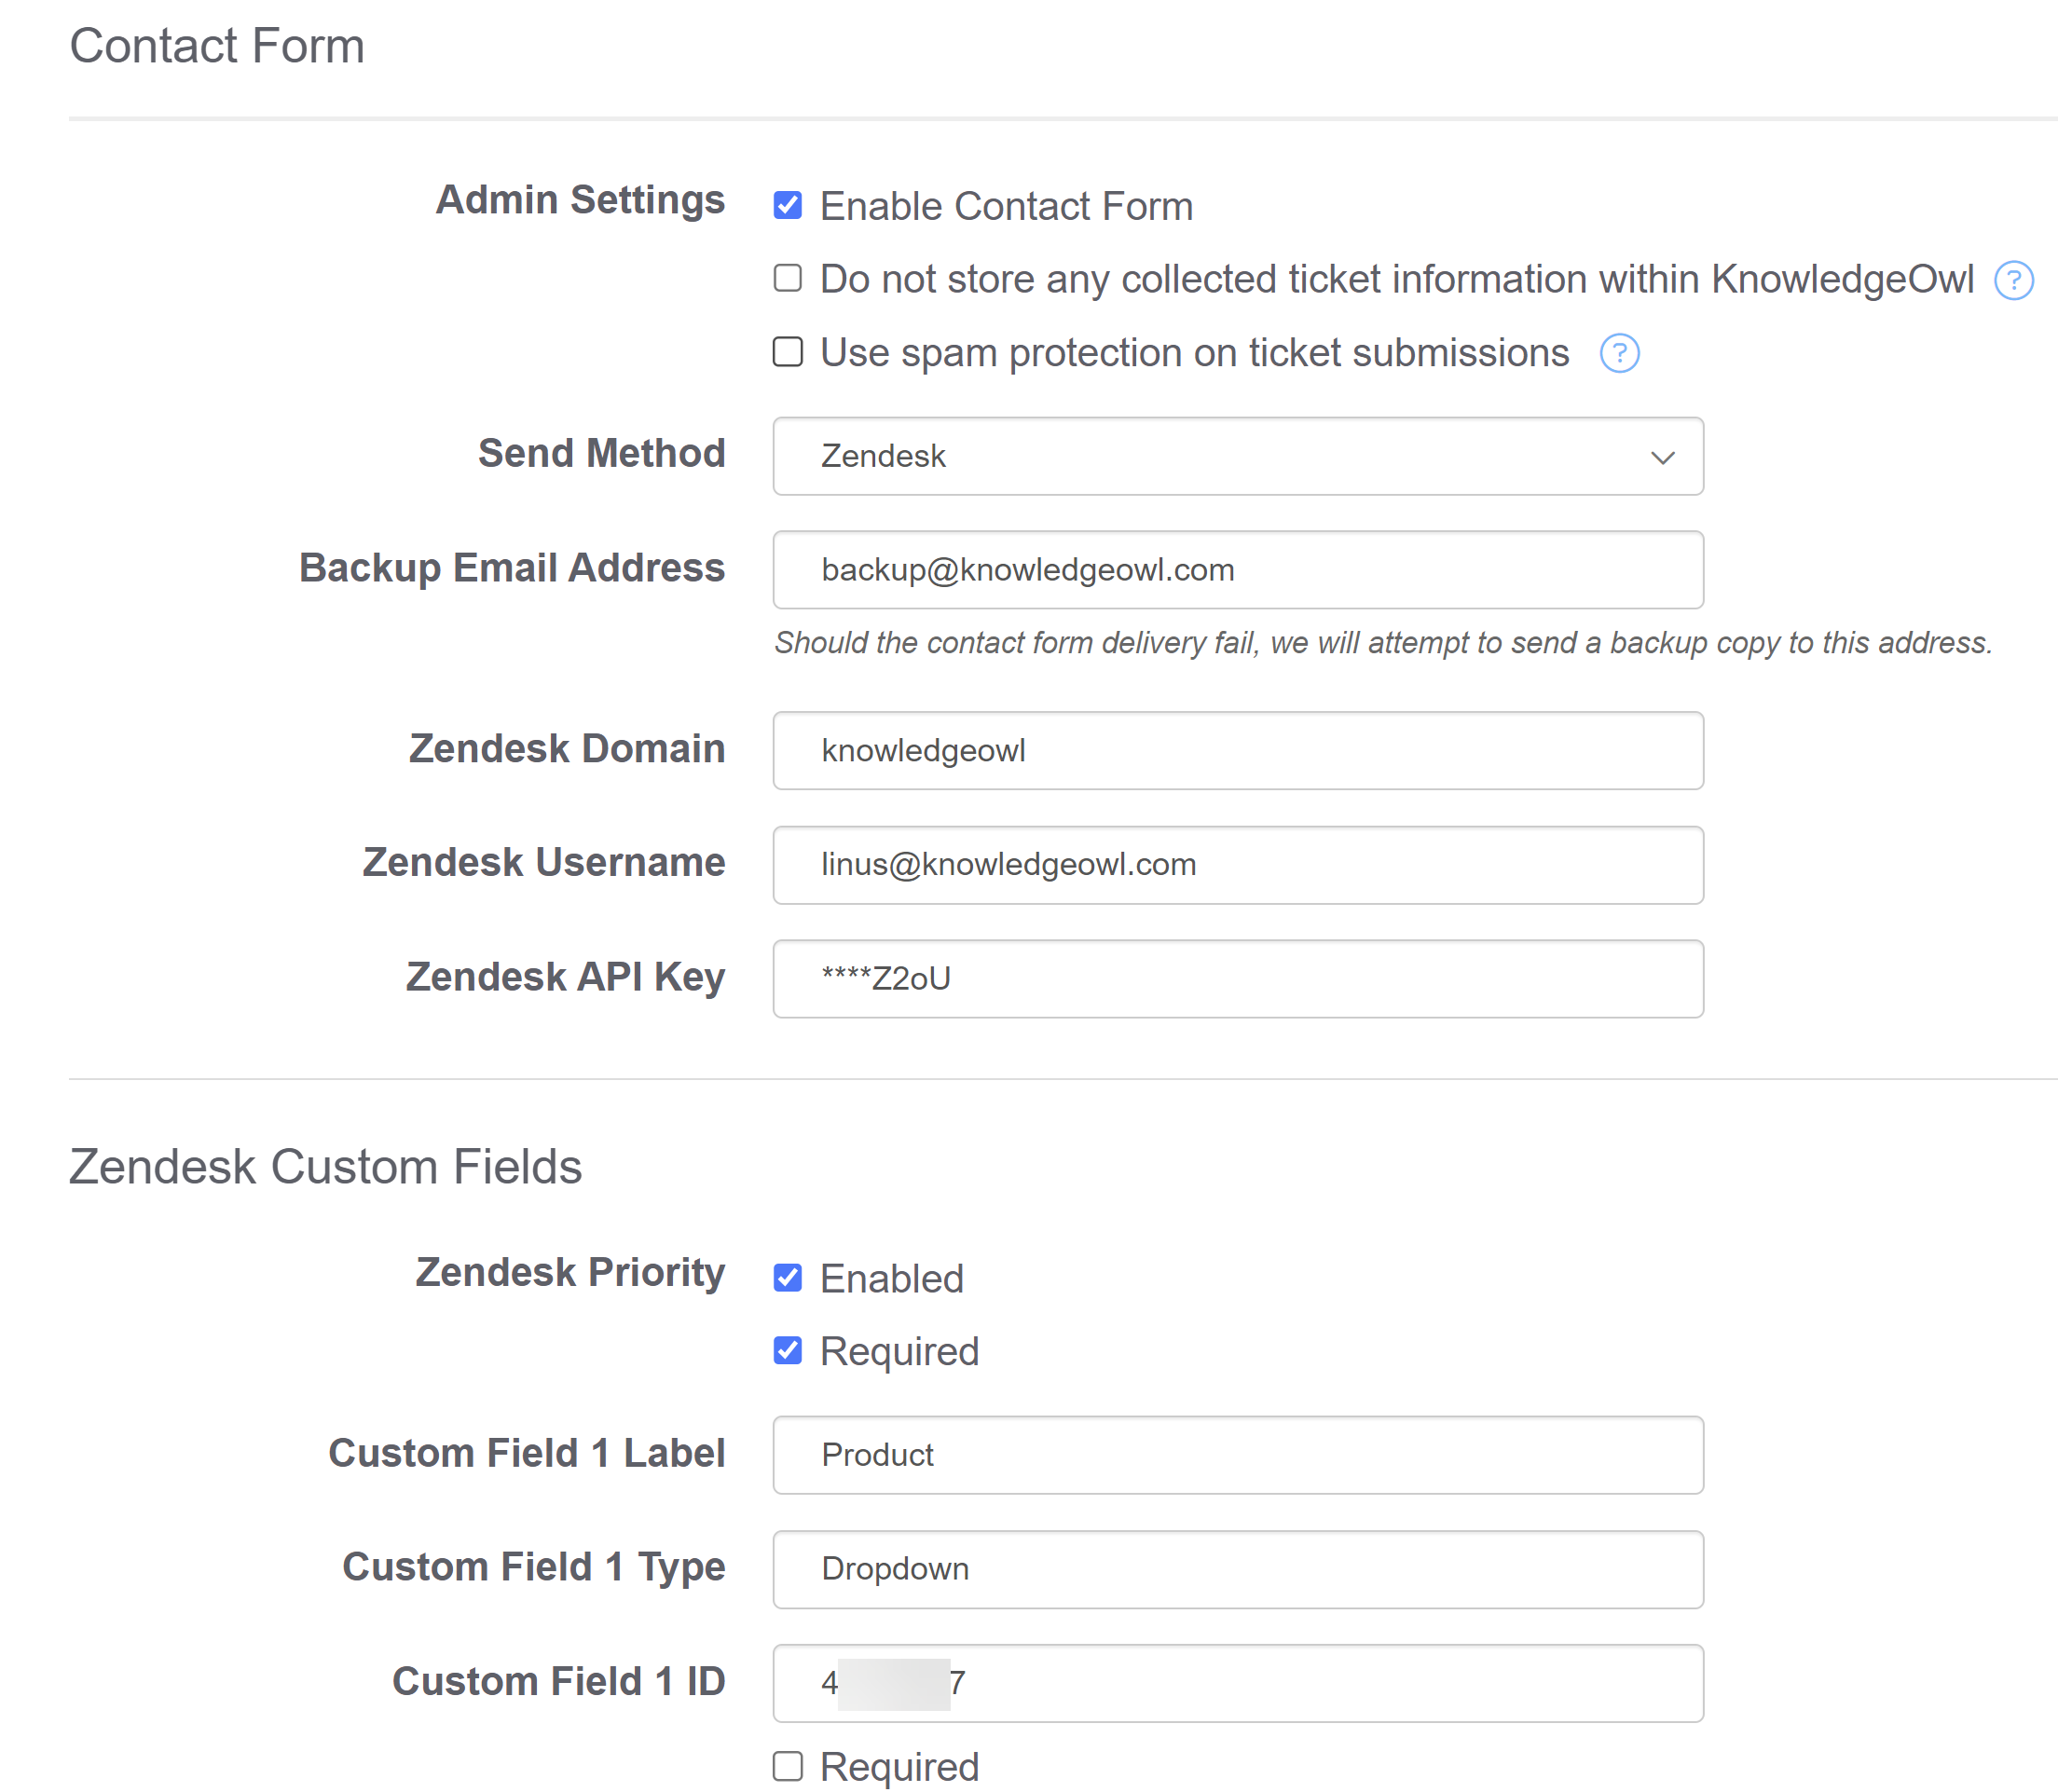 Sample completed Zendesk Contact Form