
Image captions are a great way to explain what an image is about or what a reader should focus on in the image.
To add a caption to an image:
- Open the article you'd like to edit.
- Select the image you'd like to add a caption to. The image modal opens.
- Select the Image Caption (dialog bubble) control to add or edit a caption:
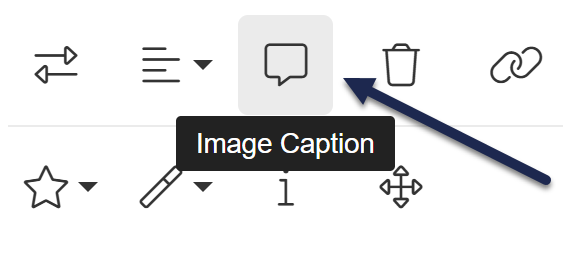 Image Caption control in the Modern Editor

This creates the image caption area and you can type in the caption you'd like.
Don't like the default grey background with white text look? Refer to Style image captions for steps on changing the caption to fit your branding!