
Use Search's General settings to control the reader's search controls and your search results display.
The General settings in search are broken into four sections:
- Enable semantic search: Use this setting to turn semantic search on and off for the knowledge base.
- Search controls: Use these settings to choose how your readers can interact with search, including:
- If a search returns more than 20 results, display pagination controls so readers can page through results.
- Allow readers to sort by relevance (default), newest, or most recently updated.
- Add the options to filter search results by top-level or top- and second-level categories.
- Search results: Use these settings to control your search results display, including:
- Whether to use Meta description article blurbs or auto-generate a blurb from the beginning of the article body.
- Whether search results article blurbs display search term snippets or the article's meta description.
- Content exclusions: Use these settings to prevent unwanted content from displaying in search.
- Exclude a category and all its child content from search.
- Set whether shared content articles are displayed in search.
Refer to the more detailed instructions below for more information on each setting.
Semantic search goes beyond simple keyword matching to understand the meaning and intent behind a query, allowing users to search in natural, conversational language. It’s the same technology that powers our AI chatbot so that it can interpret questions and deliver the most relevant answers, even when phrased in different ways.
Semantic search is available and turned on by default on new accounts. Existing accounts must explicitly turn it on.
To turn semantic search on or off:
- Go to KB settings > Search and synonyms. The Search and synonyms page opens to the General settings tab.
- In the Search controls section, under Enable semantic search, toggle the feature on or off.
- Be sure to Save your changes.
Requires reindex
Turning on semantic search will require a search reindex.
By default, the full search results page returns the top 20 articles ranked by relevance.
If you have a lot of content and the first 20 results might not give everything a reader needs, you can turn on pagination. This will still display the first 20 articles ranked by relevance, but the search results page will include page numbers and controls at the bottom so readers can navigate through search results.
To enable pagination:
- Go to KB settings > Search and synonyms. The Search and synonyms page opens to the General settings tab.
- In the Search controls section, under Pagination and sorting, check the box to Allow readers to paginate through search results if more than 20 articles are found.
- Be sure to Save your changes.
Full search results are sorted by relevance by default. The goal is to show the most relevant articles at the top of the results. While relevance can be a great default, there are times when your readers might want to find articles that were recently updated, or recently created. To allow this behavior, turn on Sorting in your search settings.
Once you turn on sorting, your knowledge base search results will display a sorting dropdown below the search bar. Readers will be able to sort the results in the following ways:
- Relevance (default): Sorted with most "relevant" articles at the top, as determined by the search relevance algorithm.
- Last updated: Sorted with articles with the most recent modified date at the top.
- Newest: Sorted with articles with the most recent created date at the top.
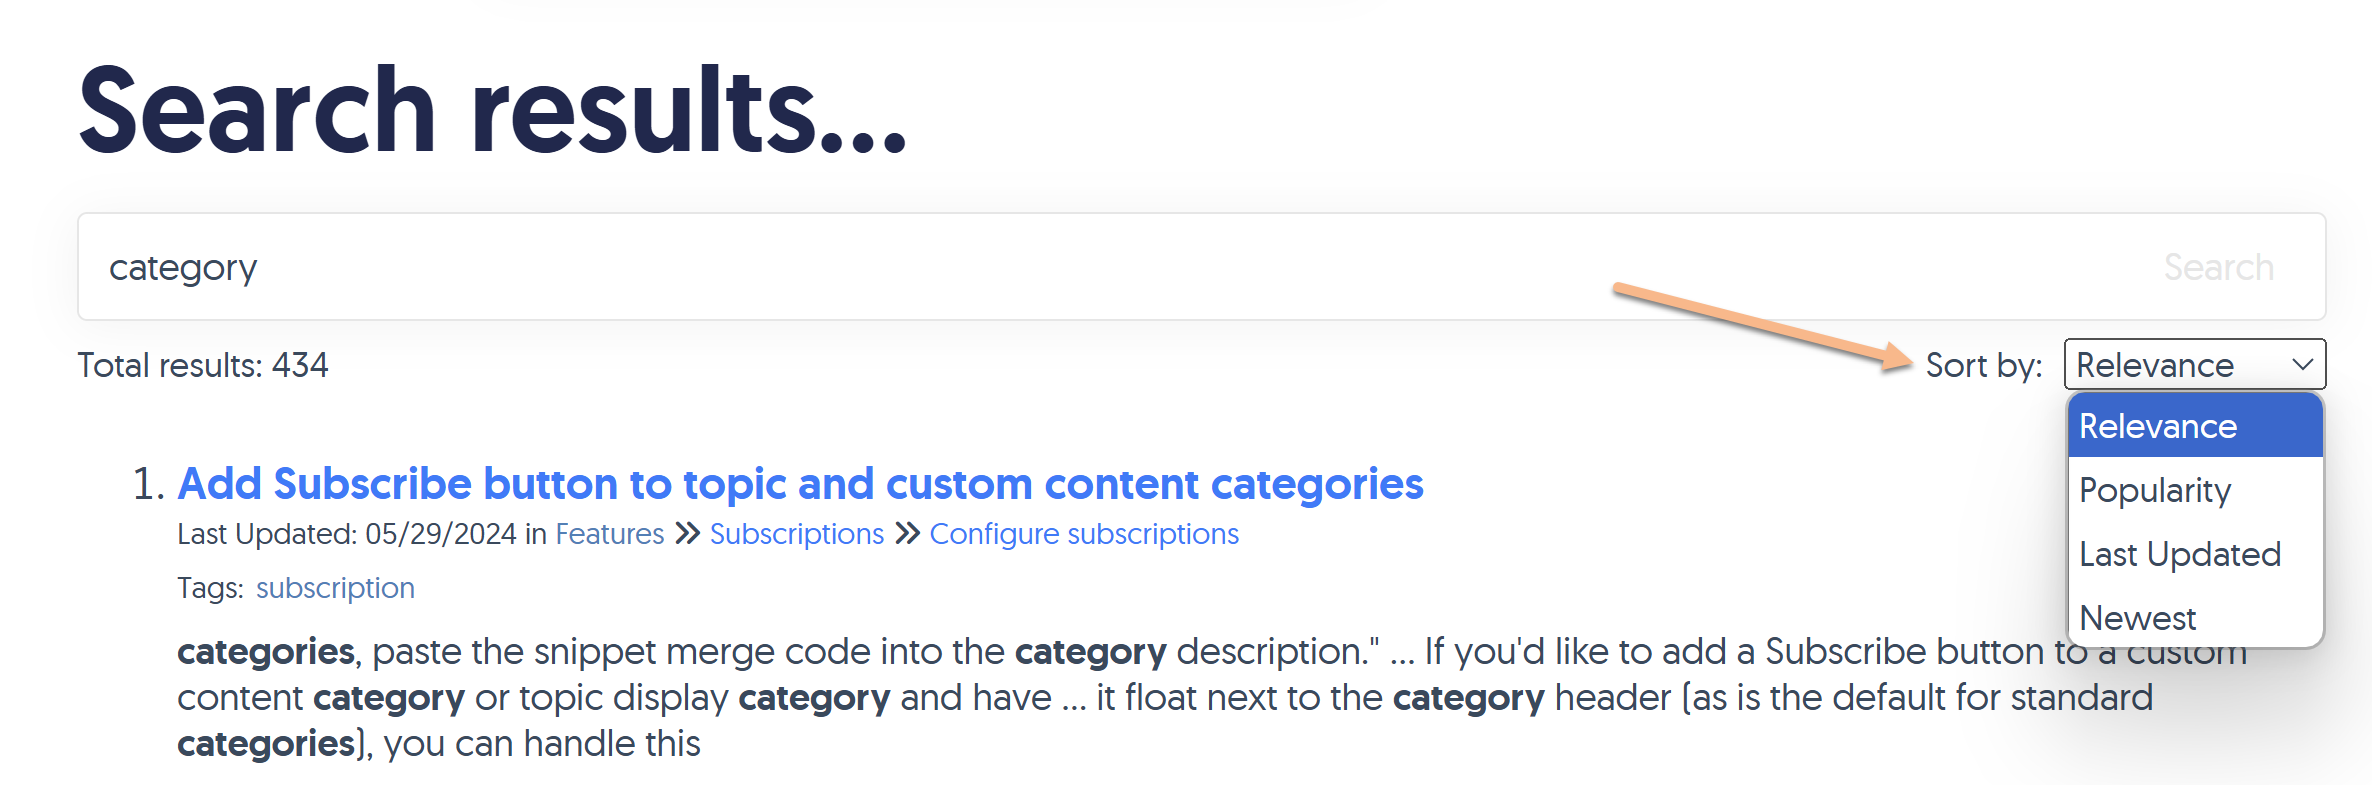 Sample Sorting dropdown
To turn on sorting:
- Go to KB settings > Search and synonyms. The Search and synonyms page opens to the General settings tab.
- In the Search controls section, under Pagination and sorting, check the box to Allow readers to sort the search results by last updated date or date created.
- Be sure to Save your changes.
Make it your own
You can change the "Sort by:" text label or the labels for the dropdown values using Customize > Default text. Refer to Customize Search text guide for information on the available text strings.
By default, KnowledgeOwl's search will search across all categories in your knowledge base.
If you'd like to give your readers a bit more control to filter the results they get, use the Category drilldown filters. These filters add a Refine dropdown menu to your search bars, which lets your readers select a category before they search:
 Sample Refine dropdown in the search bar
And the search results page will display a Refine by Category section for the same filtering:
 Sample Refine section in search results page
To add these filters:
- Go to KB settings > Search and synonyms. The Search and synonyms page opens to the General settings tab.
- In the Search controls section, under Category drilldown filters, check the boxes for the category levels you want to add:
- Allow reader to filter searches by top-level category: Will display checkboxes for your top-level categories only.
- Allow reader to filter searches by second-level category: Will display checkboxes for your top-level categories and display second-level categories for further refining, as used in the screenshots above.
- Be sure to Save your changes.
The Search results settings control how search results are displayed.
On the search results page, article preview text is the summary information displayed under each article's search result.
We set new knowledge bases to:
- Use the article's meta description wherever article preview text is displayed: Wherever article preview text is displayed in search results or category landing pages, the article's meta description is used (if it has one). If no meta description has been entered, we'll automatically pull the first approximately 150 characters from the article to use instead.
- You can override this behavior to always use the automatically generated preview text from the start of the article (not recommended).
- Display snippets of the article body containing the search terms when available in search results: This provides some contextual clues about why the article was returned in search.
- You can override this behavior to always display the article preview text instead of the search term snippets. Refer to Article preview text: Snippets vs. meta description below for a more detailed discussion of when to use each approach.
To make either change:
- Go to KB settings > Search and synonyms. The Search and synonyms page opens to the General settings tab.
- If you want to stop using the article's meta description as an article preview text and only use the automatically generated preview, under Article preview text, uncheck the box to Use the article's meta description wherever article previews appear.
- If you want to change your search results so they always display the article preview text, instead of the contextual snippets displaying the search term, under Article preview text in search results, select Always display the article's preview text.
- Be sure to Save your changes.
Article preview text: Snippets vs. meta description
We default search result article preview text to display highlighted search term snippets for a few reasons:
- It's consistent with how Google and other search engines display results.
- It provides context for the search result, and that can help readers get to the information they want faster.
- Showing search terms in context can help readers figure out other search terms that might help them find what they need better.
For many customers, this works great.
However, there are some cases where this doesn't make sense. If your articles frequently use the same word repeatedly in the same sentence, the snippet preview text can almost seem noisy or cluttered. You might also want to use meta descriptions when you have a lot of similarly-structured articles and you want to set a clear, succinct meta description to consistently appear in search results.
There is no hard and fast rule about which setting is more ideal: it really depends on how your knowledge base is set up and how readers use it. When readers might be most heavily searching product codes or serial numbers and these fields appear in tables or long lists in articles, meta description might be a better setting. But when readers are searching for topics or subjects, the search term snippets are often a better setting.
The good news is that changing this setting instantly takes effect and requires no reindexing for search, so you can toggle it one way and then go back to the other if it isn't working for you.
The Exclude category search setting lets you fully exclude a single category and all of its content from search results. When you use this option, it automatically excludes from search:
- The main category content, if it's a type indexed for search
- All subcategories, if they're indexed for search
- All articles directly within the category
- All articles within any of its subcategories
This can be especially useful if you have a category you never want to show up in search. For example, Linus has a category for Internal Reviews. He publishes in-progress work here to get subject matter experts' review, but has the category hidden from the table of contents and the homepage.
To exclude a category and all its content from search:
- Go to KB settings > Search and synonyms. The Search and synonyms page opens to the General settings tab.
- In the Content exclusions section, under Exclude category, select the gear cog icon. The Exclude category from search modal opens.
- Start entering the name of the category you wish to exclude. As you type, the modal autosuggests category titles.
- Select the category you want to exclude, then select Exclude Category.
- Once you've made your selection, be sure to Save your changes.
All of the content in that category is now excluded from search.
Why use this setting?
Search result exclusions are usually set in individual articles. They don't get passed from the category to the articles.
Excluding content from search in that piecemeal way can be inconsistent, since authors must remember to check the box in each article or add a reader group restriction.
If you always have one category that should never be indexed--like an internal review or in-progress or playground category--excluding it from search can give you full peace of mind that your in-progress or experimental work won't ever show up in your search results.
You can control whether your Glossary page shows up in search results when someone searches the word "glossary". When turned on, if a reader searches for the word "glossary" (or whatever name you've renamed your glossary to!), a link to the Glossary displays in a box at the top of your search results:
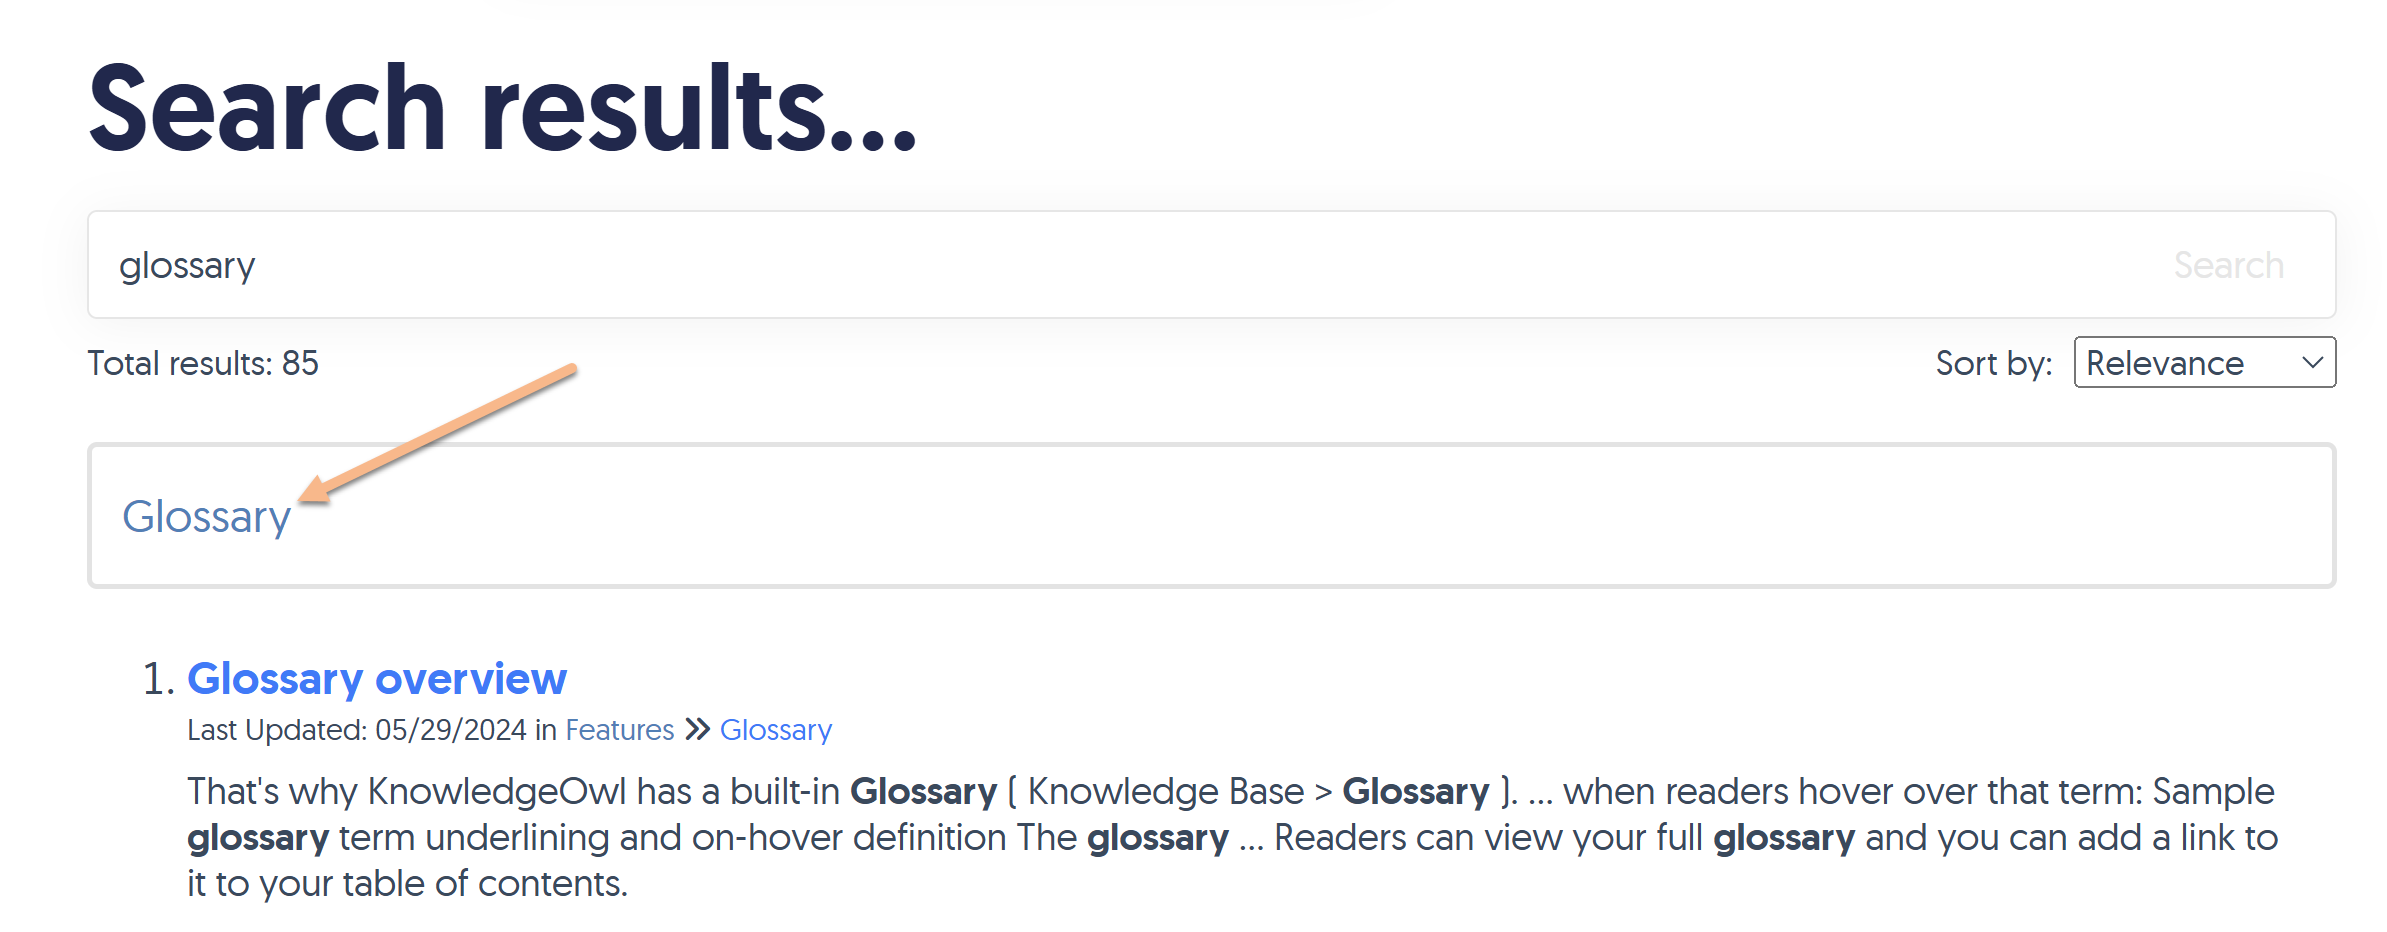 Sample glossary page search result
Not for use in the Contextual Help Widget
Unlike displaying glossary term definitions in search results, this box won't display in Contextual Help Widget search results.
To turn on this setting:
- Go to KB settings > Glossary. The Glossary settings page opens.
- In the Display options section, check the Search box to Display a link to your
glossary page when a reader searches for the word "glossary".
- Be sure to Save your settings.
Make it your own
Want to change the look and feel of that callout box? Follow the steps in Style the glossary snippet search results to get what you want. Don't like the word "Glossary" or want to add more explanation to the box? Use the Search section of Customize Default text to change the text that appears there!
If you're using the Glossary, you might want glossary term definitions to display when someone searches for a glossary term anywhere in your knowledge base:
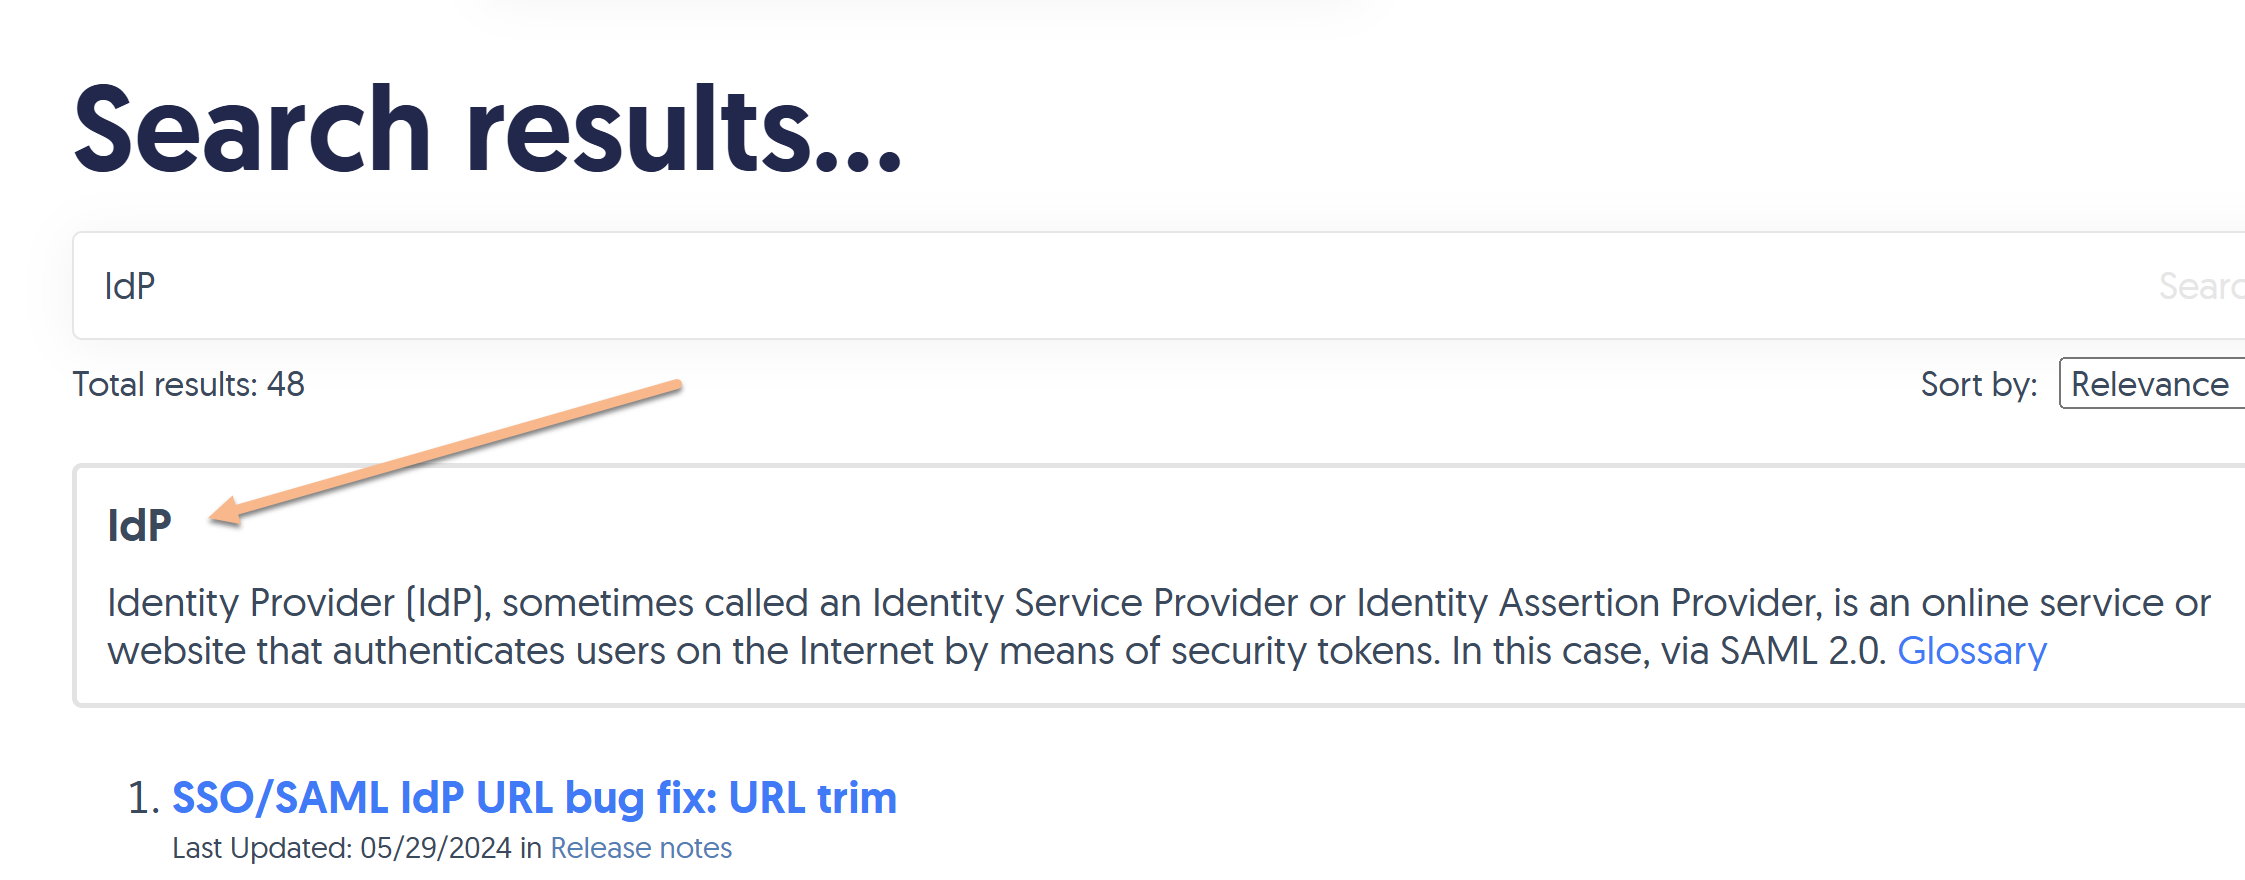 Sample glossary callout for glossary term definition of IdP
Here's how it works:
- If your reader searches a phrase that exactly matches a glossary term, the term and its definition are displayed in a box at the top of the search results.
- The definition search result also includes a link to the specific letter in the Glossary that this term falls under.
- If you're using Contextual Help Widget (2.0), these definition search results are also displayed at the top of widget full search results:
 Sample glossary term callout in the contextual help widget

To turn on this feature:
- Go to KB settings > Glossary. The Glossary settings page opens.
- In the Display options section, check the Search box to Show the term's definition at the top of search results when a reader searches for a glossary term.
- Be sure to Save your changes.
Make it your own
Want to change the look and feel of that callout box? Follow the steps in Style the glossary snippet search results to get what you want. Don't like the word "Glossary"? Use the Search section of the Customize Default text to change the text that appears there!