
If your knowledge base is set up so that some or all readers must login to see content and you're using KnowledgeOwl reader accounts rather than an SSO integration, you can allow your readers to sign up for access. This can help reduce administrative time and oversight so that readers can request access without you having to manually create accounts for them.
With signups enabled, your login page will show a link for new visitors to sign up for access:
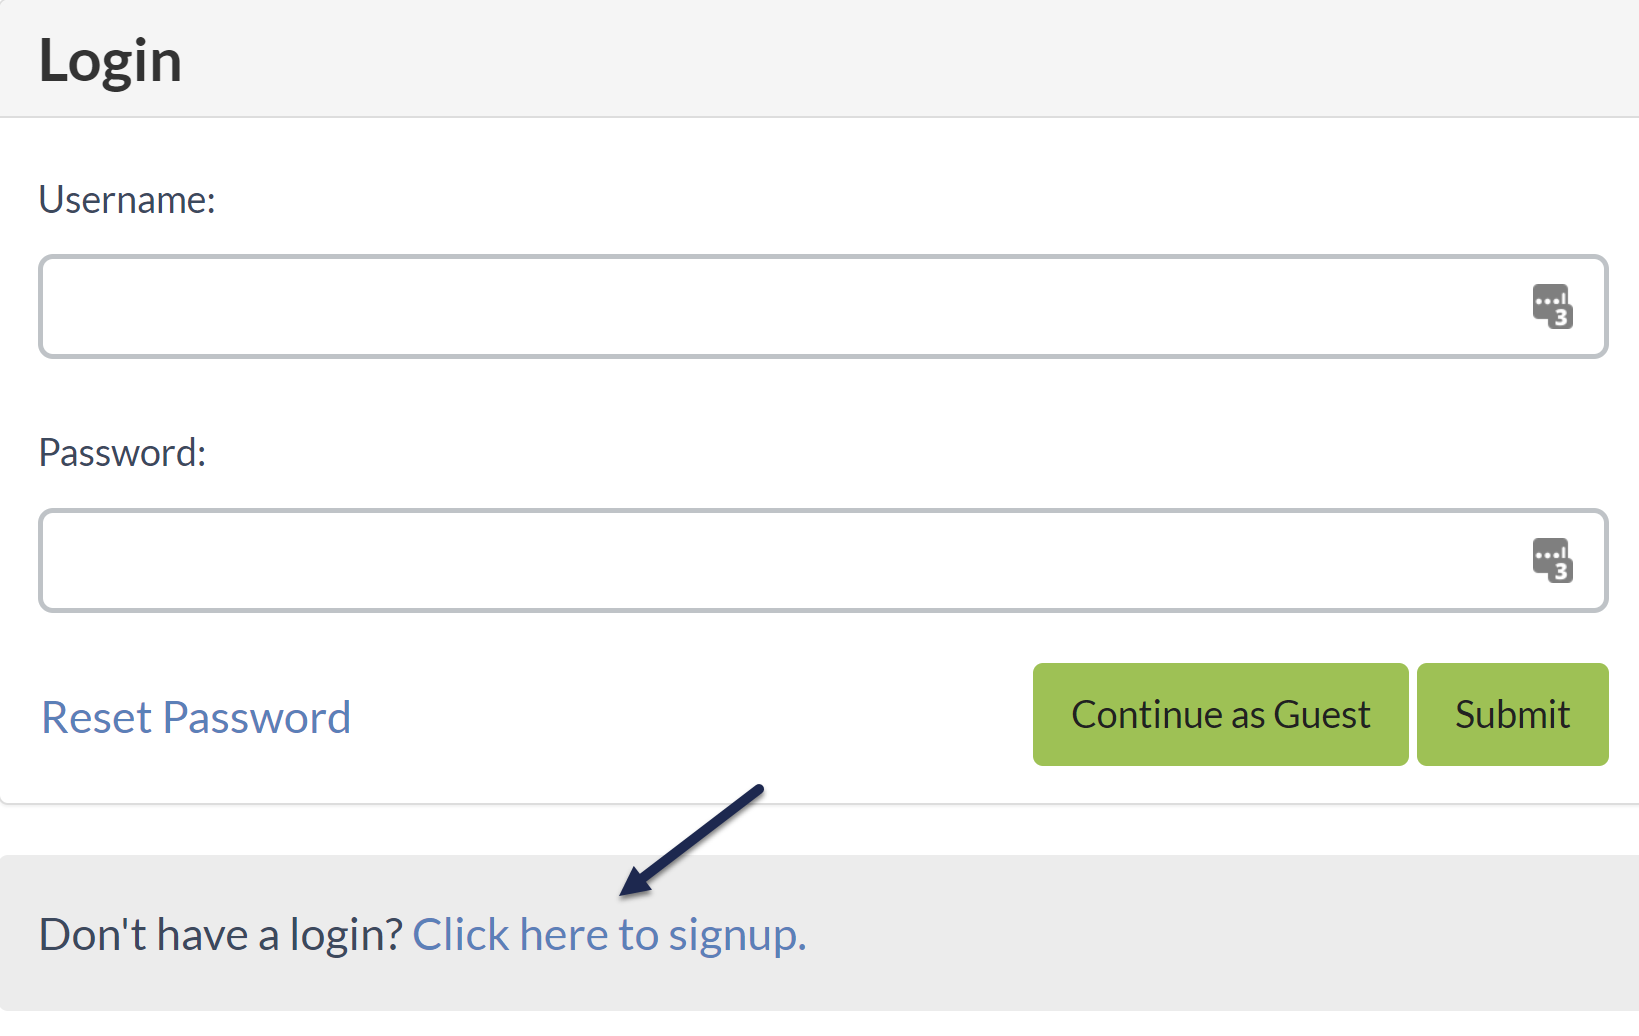 Sample login page with a signup link
You have several options when adding signups:
- You can have new sign-ups automatically granted a reader account as soon as they sign up OR require an admin to approve their access
- You can choose to send email notifications when a new reader has signed up
- You can include up to five custom fields to gather additional information about readers when they sign up
- You can auto-assign new reader signups to reader groups based on their email address domain
Signups not supported with Single Sign-On (SSO)
This option won't work if you're using SSO!
To turn on reader signups:
- Go to Account > Readers. The Readers page opens to the Readers tab.
- Open the Settings tab.
- Make sure that Password Management is set to Allow readers to administer their own passwords. Refer to Set up self-administered reader options for more information. If Passwords can only be managed by KnowledgeOwl admins is selected, you cannot enable reader signups.
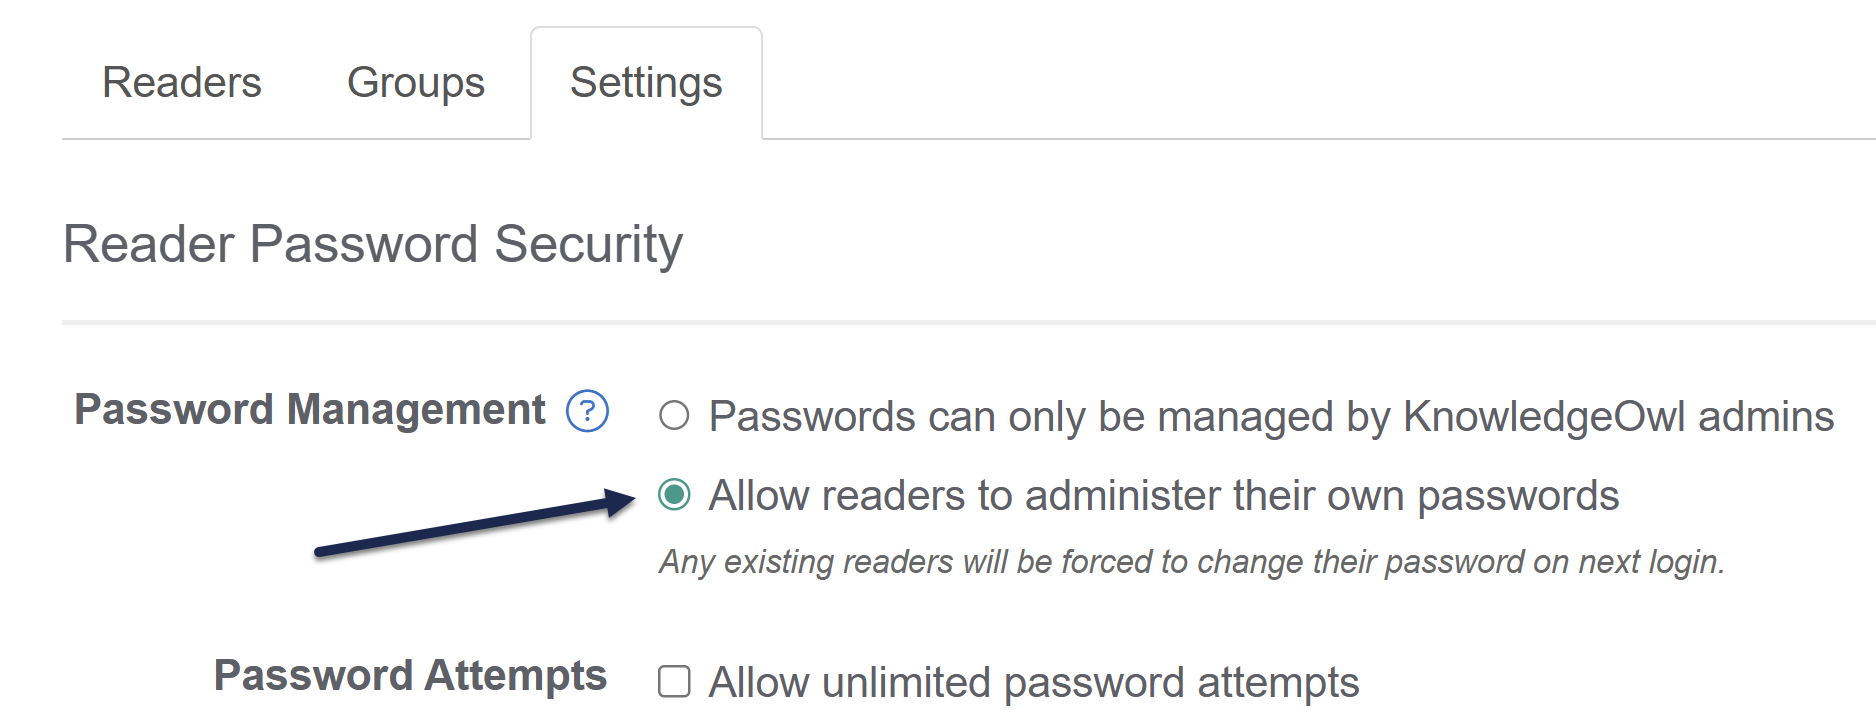 You can only use signups when Allow readers to administer their own passwords is selected
 - In the Self-Administered Reader Options section, find the Reader Signups subsection:
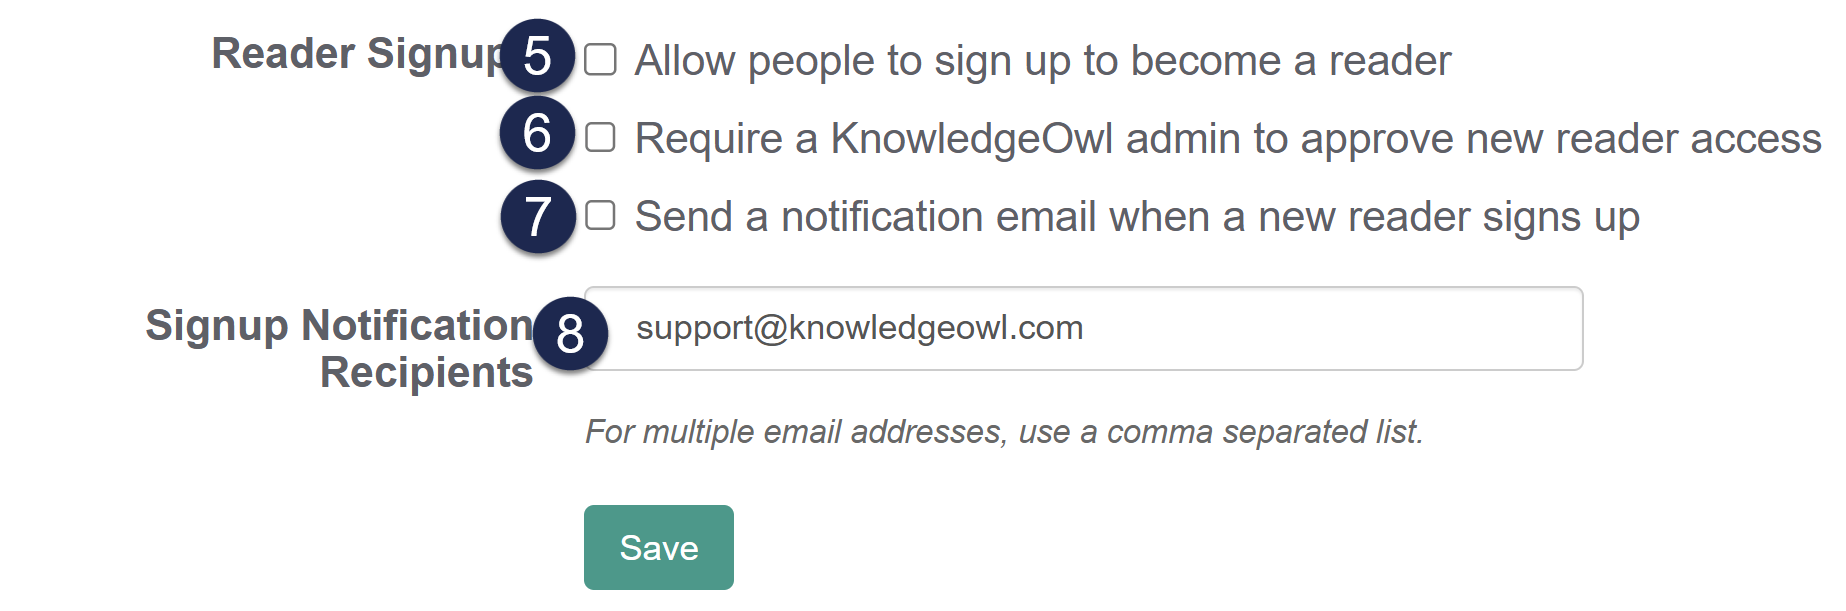 Find the Reader Signups subsection of the Self-Administered Reader Options section
 - To turn on reader signups, check the box to Allow people to sign up to become a reader.
Spam protection
The reader signup page doesn't have its own spam protection settings; it inherits them from the Contact Form. We're working to add a separate setting for this. Until that's available, please make sure you have spam protection turned on in the Contact Form to block spam on your reader signups! - Next, decide whether signups should be automatically approved and granted access, or whether a KnowledgeOwl admin must approve access:
- To automatically approve signups and grant them access, leave the box to Require a KnowledgeOwl admin to approve new reader access unchecked. New reader signups will receive a welcome email with a temporary password immediately after they sign up. This allows new readers to sign up and gain access to your site without any approval process.
- To require a KnowledgeOwl admin to review and approve new signups, check the box to Require a KnowledgeOwl admin to approve new reader access. New readers won't have any access until an admin approves them, and a welcome email and password won't be sent until an administrator approves the signup request. When a new reader signs up, they'll be added to Account > Readers in the Pending Approval list. Refer to Approve Reader Signups for more information.
- If you'd like to be alerted when new readers sign up, check the box to Send a notification email when a new reader signs up. Notifications are especially helpful if you want to manually add the reader to groups to give them access to restricted content or you require approval before the new reader can access the site.
- If you checked the box next to Send notification email when a new reader signs up, be sure to add at least one email address to the Signup Notification Recipients list. These are the email addresses that will receive the signup notifications. To add multiple email addresses, use a comma-separated list.
- Be sure to Save your changes.


Like the reader signup form, but don't like the language used in it? You can change all of the text in the reader signup form, as well as the signup prompt text and link on the main reader login form, using Customize > Default text.
Refer to Customize default text for more information on using this feature; refer to Customize Reader Login text guide for more details on the various text strings you can customize on the reader login and reader signup pages.
Do you want to capture some additional information besides first name, last name, and email address about your readers? Refer to Add custom fields to the reader signup form.
The reader signup form requires an email, first name, and last name. You can choose to include up to 5 additional fields that will be mapped to reader custom fields 1-5. These fields will be included in the signup and in your notification emails (if you're using notification emails).
 Reader custom fields
To add custom fields to the signup form:
- Go to Account > Readers. The Readers page opens to the Readers tab.
- Open the Settings tab.
- In the Reader Signup Custom Fields section, enter information for the custom field(s) you wish to add:
- Add a Label for each field you wish to use. The labels are what will be displayed on the signup form next to the field.
- If you want the field to be displayed in your reader signup form, check the Enabled box.
- If you want to require the reader to complete this field before they can submit the signup form, check the Required box.
- Be sure to Save your changes.
For example, in the screenshot above, both the Company Name and Postcode fields will be included, but only the Company Name field will be required.
Our Signup form will automatically include the new fields:
 Reader signup form with custom fields
If you require approval of reader signups, when a new reader signs up, they'll receive a message like this:
Your access has been submitted for approval. You will be notified once approval has been completed.
They won't be able to login until you or another knowledge base admin approve them.
Their reader details are added to your Account > Readers list as Pending Approval.
If you have signup notifications enabled, the email you receive will have a link in it to approve the reader:
A new reader has signed up to use your knowledge base, [Knowledge Base name]!
Reader's Email:
[reader's email address]
Reader's Name:
[reader's name]
Custom Field 1:
[reader's answer for Custom Field 1]
Before this reader can access your knowledge base, you will need to approve them here: [link to their reader-edit page in KnowledgeOwl]
If you select that link, you'll be taken directly to step 5 below.
If you aren't using notifications, or if you'd like to complete this step while already logged in to KnowledgeOwl:
- Go to Account > Readers. The Readers page opens to the Readers tab.
- If you have new readers pending approval, an alert displays across the top of the page letting you know.
- Select the Pending Approval filter from the dropdown to view these readers:You will see an alert on top of the Readers list if you have new readers awaiting approval:
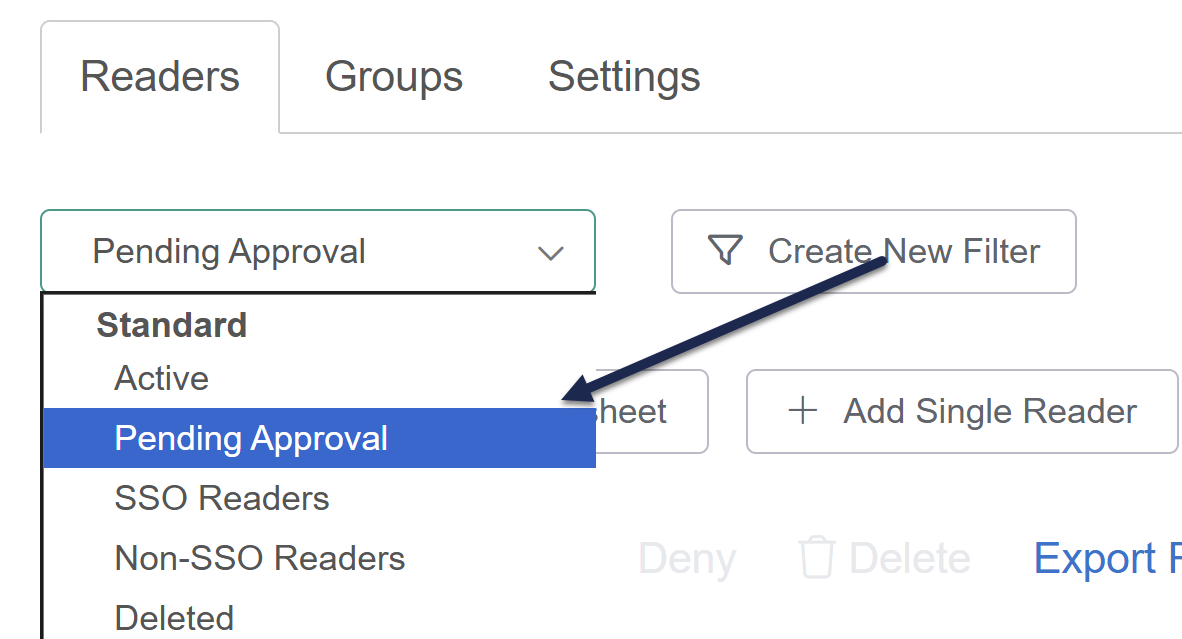 Select the Pending Approval filter from the dropdown
- The Readers page updates to display a list of all readers pending approval:
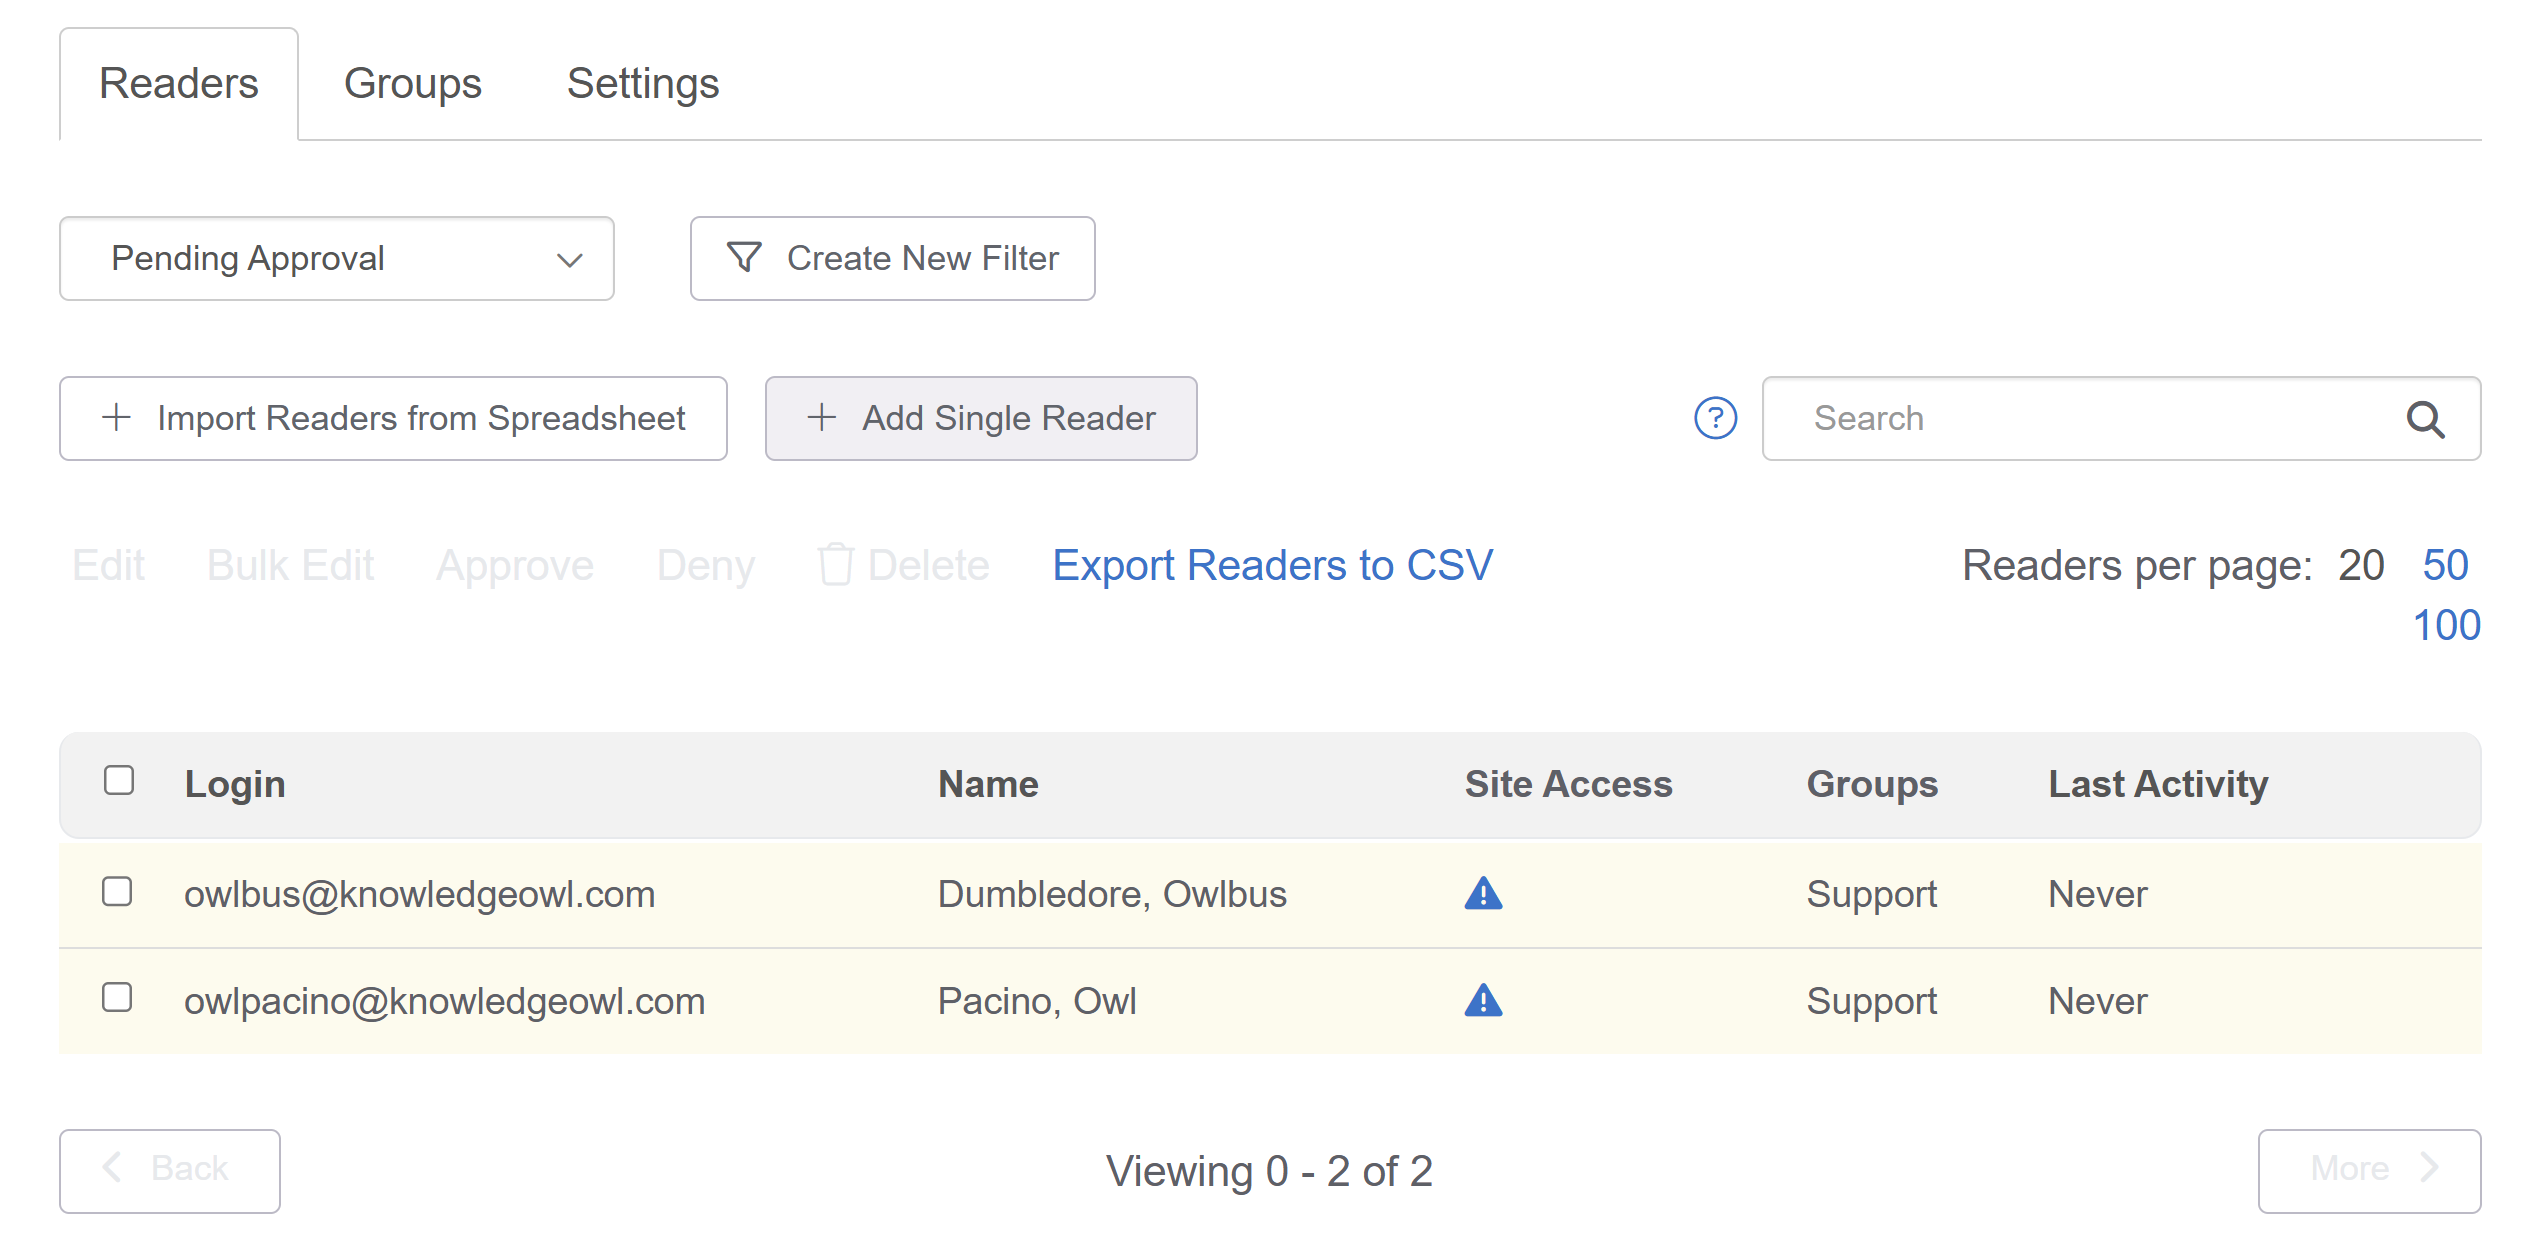 Sample Pending Approval filter display
- Select the reader's login, name, or anywhere else in that row to open the Edit Reader page in a new tab.
- Near the top of the reader's details, a message displays about the reader's pending access requests:
This reader has pending access requests. You can approve or deny them here. You will not be able to edit this reader until you approve or deny their access.
- Select the approve or deny them here link in that message:
 Sample approve/deny message in reader details
The Pending Knowledge Base Requests modal opens. - This modal lists the knowledge base(s) the reader's requested access to. To deny them access to the knowledge base, select Deny Selected. They aren't notified of your denial.
- To approve their access to the knowledge base, select Approve Selected. Their reader account will be given access and we'll send them the reader welcome email. If they're a brand-new reader, the welcome email includes a temporary password.

- Once you approve the reader, you can assign them to reader groups in the Reader Groups section.
- If you do make changes to the reader's details, be sure to Save once you complete those changes.


If you require approval of reader signups, when a new reader signs up, they'll receive a message like this:
Your access has been submitted for approval. You will be notified once approval has been completed.
They won't be able to login until you or another knowledge base admin approve them.
Their reader details are added to your Account > Readers list as Pending Approval.
You can approve or deny multiple readers at once. To do so:
- Go to Account > Readers. The Readers page opens to the Readers tab.
- If you have new readers pending approval, an alert displays across the top of the page letting you know.
- Select the Pending Approval filter from the dropdown to view these readers:Select the Pending Approval filter from the dropdown
- The Readers page updates to display a list of all readers pending approval:
Sample Pending Approval filter display
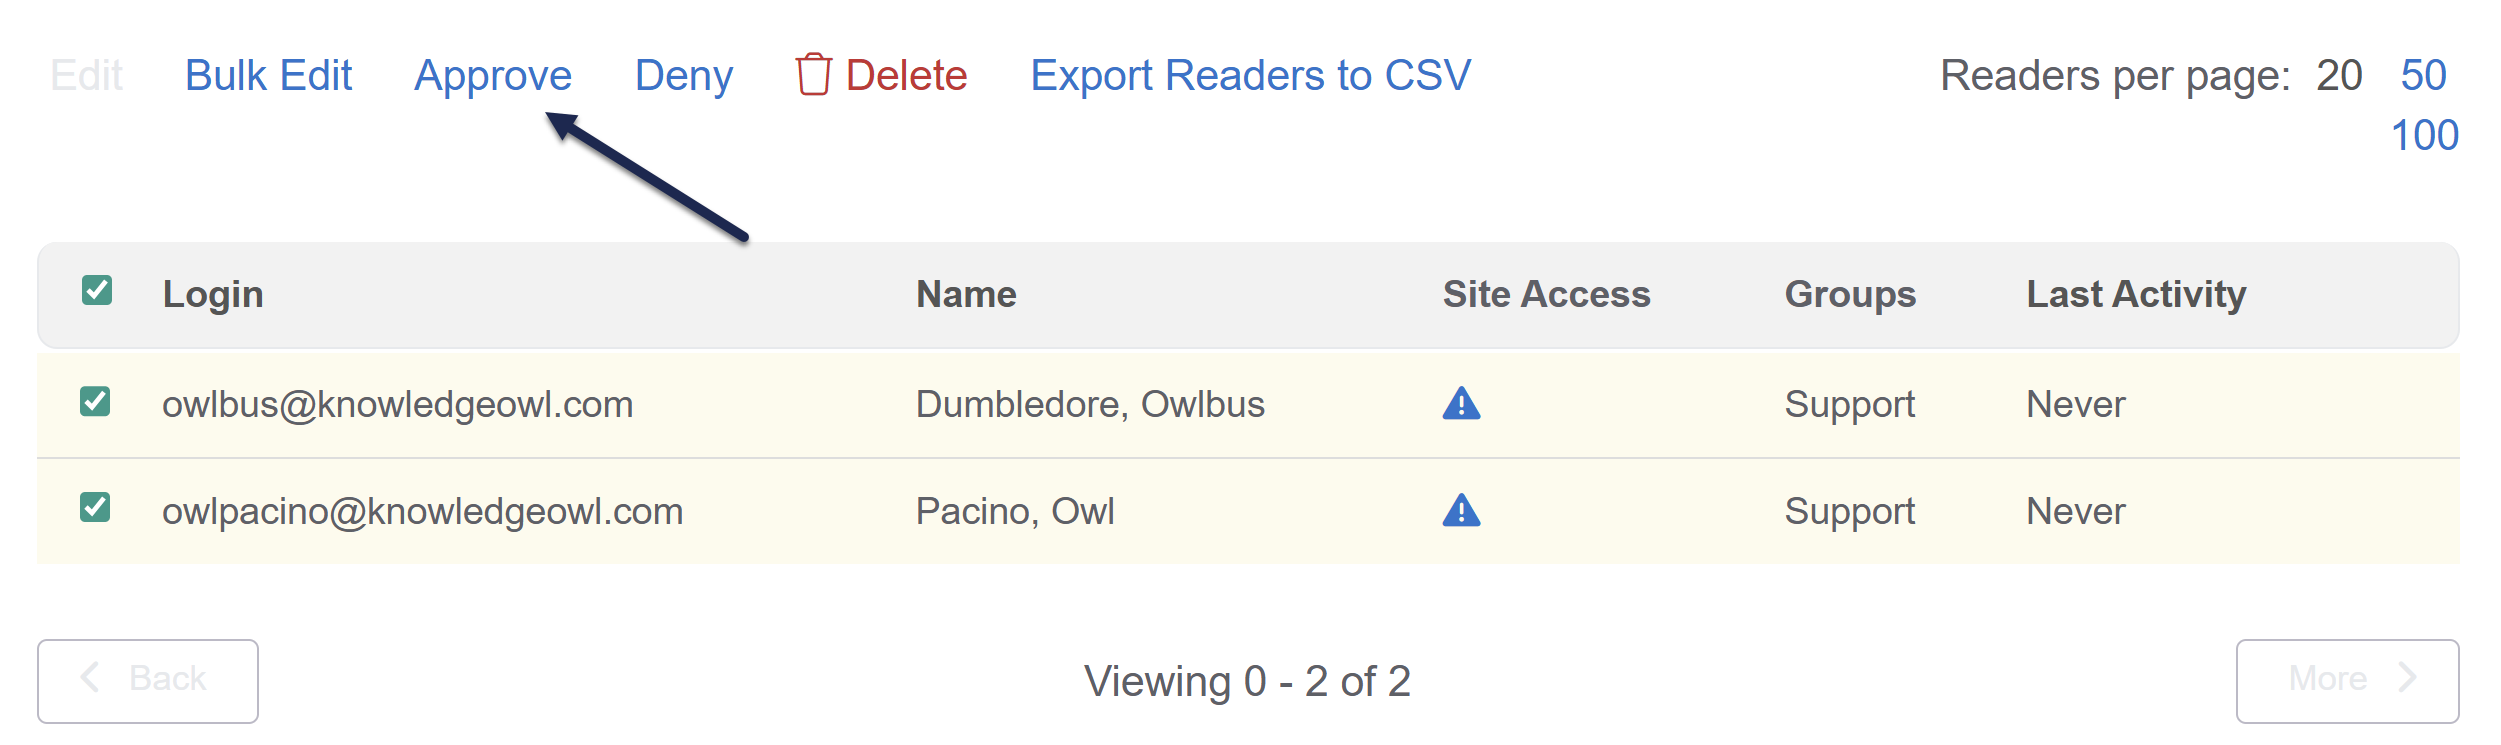
- Check the boxes next to the readers you'd like to approve or deny.
- You can use search here to refine the list, or create a custom reader filter to get at segments of the pending approval readers.
- You can also select all readers on the page by using the checkbox in the upper left corner.

- Once you've selected all readers on the page, if there are multiple pages, select the link that appears at the top of the reader list to select all readers in the filter/view.
- Not sure what you've selected? If you select all readers that match the current filter, the text will change and you'll have the option to Clear selection.
- With your readers selected, select the Approve or Deny link near the Bulk Edit option to approve or deny these readers.
- When you Approve readers:
- The knowledge base they requested access to is added to their Site Access.
- They'll be marked with an Active status and appear in the Active filter.
- They'll receive a reader welcome email.
- When you Deny readers:
- The knowledge base they requested access to won't be added to their Site Access column.
- They'll be marked with an Active status and appear in the Active filter.
- They will receive no email notification of the denial.
- If the readers have no additional site access, we recommend also Deleting the readers.
- When you Approve readers:
- If you'd like to assign these readers to reader groups or make other changes to their access, we recommend using a bulk reader edit to update them.


New reader signups aren't assigned any reader groups. You can create rules to automatically assign readers to groups based on their email domain.
A common use case is to assign all readers with internal email addresses to an internal reader group. For example, Linus likes having a rule that will assign all readers with a knowledgeowl.com email address to the Support reader group, which gives them access to all content restricted to our Support group.
If you're using reader signups, automatic domain rules like this can help guarantee that new readers get access to the content they need without a KnowledgeOwl admin having to manually review and assign them to the appropriate groups.
- Reader accounts that you or another KO admin manually creates in your Account > Readers (singly or in bulk). Manually add those reader accounts to groups.
- Readers who come through remote authentication or any of our Single Sign-On (SSO) integrations. If you're using SSO, refer to Auto-Assign Groups By Email Rules (SSO Edition) instead!
To set up Email Rules:
- Go to Account > Readers. The Readers page opens to the Readers tab.
- Open the Groups tab.
- In the Auto-Assign Groups by Email Rules section, select + Add Rule.
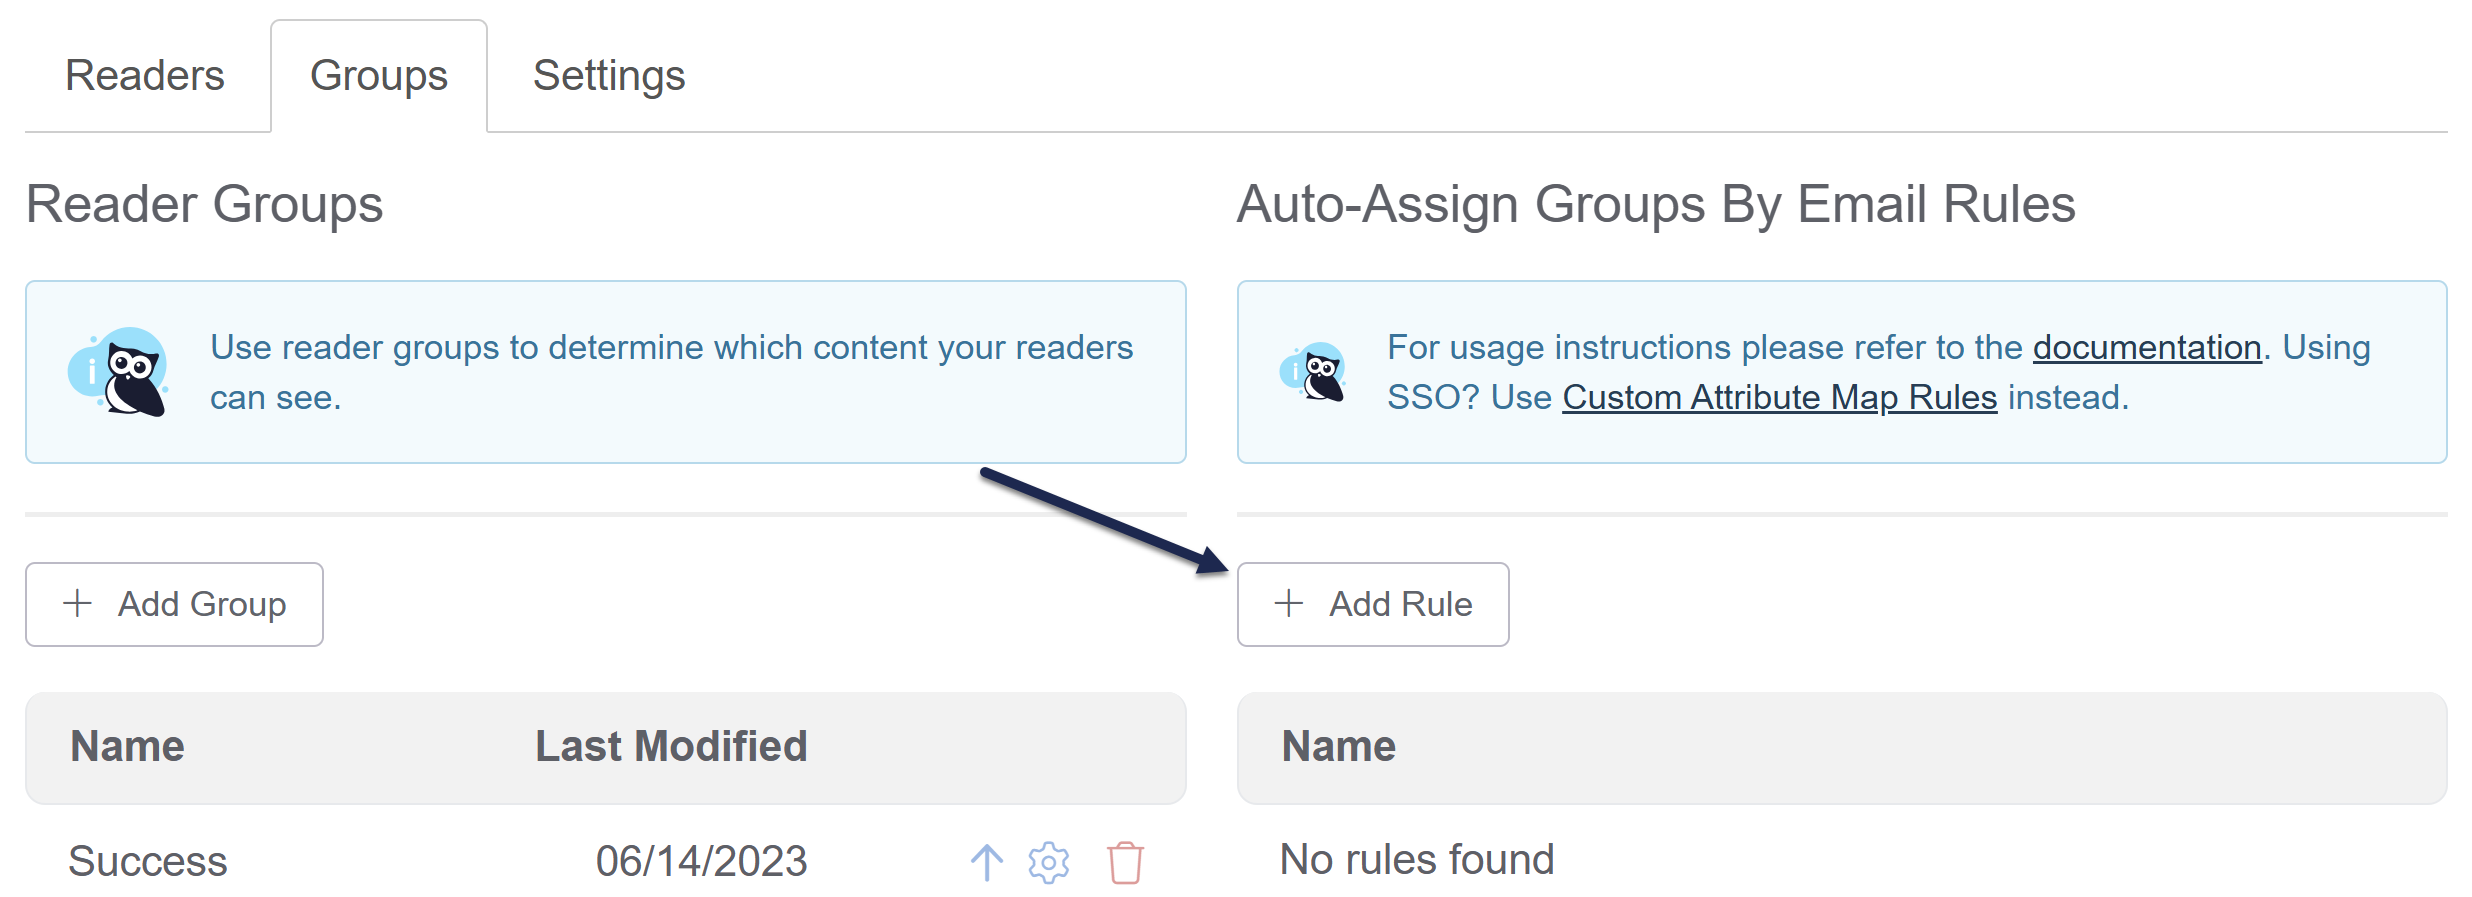 Select + Add Rule.
- The Auto-Assign Groups by Email Rule modal opens.
- Use the fields in the modal to set up your rule:
- Enter a Rule Name. This name displays in the Auto-Assign Groups by Email Rules section in Account > Readers > Groups, so it should help describe the rule.
- Enter the Email Domain the rule applies to. All readers with this email domain will have this rule applied. It must be an entire domain, such as @knowledgeowl.com, @gmail.com, @yourcompany.com, etc.
- Use the Assign to Groups checkboxes to select the Reader Group(s) that people with that email domain should be assigned to. This list depends on the Reader Groups you've set up in your knowledge base.
- Select Save Rule to save your changes. Your rule displays in the Auto-Assign Groups by Email Rules section and will be applied to all reader signups moving forward. You can edit it (gear icon) or delete it (trashcan icon) using the icons to the right of the rule.
- Your rule will now appear in the Auto-Assign Groups by Email Rules section of Readers > Groups and will be applied to all reader signups from here on out. You can edit it (gear icon) or delete it (trashcan icon) using the icons to the right of the rule.

You can choose whether to apply the rule only when a new reader first signs up or to run it on every login. By default, it's applied only when the reader first signs up.
To apply rules on all logins:
- Go to Account > Readers. The Readers page opens to the Readers tab.
- Open the Settings tab.
- In the Self-Administered Reader Options section, check the Auto-Assign Group Rules box to Override reader groups based on rule logic on each login.
- Be sure to Save your changes.
Don't apply to all logins if you're also manually assigning groups
If you apply rules on all logins, these automatic group assignments will override any manually-assigned reader groups for readers affected by the rule.