
Snippets are chunks of reusable content or code that can be placed within articles, categories, and even your theme's HTML. The content of the snippet can be as simple as a single word or sentence, or as complex as a JavaScript function that performs an action on whatever page it is used.
For example, you could create a snippet that contains your company's copyright information. Wherever you want the copyright to appear, instead of typing it out again and again, you would use the snippet's merge code in its place.
When the page displays, the snippet merge code is replaced with the snippet's content. When you need to update your copyright information, you can edit and update the snippet content, and the changes will be automatically reflected wherever the snippet was used.
Text within snippets is not indexed for search.
Not all content reuse should be a snippet
If you have a chunk of content that you'd like to reuse but that also makes sense as a stand-alone article, consider using topic articles instead.
All created snippets are stored in the Snippets page, accessible in the left navigation. The Snippets page stores all your snippets:
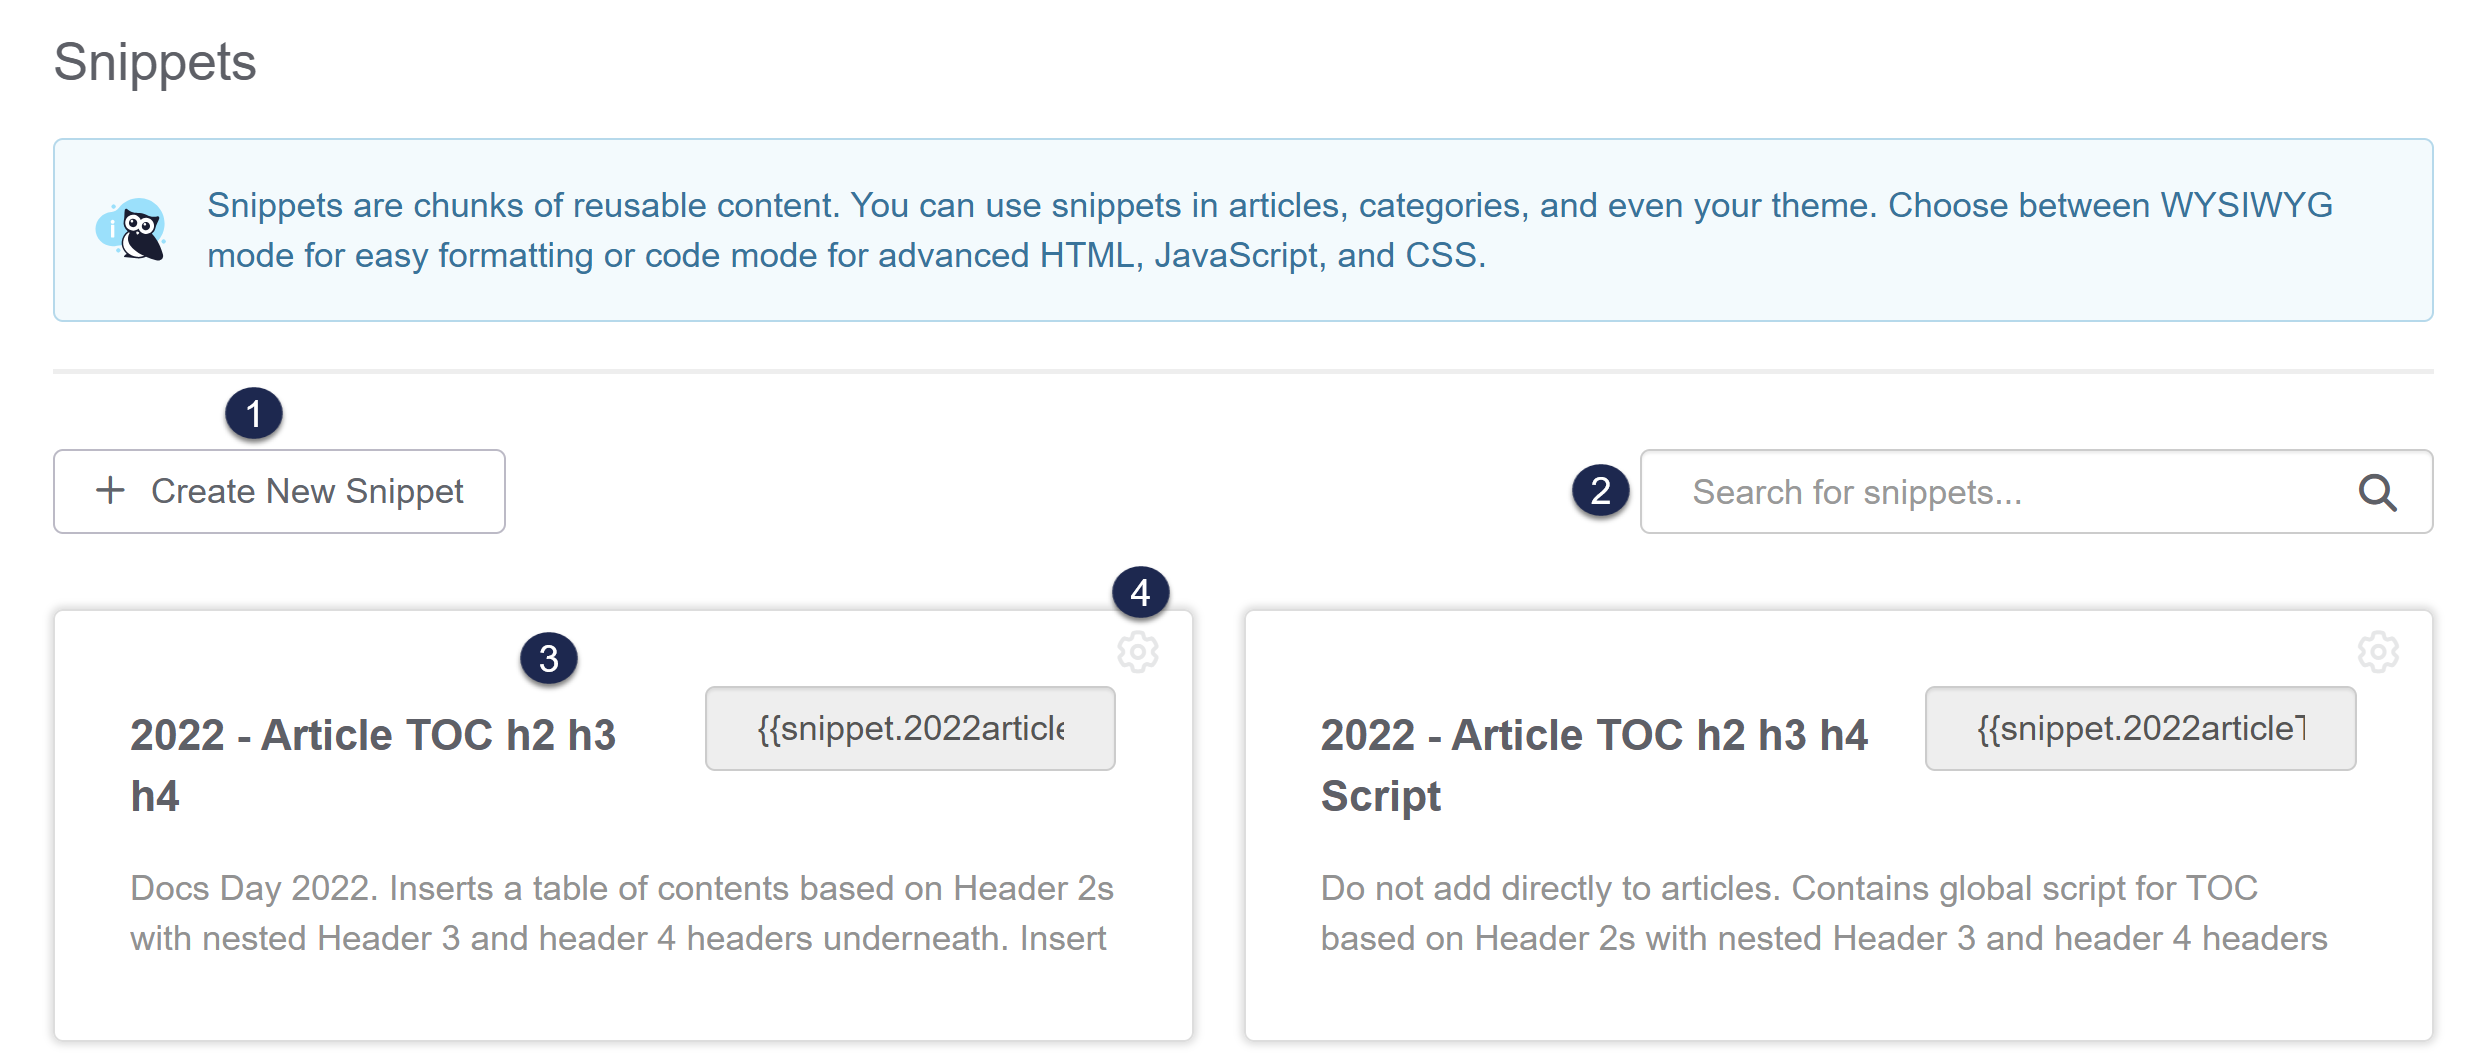 Sample snippet page layout
Within the Snippets page, you can:
- Create new snippets.
- Search for existing snippets using words in the snippet's Name or Description.
- Select any snippet to open it in edit mode.
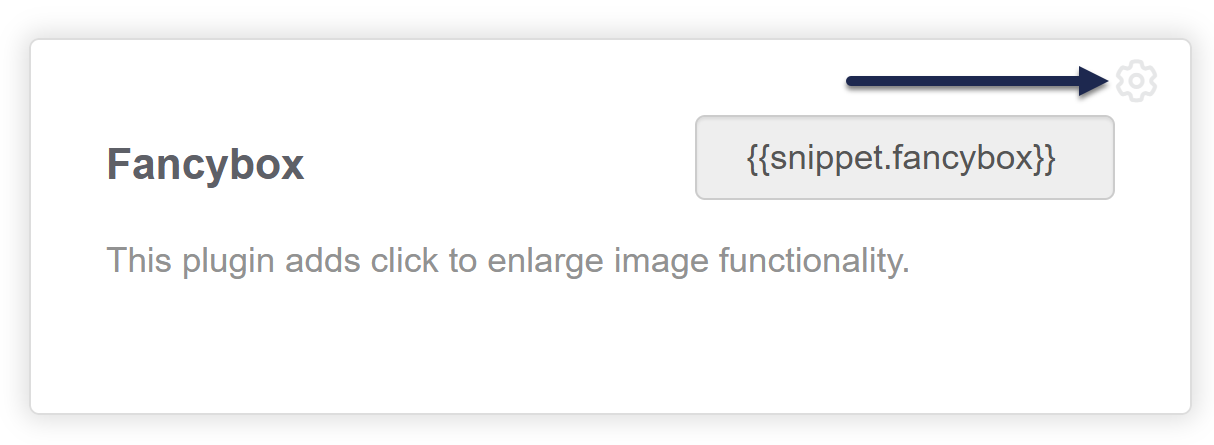
- Copy or delete a snippet by selecting the gear cog icon in the upper right corner of the snippet's card.
Alphabetical, case sensitive sorting
The Snippets page is sorted alphabetically and is case sensitive. All snippets beginning with upper case letters will appear first, in alphabetical order, followed by all snippets beginning with lower case letters, also in alphabetical order.
You can choose to create a snippet from scratch or to copy an existing snippet to use as a starting point.
Authors with the default Editor or Writer role can create snippets. If you're using a custom role, you'll need to have the Snippets custom author role permission to Add snippets.
To create a snippet from scratch:
- In the left navigation, select Snippets. The Snippets page opens.
- Select + Create New Snippet.
- Enter a Snippet Name. This is how the name will appear in the Snippets page and in snippet look-ups.
- The Merge Code Name will auto-generate from the Snippet Name, but you can edit it if you'd like to. The Merge Code Value is generated from the Merge Code Name. This is the value you'll enter in your articles, categories, or theme when you use the snippet.
- Enter a Snippet Description. This will help describe what your snippet does to other authors (and may help remind you if you forget). This description is only visible in the Snippets page and the Snippet Details pages.
- Enter your Snippet Content.
- If your snippet is used to display text (as our copyright is), type and format the text you want to display directly in the WYSIWYG Editor.
- For code-based snippets containing scripts or style tags, or for in-line text snippets, select the Snippet Content dropdown and select Code Editor. This toggles the editor to a simple code editor where you can enter raw HTML, scripts, CSS, and so on:
- Optional: In the right column, choose from these Visibility options:
- Hide from PDFs: This prevents the snippet from loading in PDFs. It's useful this is a script or other functionality that won't work in a PDF.
- Include snippet content in article blurbs: Article blurbs are used in search results and on category landing pages. If your snippet contains text content you want displayed, check this box. If it's a script, style, or other functionality, leave it unchecked.
- Optional: If you're using Reader Groups and only want this snippet to be visible to members of certain groups, check the boxes next to those groups in the Restrict to Reader Groups.
- Once you've finished formatting your snippet, select Create. Your snippet's created in the Snippets page and is available when someone tries to Insert Snippet in an article or category.
To help with content auditing and visibility, KnowledgeOwl tracks when you save an article or a custom content category containing a snippet's merge code. We save this information in the snippet's References so you can quickly locate all the places where it's used.
When you have a snippet open for editing, the righthand menu displays this References section beneath the Restrict to Reader Groups section:
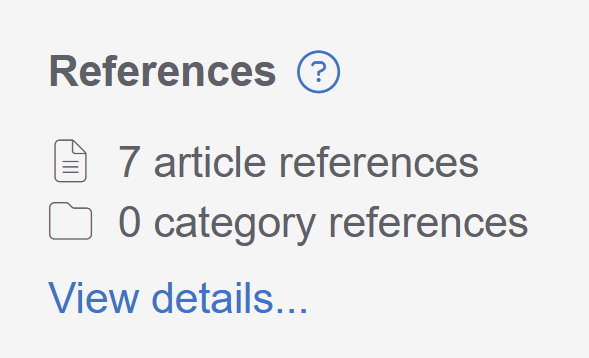 Sample snippet References section
Select View details... to open the References modal.
This modal displays a full list of the articles and custom content categories that reference this snippet. Articles include a badge that shows the article's publishing status:
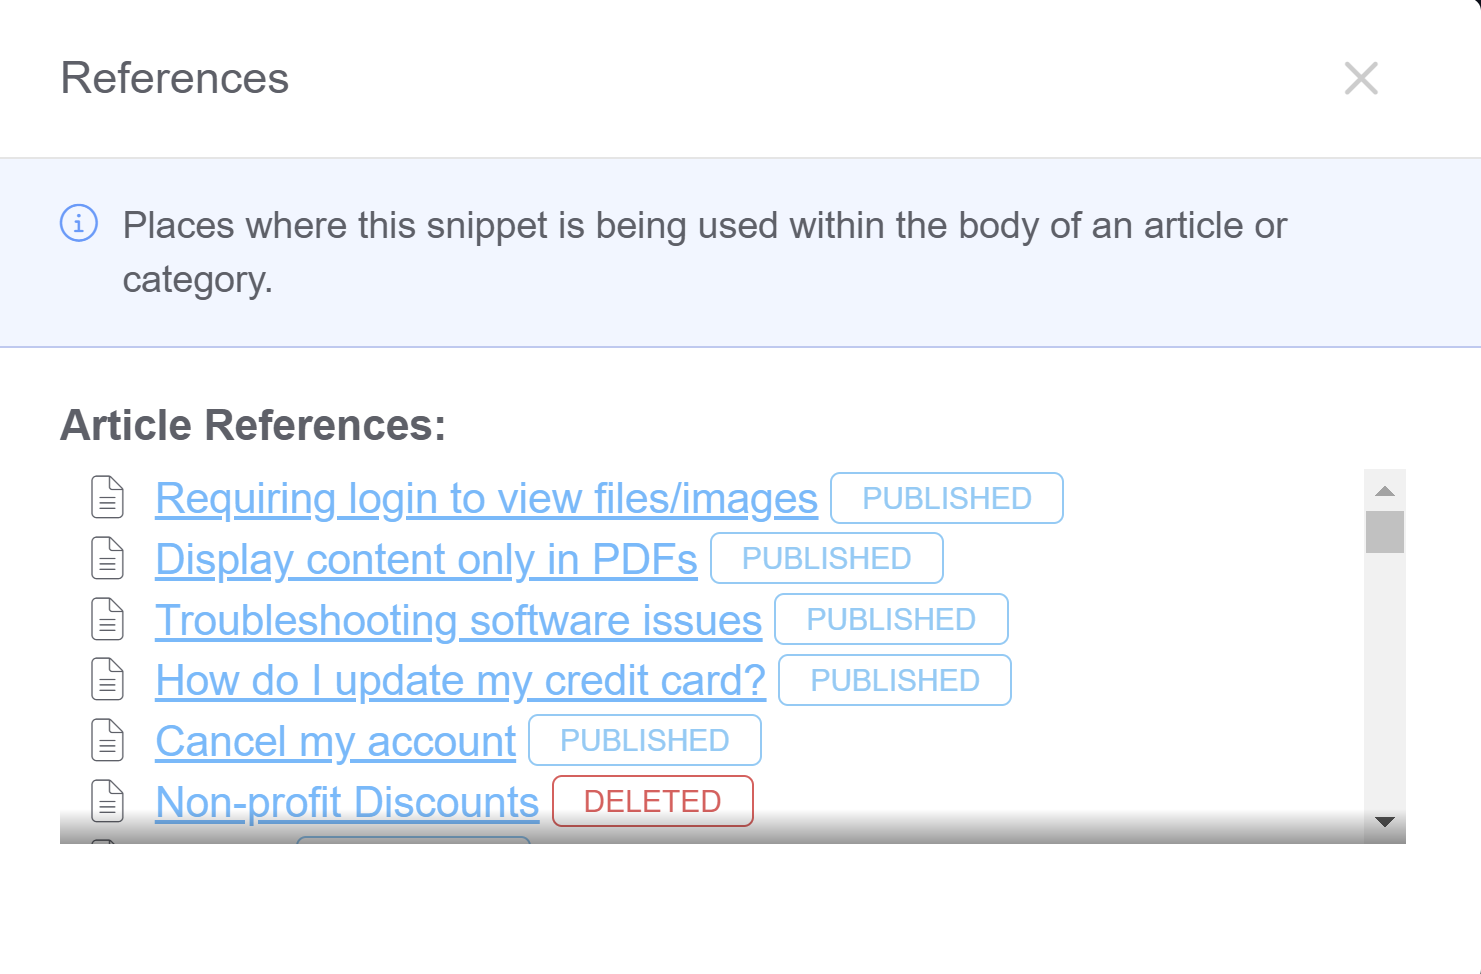 Sample References modal
The links open the article and custom content category for editing.
What if you want to test out some tweaks to an existing snippet? Instead of trying to copy the whole thing yourself, copy your existing snippet!
To copy an existing snippet:
- In the left navigation, select Snippets. The Snippets page opens.
- Find the snippet you want to use as a starting point. You may need to search.
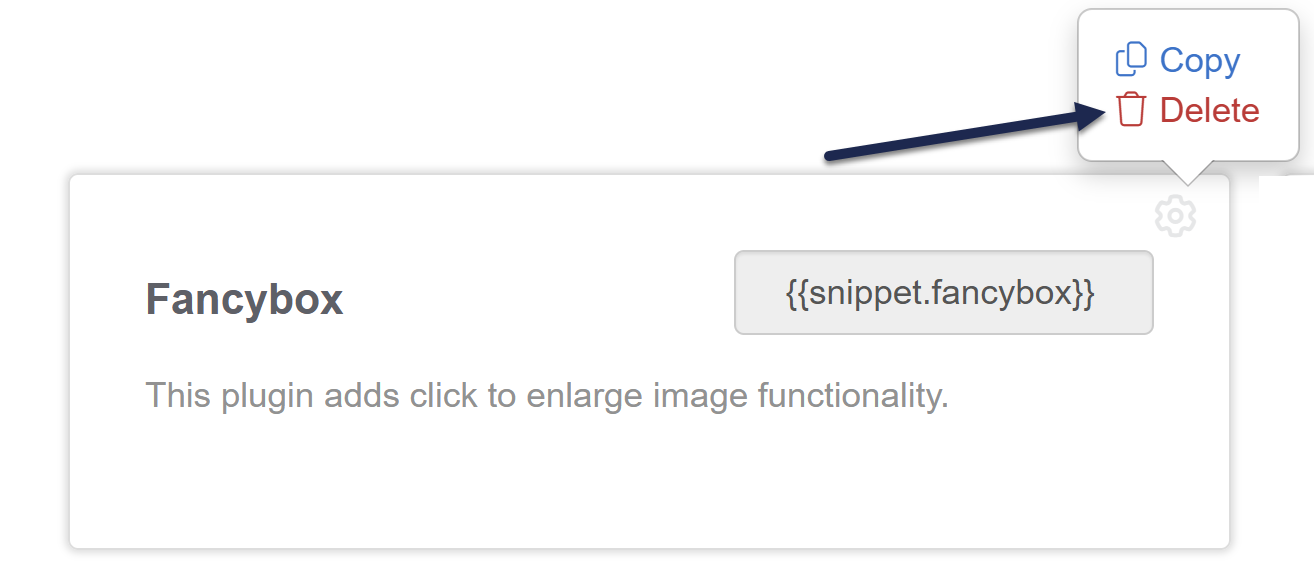
- Select the gear cog icon in the upper right of the snippet's card.
- Select Copy:
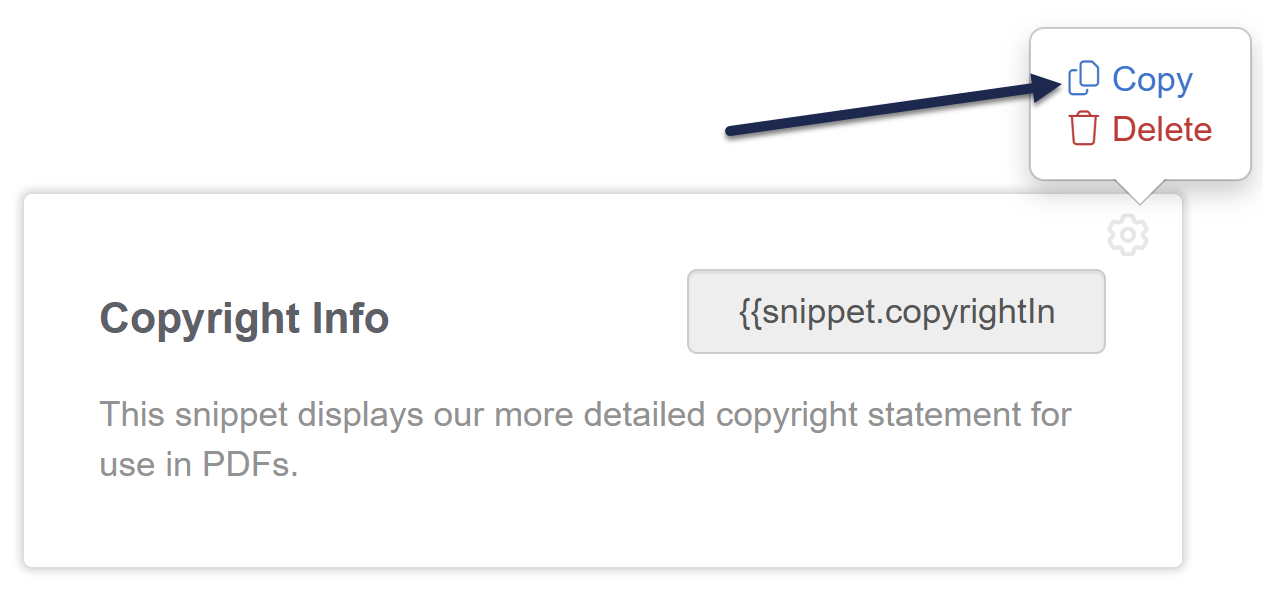 Select the gear cog icon > Copy.
 - A confirmation modal opens. Make sure the name of the snippet you're copying is the one you meant to select. Then select OK.

Snippets need to have unique unique merge code names, so we'll automatically add "Copy" to the new snippet, but you can edit the name and merge code to whatever makes sense to you.
To add a snippet to your content, you'll need to add its Merge Code Value--this is a value in double curly brackets, like {{snippet.mySample}}.
You can add snippets to:
- Articles: Use the editor control to Insert Snippet to quickly add snippets to articles. Refer to the instructions below.
- Categories: For custom content categories, use the editor control to Insert Snippet to quickly add snippets to articles. Refer to the instructions below.
- If you need to add a snippet to a category description or meta description, you'll need to manually copy the merge code value to enter it.
- Customize > Style (Custom HTML & CSS) > Customize HTML, CSS, and JS > Custom HTML. You'll need to manually copy the merge code value to enter it.
- Add snippets to Custom HTML > Body to display their content everywhere, like a footer or copyright statement.
- Add snippets to Custom HTML > Article to add them to all articles.
To add a snippet in the article or custom content category editor:
- Select the Insert Snippet control (two gear cogs icon) from the editor toolbar:
The Add Snippet modal opens.
 The Insert Snippet control in the editor
 - Enter part of the snippet's name; the window will autosuggest snippets as you type.
- Select the suggestion that matches it. Once you select a snippet, the Snippet Description and the first few lines of Snippet Content display so you can be sure you've selected the correct snippet. (No Description displays if the snippet you've entered doesn't have one.)
- Once you're sure you've selected the correct snippet, select Insert Snippet. This closes the modal and inserts the snippet's Merge Code into your article, like this:
Lorem ipsum dolor sit amet, duo utamur copiosae torquatos ad, sale virtute vituperata ne cum, id quo aliquando adolescens argumentum. {{snippet.copyrightInfo}} - Once you Save your changes, a reader will see the body of the snippet (if it's text) or the results of the code in it. For example, here's our copyright Info snippet:

Copyright © 2015 – 2026 Silly Moose, LLC. All rights reserved.
These documents are a static export of a dynamic knowledge base. For the most up-to-date information, head to our knowledge base.
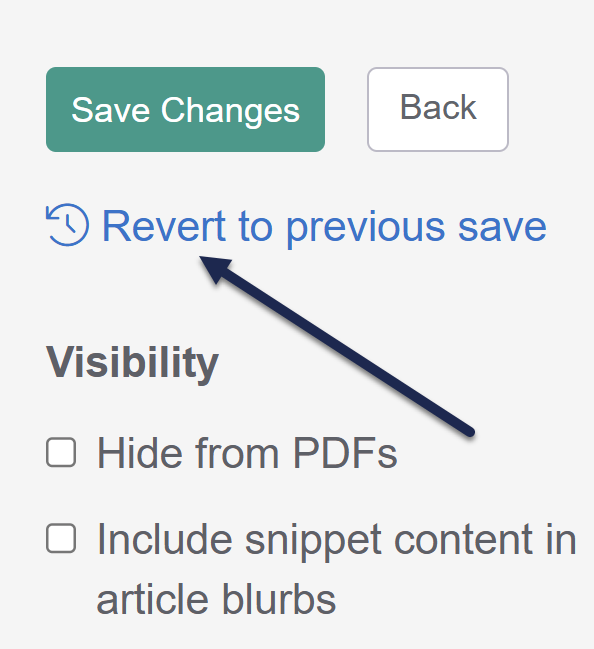
Snippets don't save a full revision history like articles do, but you do have the option to Revert to previous save. This feature tracks the last ten saves of the snippet so you can roll back changes to one of those previous saves. (It works similarly to our Undo changes to Settings > Style feature.)
Reverting to a previous save will roll back any changes to:
- Snippet Name
- Merge Code Name (and, by extension, the Merge Code Value)
- Snippet Description
- Snippet Content (whether in Code Editor or WYSIWYG Editor)
- Visibility settings (Hide from PDFs and Include snippet content in article blurbs)
- Any Restrict to Reader Groups selections
Authors with the default Editor or Writer role can revert changes to snippets. If you're using a custom role, you'll need to have the Snippets custom author role permission to Edit snippets.
To revert to a previous save:
- In the left navigation, select Snippets. The Snippets page opens.
- Open the snippet you'd like to recover changes on.
- In the right column, select Revert to previous save.
The Previous saves modal opens.Help, I don't have Revert to previous save!
If you don't have this link in the upper right, it means we don't have a record of any previous saves to revert to. This can happen if:- The snippet was created before 30 December 2023 and has been saved 0-1 times since then.
- The snippet was created after 30 December 2023 and has only been saved once after creation.
- In the Previous saves modal, select the previous save you'd like to revert to from the Previous Saves dropdown.
- We store up to ten recent saves for each snippet. These saves will be identified by the date/timestamp of the save, with the author who saved the changes in parentheses, for example: 01/09/2025 12:48:25 pm EST (Linus Owl).
- Once you're sure you've selected the Previous Save you want, select Revert.
- All of the snippet's details will be updated to the reverted save. You must Save the snippet for these changes to go live.

When you no longer use a snippet or you've replaced it with a more current one, delete the unused snippet to clean up your Snippets page and prevent your authors from using it moving forward.
When you delete a snippet, here's what happens:
- The snippet's removed completely from your Snippets page.
- The snippet won't appear in the Insert Snippet modal lookup.
- Your snippet merge code will still exist in any articles, categories, or Customize > Style > Custom HTML templates where you used it, but it won't render to anything in the live knowledge base. The merge code will be hidden from that view and replaced with no text or code.
Before you delete
Before you delete your snippet, we strongly recommend reviewing the snippet's references to review where it's been used.
Once you delete the snippet, the references are removed, so you won't have a quick punchdown list to check where it was used and remove the merge code.
Refer to Snippet references for more detailed instructions on viewing and working with snippet references.
Hard to recover
You can't recover a deleted snippet. Our support team can if you can provide the name or merge code, but it's much easier to check the references before you delete!
Delete your snippet
Once you've verified the snippet isn't used meaningfully anywhere, delete your snippet:
- In the left navigation, go to Snippets. The Snippets page opens.
- Browse or search to find the snippet you want to delete.
- In the snippet's card, select the gear cog icon in the upper right:
- A small modal opens with snippet options. Select Delete:
- A snippet delete confirmation modal opens. Review the name of the snippet displayed there to be sure it's the snippet you meant to delete.
- If it's correct, select OK to delete the snippet.

The snippet's deleted.
Remove snippet merge code
Don't panic if you deleted a snippet without making sure it had been removed from all your content. As an author, you can see the snippet merge code in the article editor, category editor, and Customize > Style, but in the live knowledge base, that snippet merge code is replaced with no text or code, so it's as if it doesn't exist.
To track down wherever the snippet was used:
- Use Tools > Find and replace to search for part or all of the snippet merge code. This should let you remove it from articles or custom content categories. Refer to Run find searches for more information; an exact match search for the merge code with or without the curly brackets should do the trick.
- Review Customize > Style (HTML & CSS) > Custom HTML and remove the snippet merge code wherever it appears.
- If the snippet was used in category descriptions, the best way to find it is using the KnowledgeOwl API to pull a list of active categories. Contact us if you'd like help pulling this list; our support owls would be happy to help if you can provide the snippet's merge code!
There are a number of great use cases for snippets:
- Footers or other statements that need to be used a lot of places, such as confidentiality statements.
- Brand names or terms that may change frequently: make a snippet for that term and only reference the snippet instead of the full term in all your documentation. When the term needs updating, update only the snippet and all your documentation is updated!
- Specialized sections for articles, such as Article Table of Contents.
- Code to handle unusual formatting or to provide a set of styles for individual articles that differs from your general knowledge base styles.
- Adding third-party scripts, embeds, or functionality.
Refer to Snippet best practices for more details on how to handle some of these use cases gracefully.
Snippets can be incredibly powerful. Here are some general best practices for making good use of them.
The most common use cases for snippets are:
- Code or CSS
- In-line text
- Reusable content
Below, we've captured some general guidance and best practices for each use case, as well as some examples to help guide you in your snippet journey. Contact us if you have questions about anything not detailed below!
Code or CSS
One of the best use cases for snippets is to add HTML, code, CSS, or any combination of those.
Why you might want to do this:
- The snippet editor will support complex HTML that the article editor strips out on-save.
- You control where snippets are added, so it's a great way to add functionality or styling to a very specific, manually-selected subset of your documentation.
- Snippet references are tracked, so you can see at a glance where this code or CSS has been used, which makes auditing much faster.
For straight HTML, you can use the Code Editor for total control, or use the WYSIWYG editor to construct the HTML you need.
Best practices for adding code or CSS to snippets:
- In the Snippet Content section, be sure that Code Editor is selected, not WYSIWYG editor.
- Don't ever toggle back to the WYSIWYG Editor view, as that toggle applies the same extra-vigilant HTML parsing that the article editor does.
- To add scripts, be sure you include opening and closing
<script>tags. - To add code from other systems for embeds, etc., copy whatever code they give you exactly and paste it in. You don't need to add
<script>tags if they aren't already in the embed. - To add CSS styles, be sure you include opening and closing
<style>tags.
Here are some examples of those best practices at work:
Script and style
Some snippets can contain both scripts that do things and a style section to do CSS, like the snippet created in Add search to the glossary page.
HTML and script
We have a snippet to create a Subscribe button for our custom content categories. This includes HTML to add the button merge code in a paragraph, as well as a script to insert the button where we want it.
Third-party script and style
Some third-party tools will provide specially-formatted HTML to add functionality. The regular article editor will generally strip these out because they aren't part of the HTML spec. Using a snippet for that special script is great--and you can still tuck a style section in for some extra styling of that element or others. For example, we embed our Zapier integration in our documentation. Zapier provided us with a pre-built script for this, but we also use some CSS to hide the article title. So we use Zapier's code and also include a style section to add our custom CSS.
In-line text
To use a snippet to add in-line text (such as a text variable you want to use various places), follow these general best practices:
- In the Snippet Content section, be sure that Code Editor is selected, not WYSIWYG editor.
- Add your in-line text directly into that Code Editor, with no paragraph or other tags around it.
- Don't ever toggle back to the WYSIWYG Editor view, as that toggle will apply some auto-formatting like the article editor, and your text will get wrapped in a paragraph.
Example
For example, we have a set limit on the size of files you can upload to KnowledgeOwl. Since that limit might change at some point in the future, we use a snippet to provide the text, so if we update it, we only have to update the snippet and every article referencing it will update too. The Snippet Content for this is in Code Editor and just entered directly with no HTML:

Reusable content
The last major use case for snippets is that they can contain content you might want to reuse. Snippets can have reader group restrictions different from the article where they're embedded, so this can sometimes be a way to show content to some folks but not others.
Best practices for using snippets for reusable content include:
- Be sure a topic article wouldn't be a better choice.
- Make sure it's content you don't expect to turn up in search; snippet content is NOT indexed for search (topic article content is, though).
- We recommend using the WYSIWYG Editor for the Snippet Content to be sure the content looks and is laid out exactly how you want it.
The best use cases for this include things like:
- Callouts or alerts that you want to standardize/reuse and don't need indexed for search
- Copyright statements or other disclaimers
Because snippets give you so much flexibility, we strongly encourage you to incorporate them into:
- Your content auditing/review processes (Snippet references are a key feature for this process!)
- Your style guide
For style guide or snippet creation guidance, we've developed a checklist template for you to adapt.
Use this checklist either retroactively to clean up existing snippets or proactively as the basis for a snippet creation or review guide:
Snippet standardization checklist template
Use these steps to review existing snippets or create new snippets:
- Make sure all snippet names begin with the same case.
- The Snippets page sorts alphabetically AND IS CASE SENSITIVE. All snippets’ names beginning with an uppercase letter are sorted first, then all snippets’ names beginning with a lowercase letter. It’s a gift to your future self and other authors to use consistent case.
- Apply any additional naming conventions that make sense for you.
- For example, we begin all snippets that are designed specifically for use in our release notes with “Release Notes” in the name.
- Make sure your snippet Description describes what the snippet does.
- This Description is previewed in the initial Snippets display and is displayed in the Add Snippet modal to help authors determine if they've selected the correct snippet.
- Make sure your snippet Description describes where the snippet should be used.
- This provides great context for other authors inserting the snippet and can streamline future auditing. For example: "Use in individual articles/custom content categories." or "Use in category descriptions." or "Use only in Style > Custom HTML > Article."
- Make sure any code in the Snippet Content editor is commented.
- Add comments for general code functions for troubleshooting/future research around why a snippet’s used.
- If it’s a third-party integration, add a comment about where/how you got the code. This can make it easier for an author to upgrade to a new version at a future date.
-
For snippets containing <style> sections, comment the CSS to describe what it’s doing.
- Create a snippet style guide/checklist or update the existing one with any changes.