
A file label is a word or short phrase that describes or categorizes a file. Files can have as many file labels as you like. They can be a great way to add organization to your Files page.
File labels are only displayed in the Files page. They're only viewable by people with app.knowledgeowl.com access to one of these two locations.
The easiest way to think about file labels is as filters for your files. These filters can be used in the Files page to make it easier to find files you need quickly:

Common uses for file labels include:
- The relevant feature, functionality, geographic region, policy, procedure, etc. for a given file. For example, we have a
brand assetlabel so we can find all of our icons, logos, and font files. We also have alinuslabel so we can quickly find all the images of Linus we store in our knowledge base. - The file's owner. This can be an individual, team, department, or so on.
- Other information relevant for file audits, such as fiscal year.
You can create file labels in two ways:
- In Files > File Labels using the Create link.
- In Files while editing an individual, enter new File labels and hit Enter or tab.
Authors with the default Editor or Writer role can create file labels. If you're using a custom role, you'll need to have the Files custom author role permission to Create file labels.
Create labels in Files > File Labels
Creating labels in the File Labels tab can be great if you:
- Need to create a lot of file labels at once.
- Want to be able to see file labels that already exist while you create file labels.
To do so:
- In the left navigation, select Files. The Files page opens.
- Select the File Labels tab.
- Select Create. The Create Label modal opens.
- Enter the Label name you'd like to use.
- Select Create Label. Your Files page updates to include the label and you can begin using it immediately.
Create labels while editing Files
You can also create labels on the fly while you're editing an individual file in the Files tab.
To do so:
- In the left navigation, select Files. The Files page opens.
- Select the file you'd like to edit.
- Select Edit near the top of the page or the gear cog icon in the file metadata modal at the bottom of the page:
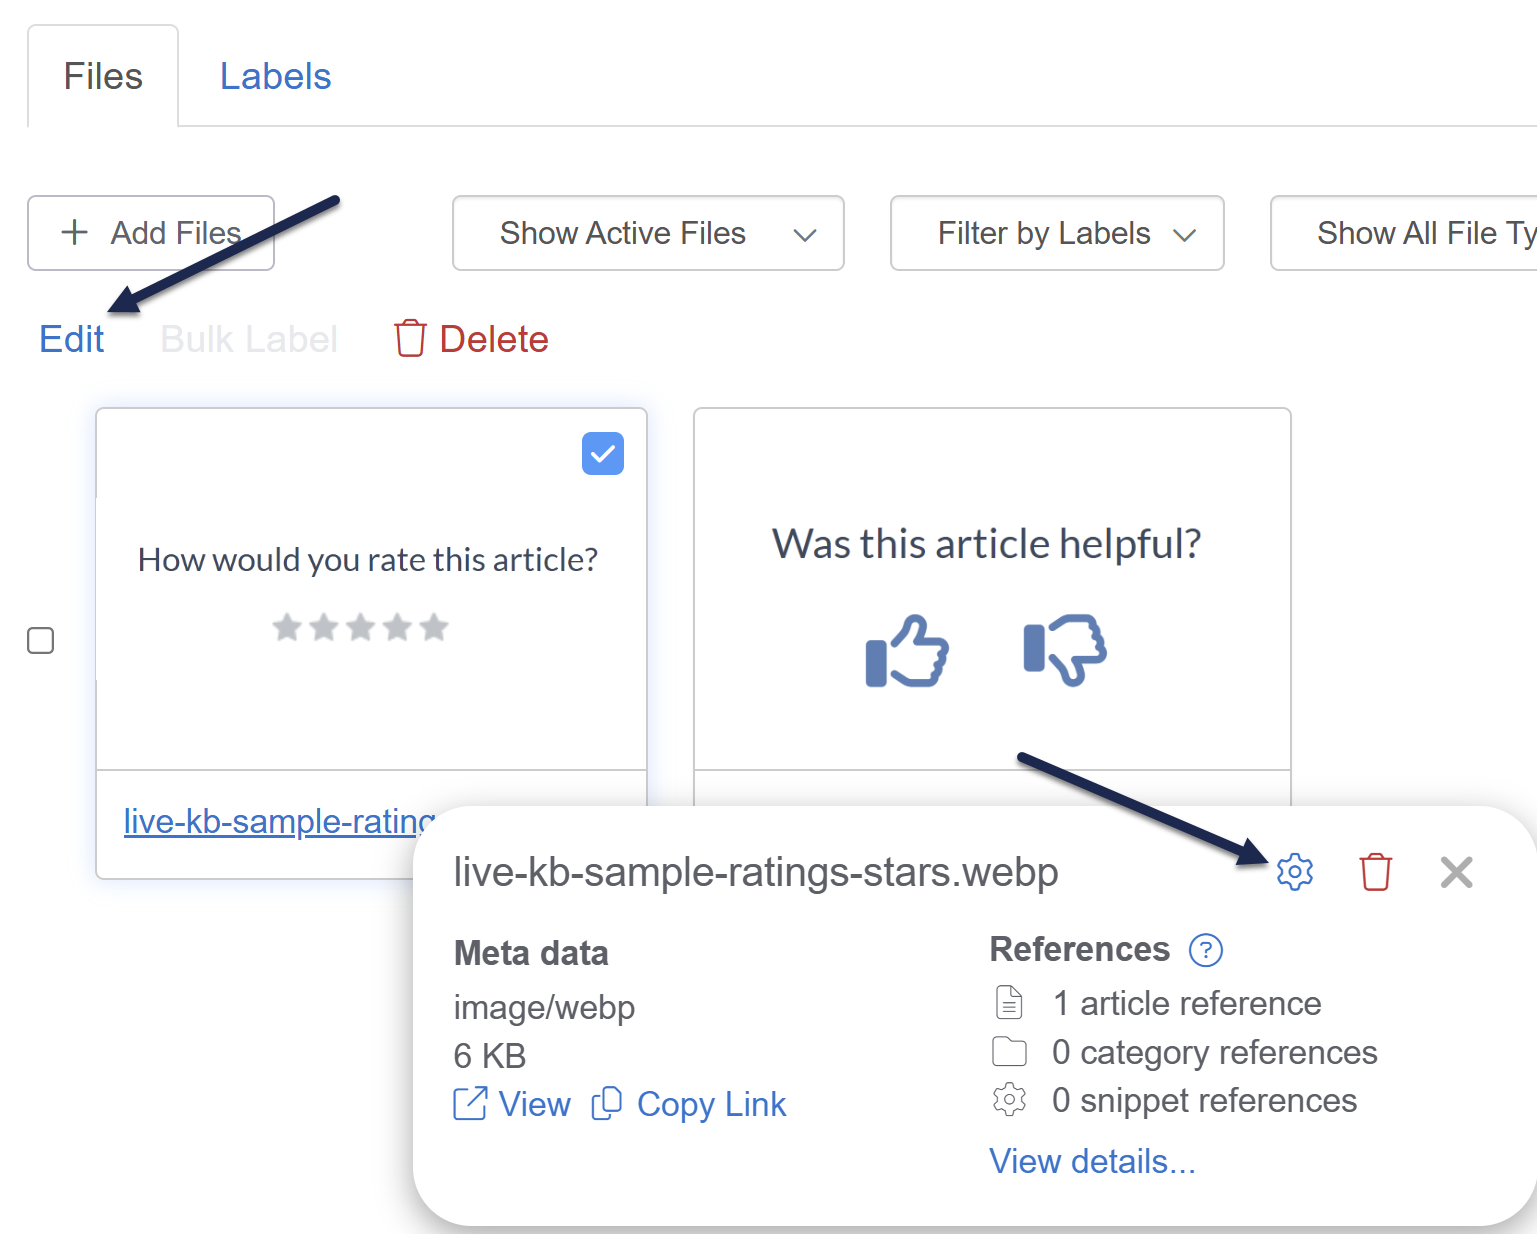 Two ways to open the Edit File modal
 - The Edit File modal opens.
- Enter your new label in the File labels field and hit Enter or Tab.
- KnowledgeOwl creates the label and adds it to this file.
- Be sure to Save your file once you're done.

Once a file label has been created, you can edit it to update the name.
Authors with the default Editor or Writer role can create article versions. If you're using a custom role, you'll need to have the Files custom author role permission to Edit file labels.
To update the label text:
- Select Files from the left navigation. The Files page opens to the Files tab.
- Open the Labels tab.
- Select the file label you'd like to edit. (If you have a lot of labels, you may need to search to find the label you want.)
- Once you've select a label, select Edit.
The Edit Label modal opens. - Update the Label name to the text you'd like to use, then select Edit Label to save your changes. Refer to Merge labels for information on using the Merge into different label option.

All files with this label will now display the updated label text.
Once a file label has been created, you can only delete it from Files > Labels. This removes the file label from all files where it's been used and deletes it from the Labels list.
Authors with the default Editor or Writer role can delete file labels. If you're using a custom role, you'll need to have the Files custom author role permission to Delete file labels.
To delete a label:
- In the left navigation, select Files. The Files page opens.
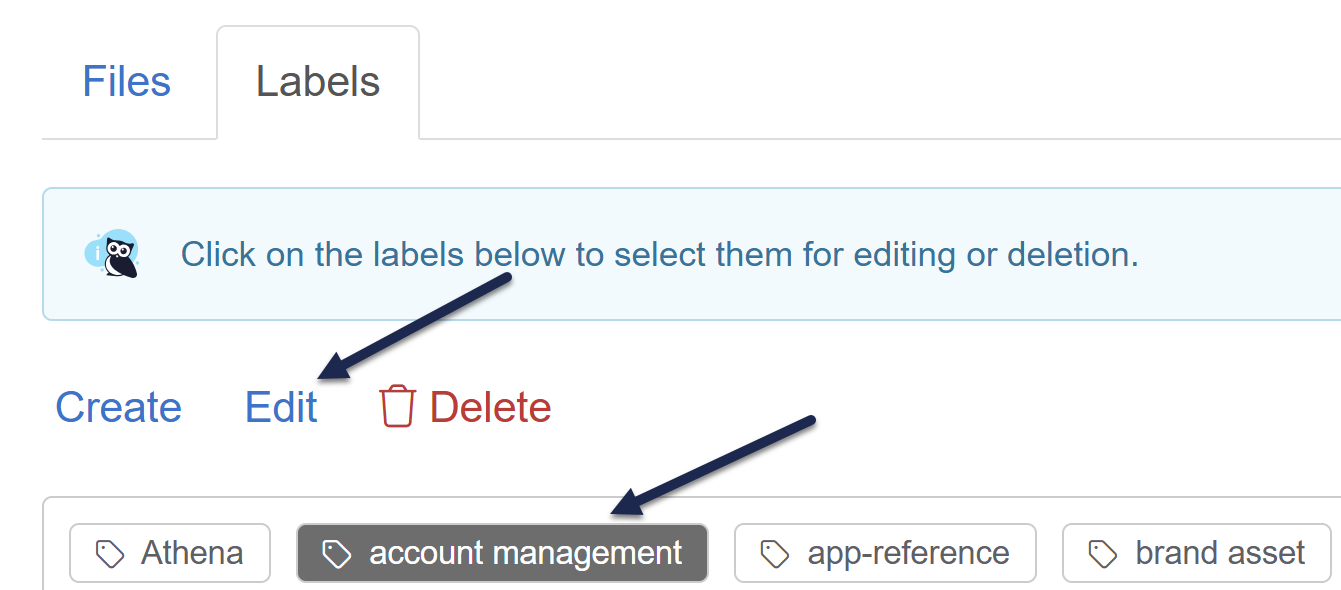
- Select the Labels tab.
- Select the file label or labels you'd like to delete. If you have a lot of labels, you may need to search to find the labels you want.
- Once you've selected one or more labels, the Delete option activates. Select it. The Delete Labels modal opens.
- Confirm the labels listed in the modal are the labels you meant to delete, then select OK.
- All the labels you selected will be deleted and removed from any files that referenced them.
Creating a new label is not always the same thing as adding an existing label to a file.
Authors with the default Editor or Writer role can add existing labels to files and create new labels. If you're using a custom role, you'll need to have the Files custom author role permission to Edit files. If you also have the permission to Add new labels, you can start typing and then create a new label or select an existing. If you only have the Edit files permission, you can only select from existing labels.
To add an existing label to a file:
- In the left navigation, select Files. The Files page opens to the Files tab.
- Select the file you'd like to add the label to.
- In the file detail modal that opens at the bottom of the page, select the gear cog icon (or select Edit near the top of the page):
The Edit file modal opens. - In the modal in the File labels field, start entering the name of the label. As you type, the modal displays a list of autosuggested matching labels. Use the arrow keys and Enter or use your mouse to select the label you'd like to add:
- Once you've finished adding labels, be sure to Save the file.
Removing a label from a file simply removes it from the file--it doesn't delete the label from your knowledge base. If you'd like to delete a label from your knowledge base completely, refer to Delete a label.
Authors with the default Editor or Writer role can remove labels from files. If you're using a custom role, you'll need to have the Files custom author role permission to Edit files.
To remove a label from a file:
- In the left navigation, select Files. The Files page opens to the Files tab.
- Select the file whose label you'd like to edit.
- Select the Edit link near the top of the page or the gear cog icon in the file metadata modal at the bottom of the page:
- The Edit File modal opens.
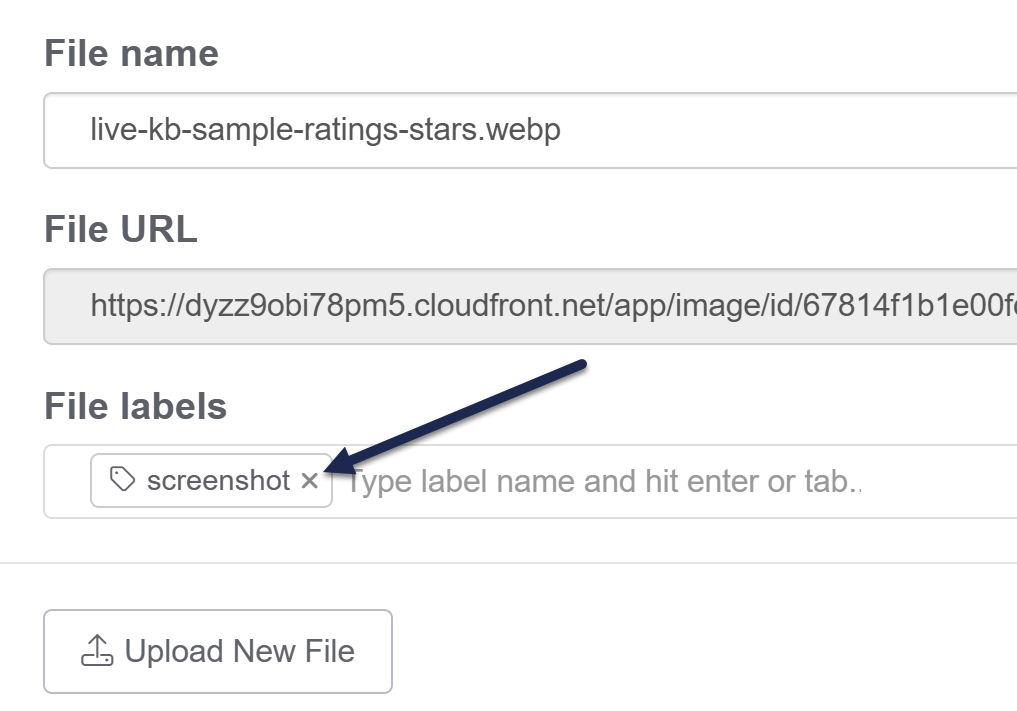
- In the File Labels section, select the x in the card for the label you'd like to remove.
 Select the x on the label you'd like to remove
- Be sure to Save the file.

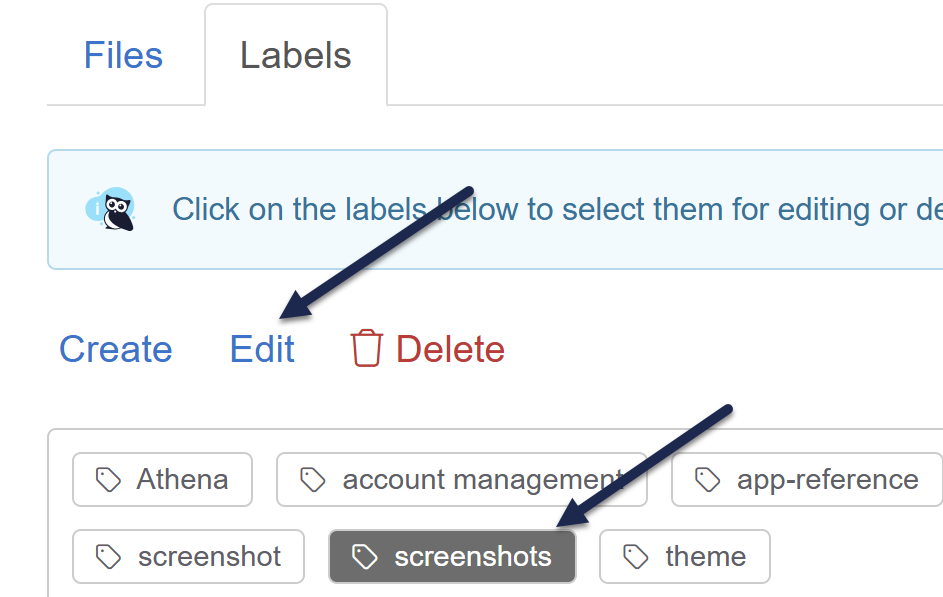
Like your product, company, and policies, file labels might change over time. And without clear style guidelines (and even sometimes with them!), different authors might create differently-structured labels. Linus has faced this problem several times in our documentation, for example, some files were labeled with screenshot and some were labeled with screenshots. What's an owl to do?
Authors with the default Editor or Writer role can merge file labels. If you're using a custom role, you'll need to have the Files custom author role permissions to Edit file labels and Delete file labels.
Merging allows you to replace one label with the other and delete the now unneeded label. It's fast and much easier than auditing files through a Files page label filter. Refer to What does merging labels do? for a more detailed explanation of what happens behind the scenes during a merge.
To merge labels:
- In the left navigation, select Files. The Files page opens.
- Select the Labels tab.
- Select the label you'd like to merge into another label. This will be the label that gets removed.
- With the label selected, Edit and Delete options activate. Select the Edit link.
 Select the label you'd like to merge and then select Edit
The Edit Label modal opens. - Select the Merge into different label option. If you don't see this option, you don't have the appropriate permissions to merge labels. Check with your knowledge base administrator.
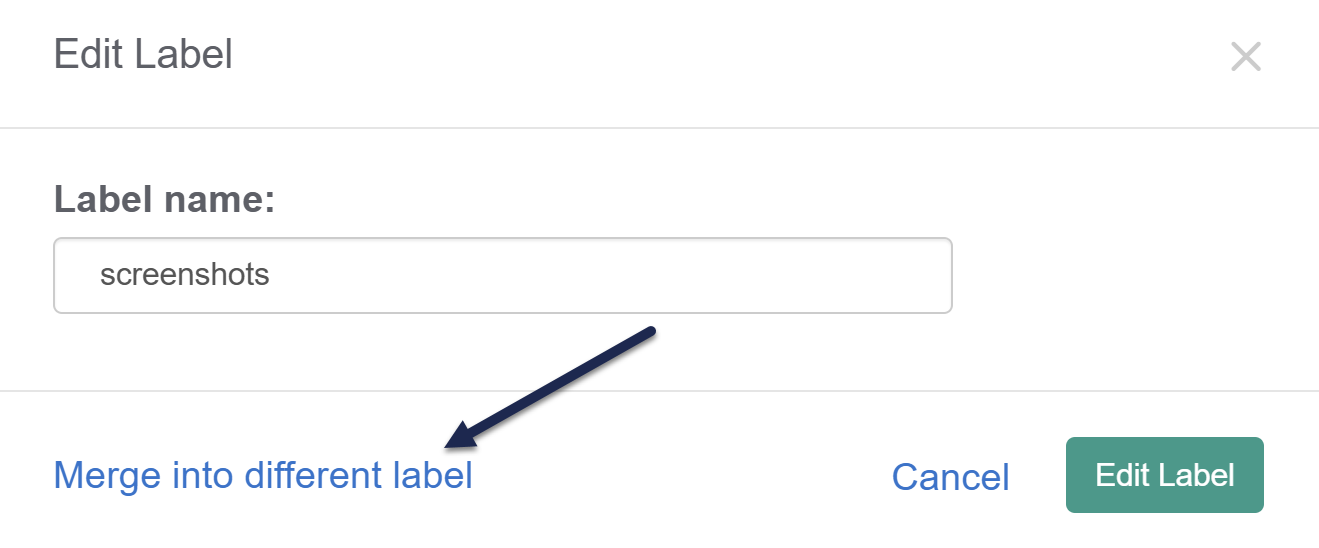 Select Merge into different label to begin the merge process
The modal changes to the Merge Label modal. - Start entering the label you'd like to replace this label with in the Existing label to merge with field. The field autosuggests labels as you enter letters. Refer to What does merging labels do? for more explanation of how the merge works.
Look before you leap
Label merges cannot be undone. Be sure you've selected the right labels! - Once you're sure you've selected the right labels, select OK to complete the merge.


In each label merge, there are two labels:
- The Current label: The label you began the merge from.
- The Existing label to merge with: The label that will remain when the merge is complete.
Merging will:
- Add the Existing label to merge with to all files that have the Current label
- Remove the Current label from all files
- Delete the Current label from your knowledge base
Let's assume I'm using this scenario in my merge:
- Current label:
screenshots. The label I began the edit and merge with. - Existing label to merge with:
screenshot
When I complete the merge:
- The
screenshotslabel won't exist anymore. - All articles that had
screenshotsas a label will have thescreenshotlabel. - Articles that had both labels will only have the
screenshotlabel. screenshotswill no longer appear in the Files Filter by label dropdown, butscreenshotwill.
Once you have added file labels to your files, those file labels can be used to filter your Files page. To do so:
- In the left navigation, select Files. The Files page opens.
- Select the Filter by Labels dropdown.
- Select the label(s) you'd like to use as filters. If you select more than one label, only files with all the selected labels are displayed.
 Sample Filter by Labels selection.
 - Once you select a label, the Files display updates to show only the files with that label.
- To remove a label from your filter, select it again to deselect it or reload the page.
You can combine the labels filter with the Show Active/Deleted Files and Show File Type filters, too.