
To create a new article:
- Navigate to the category where you want to create the article.
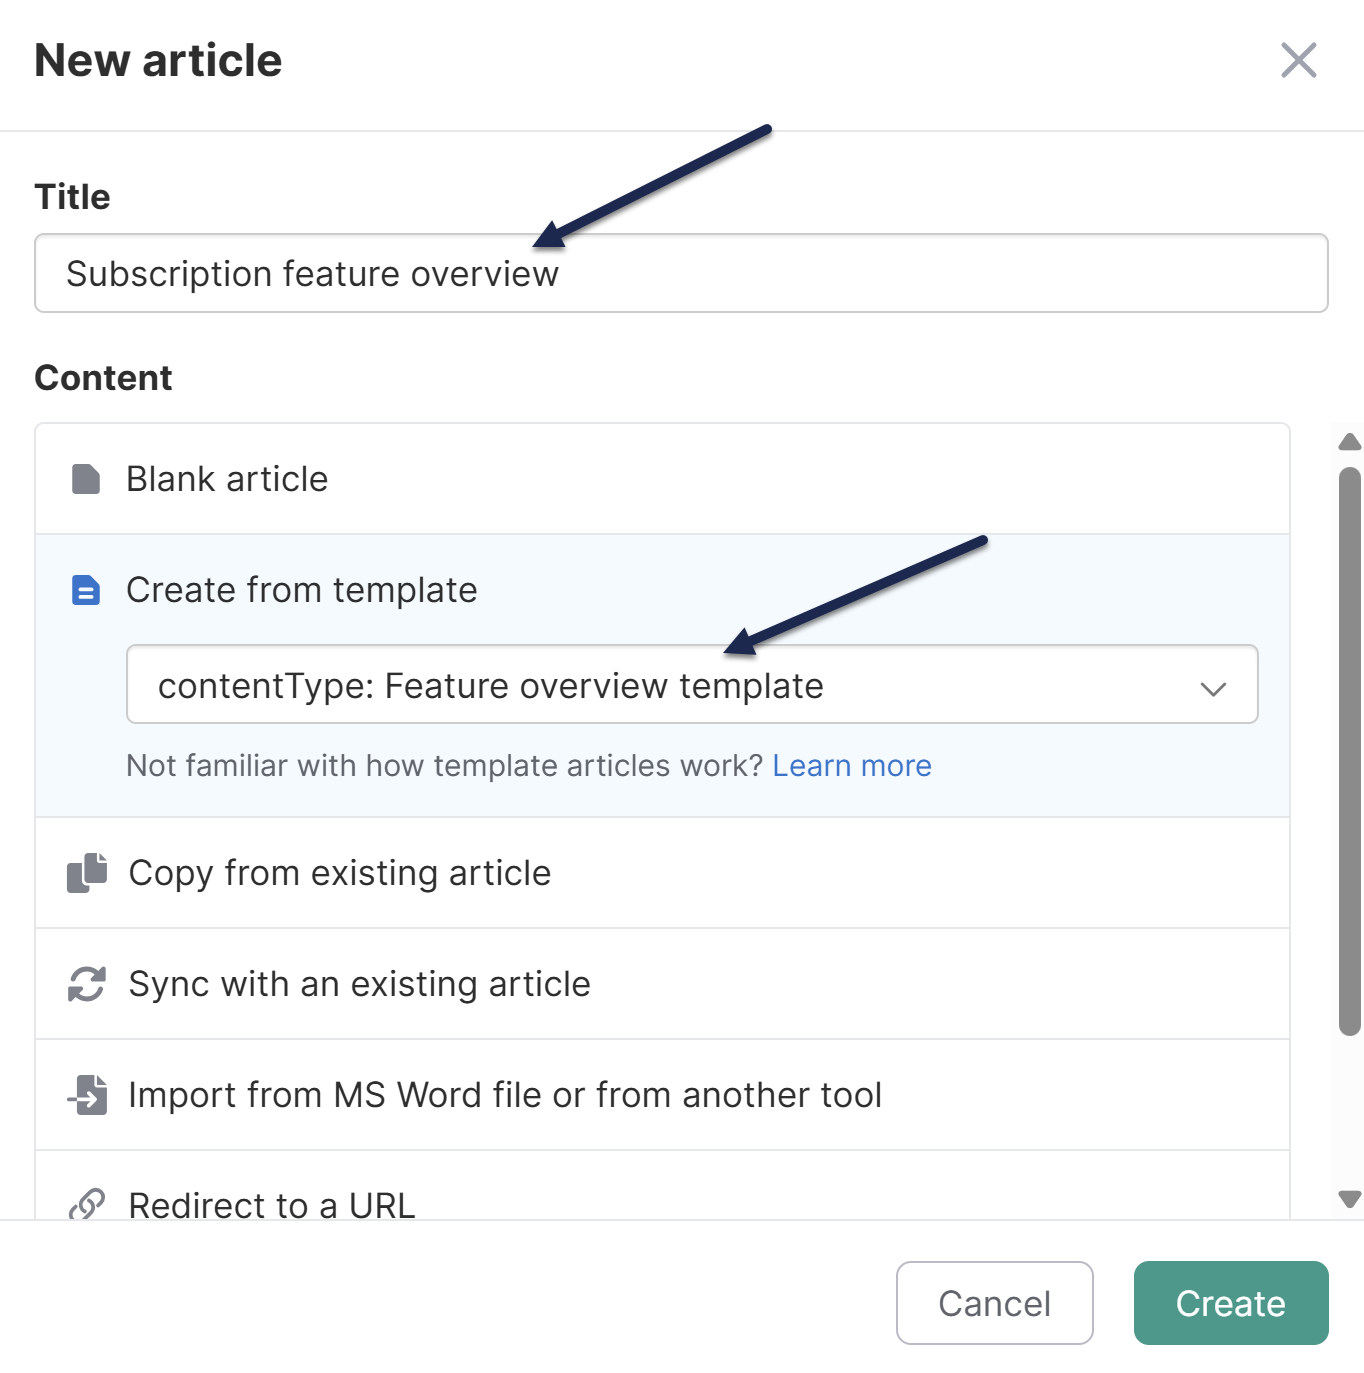
- Select + Add, then select Article. The New article modal opens.
- Enter a Title for your article. You can always edit this later!
- Select how you want to create the article. Some of these trigger further steps. The options are:
- Blank article: Use this option to start with a completely empty article you can add whatever you want to.
- Create from template: Use this option to create an article by copying a template article. When you select this option, you'll also Select a Template you want to copy. Refer to templates for more information. There is no ongoing link between the template and the new article, so updates to the template do not affect the article.
- Copy from existing article: Use this option to create your new article by copying an existing article. When you select this option, you'll also select the knowledge base and article you want to copy.
- Sync with an existing article: Use this option to create your new article as a synced copy of an existing article. When you select this option, you'll also select the knowledge base and article you want to sync from. Refer to Share articles between categories and knowledge bases for more information on working with synced content.
- Import from MS Word file or from another tool: Use this option to import content from other supported systems. Refer to Import content for more information.
- Redirect to a URL: Use this option to create a URL redirect article.
- Generate content with Owl Intelligence: Use this option to Generate article content with AI.
- Once you've made your choices, select Create to create the article and open the editor.
Select this option during article creation to begin with a blank article.
Refer to the Article creation guide for step-by-step instructions.
You can mark specific articles as templates in the Reuse Flags section of the old article editor or in the Other section of the new article editor. When you create a new article from a template, it creates a one-off copy of the template.
There is no ongoing link between the template and the new article, so updates to the template do not affect the article.
The new article will include this information from the template article:
- The complete contents of the article body (whatever's in the editor)
- Any author notes visible in the editor
Create a new article from template
To create a new article using an existing template:
- Enter a Title for your new article in the New article modal.
- In the Content section, select Create from template.
- Select the template you'd like to use as a starting point in the Select a Template dropdown.
- Select Create.

The article editor opens with the content of the template copied into it. This is a one-off copy. Make the edits you'd like to the article.
Refer to the Article creation guide for more details.
No templates yet?
For more information on turning existing articles into templates, refer to Create a template.
This is a sample template for providing style and structure guidance. Refer to Create from template for information on creating articles using templates. You could create a template article with a setup similar to this sample, in order to provide guidance to your writers.
When thinking about what to include in your template, consider using a style guide.
Heading 2: Major topic
Body paragraph. Anything not in a list should be formatted like this. References to specific menu/navigation options should be capitalized, e.g.: Click on Settings > Style. In general, avoid using italics. Use bold only when it feels necessary.
Heading 3: Subheading for Heading 2
Heading 4: You should really consider restructuring your content and breaking it up
Numbered Lists:
- Always use numbered lists for step-by-step instructions.
- Step 1. Each step should be a single, clear step in the process.
- Screenshots should be included in the list item so that they are properly indented. Include arrows or callouts using branded color palette. Use rounded square for shape call-outs.

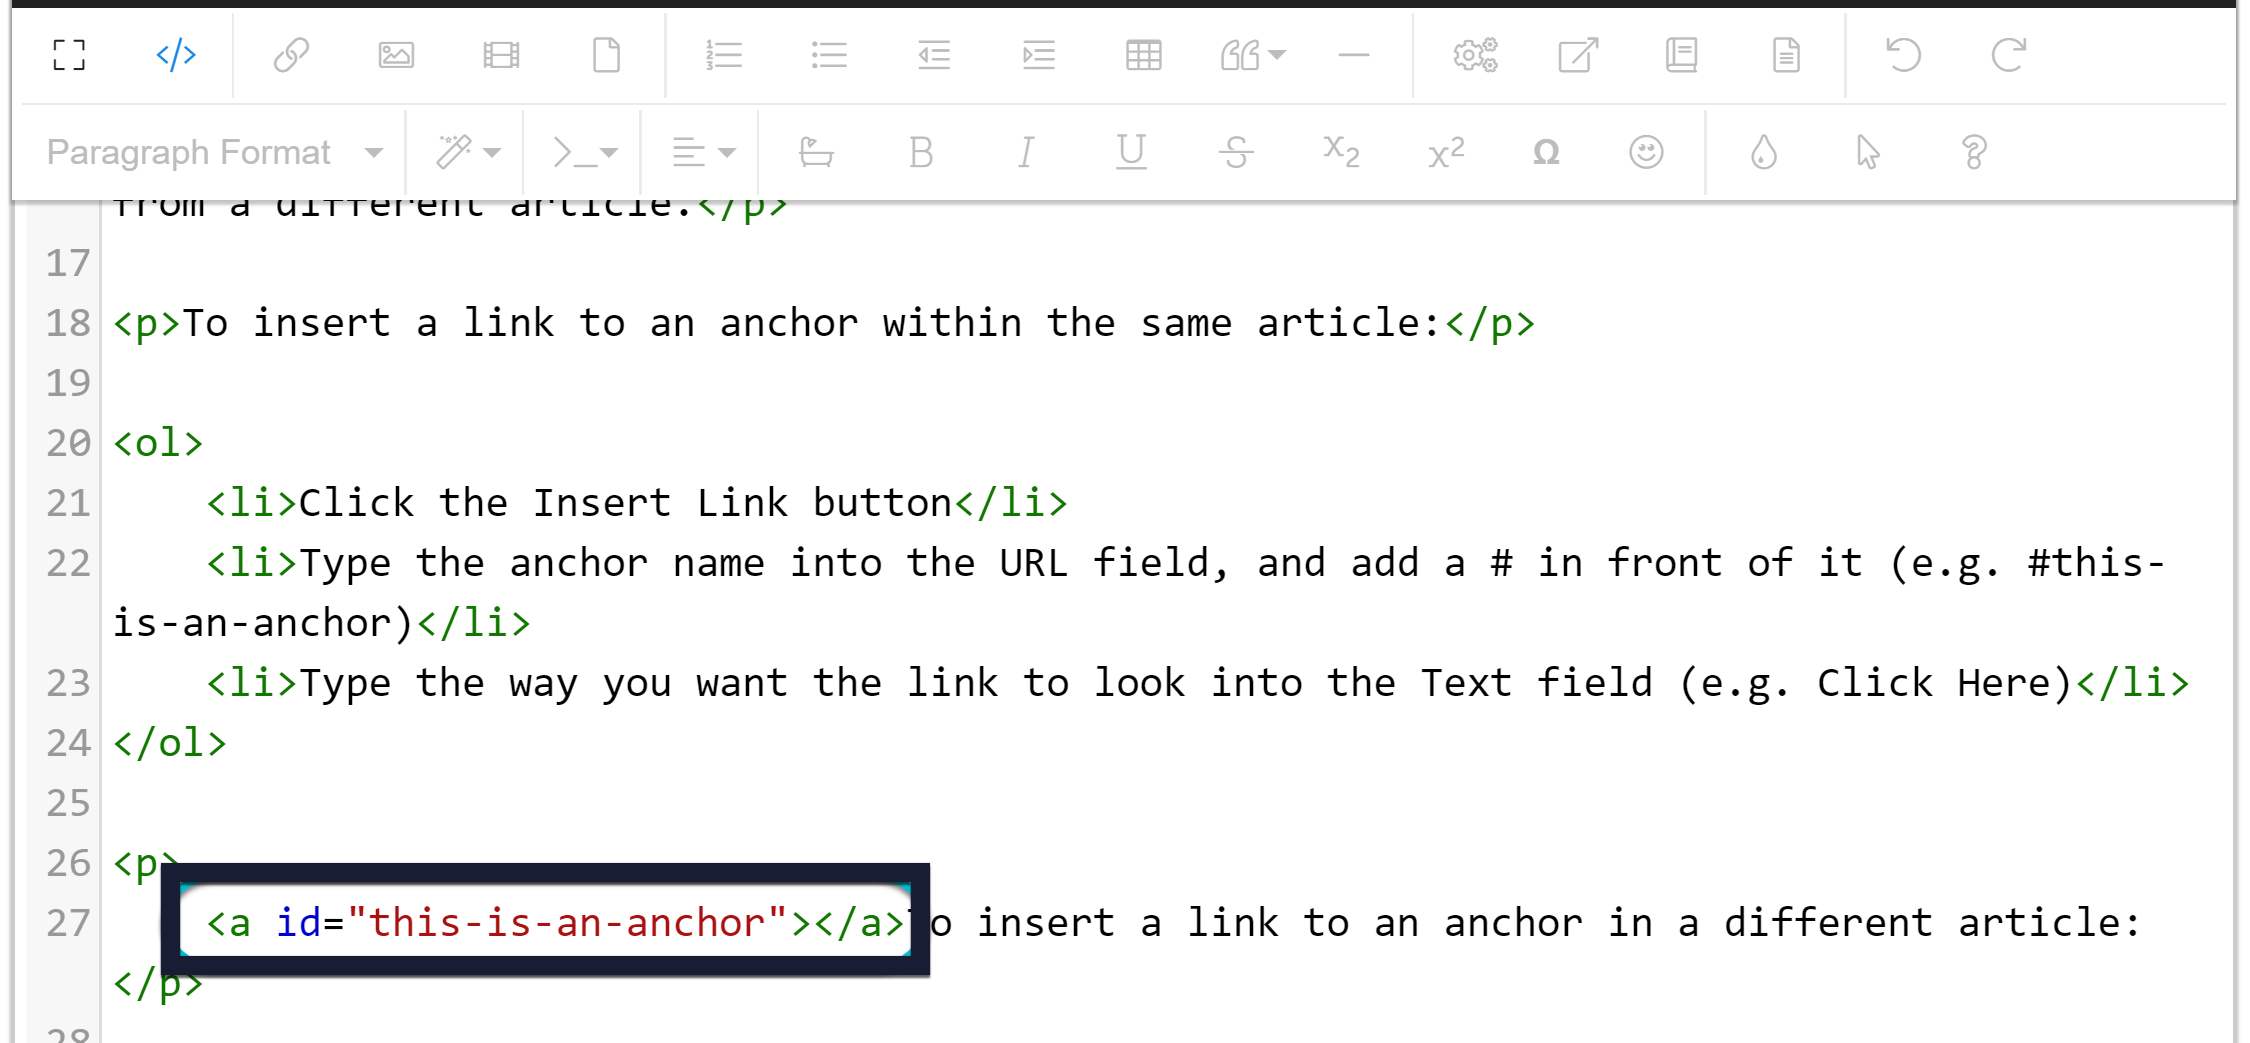
- Sample code should be included in the list item so that it is properly indented:
<a href="#">Here's some sample code in just preformatted style</a>

Bullet point lists:
- Always use bullet point lists for lists rather than instructions
- Think carefully about list length. Longer lists are harder to process; it's recommended to keep bulleted lists to about seven items. Read more about making your content brain friendly.
- Good use of bold: when you have a bullet point list with items that also have descriptions
- Keep your list consistent; list items should either all end in periods or should have no periods
- Screenshots relevant to the list should be within the bulleted list item:

Pro Tip: Use Alert Success for things that could be classified as tips or "Pro Tips". These look better if they start with a bolded phrase.
Note: Use Alert Info for useful notes and asides. These aren't tips; they're a note or point that you want to call attention to.
Warning: Use Alert Danger for things that are destructive, permanent, or otherwise dangerous. If making a change or not following this step is going to cause disaster and chaos, tell people!
You can copy an existing article from any of your knowledge bases to use as a starting point for your article. Copying an article does not create a link between the two articles. Any changes you make in the new article will not affect the old article.
Refer to the Article creation guide for step-by-step instructions.
Have an article that might fit in two different categories? Instead of creating those two articles independently, create a Shared content article. The content (body) of the article as well as all versions stay in sync across all shared articles.
Each article can have its own title, restrictions, and callouts. Body edits to any one of the synced articles will update all the others. This is a great way to have the same content appear in multiple categories or even in multiple knowledge bases.
To create a new article synced to an existing article:
- On the Articles page, navigate to the location where you wish to add the article.
- Select + Add, then select Article.
- Select Sync with an existing article. Two additional fields appear.
- Use the dropdown to select the knowledge base where the article you want to sync from is located. If you only have one knowledge base, ignore this dropdown.
- Next, in the Search for an article by its title field, start typing part of the article's name. This is an autosuggest search. As you type, a list of articles matching your type appear.
- Once the article you wish to sync content with appears, select it.
- This will copy the article Title field at the top, based on the synced article's title. You can change this if you wish.
- Once you're done selecting the article and editing the title (if needed), select Create to create the synced article. Your new synced article opens in the article editor in Draft status so you can make any other adjustments. Remember that any changes to the article body will be updated in all shared content articles.
You can always tell if an article is synced to another article by checking for banners in the article editor. Use the links in the banner to quickly navigate to the synced article or knowledge base where it's located.
Refer to Synced articles for more information on how these article types work and how to work with them.
Stuck with writer's block? Use AI to generate a rough draft or outline for a new article!
Prerequisite
An account administrator must Set up Owl Intelligence and your author role must have permission before you can use this feature.
How it works
We'll send a very specific prompt based on the information you provide to our LLM using Amazon Bedrock. No other information or content from your knowledge base is sent, and your data is never stored or used for training.
Refer to our Owl Intelligence feature overview for more information.
Generate an article
To use this method for article creation:
- On the Articles page, navigate to the location where you wish to add the article.
- Select + Add, then select Article.
- Select Generate content with Owl Intelligence. Additional information about this account generation option displays.
- Select Open AI authoring tools. The modal updates to display the Generate article content using AI options.
- Choose whether you want to create a First draft or an Outline in the What would you like to create? section.
- First draft generates full, detailed content.
- Outline generates sections and headings along with placeholder text.
- First draft generates full, detailed content.
- Enter or update the Article title.
- Finish this sentence "Write an article about..." to enter the subject you want the article to be about.
- Enter up to 500 characters.
- Optional: Check the Apply style guide checkbox if you want the generated content to follow your style guide. This option is only relevant if you have created a style guide in KB settings > Style guide.
- Choose the type of article you'd like to generate from the What type of article is this? dropdown. Refer to Article types below for guidance on which type to select.
- Select your intended audience for the article from the Who is this article for? dropdown.
- Select the tone of voice you want the article written in from the What tone of voice do you want the article written in? dropdown.
- Once you've made your selections, select Generate Content.
- The modal updates to show you the content as AI generates it so you can preview what it looks like. Here's what ours looks like after selecting these options:
- What would you like to create?:
First draft - Article title:
Mad Hatter's riddle - Finish this sentence: "Write an article about...":
why is a raven is like a writing desk? - What type of article is this?:
Explanation - Who is this for?:
General public / end users - What tone of voice do you want the article written in?: Professional and conciseIf you realize you need to make changes to how the output is generated, select Edit prompt to refine your prompt.
 Sample generated article content preview
Once you're happy with the results, select Create article.
- What would you like to create?:
- The article editor opens with the generated content.

Writer's block?
Use Owl Intelligence to generate templates or outlines or use some of our team's favorite amusing prompts from Article title prompts for Owl Intelligence.
Article types
Owl Intelligence will generate one of eight different article types. Here's a bit more information on the format Owl Intelligence will generate for each type:
- How-to guide: A practical, step-by-step guide to completing a task. Begins with a short summary followed by a list of clear steps.
- Explanation: A conceptual article providing background, rationale, or a deep dive into a topic.
- Reference: A structured, factual description of options, fields, or features. Information should be presented in a consistent format like tables and bullet points.
- Tutorial: A beginner-friendly, end-to-end walkthrough for learning something new. Begins with context and prerequisites, details the walkthrough, and then provides next steps.
- Policy: A formal rule or guideline using clear, declarative statements.
- Procedure: A standardized, internal process described in clear, ordered, numbered steps.
- FAQ: Generates a Frequently Asked Questions (FAQ) format with clear questions and comprehensive answers.
- KCS knowledge article: A real-world, question-driven article that documents an issue, environment, and resolution. Should Include sections for Issue, Environment, Resolution, and Cause (if known), similar to some of the standard KCS knowledge article templates.
I'm out of Owl Intelligence credits
Each KnowledgeOwl plan comes with a set amount of Owl Intelligence credits each month. If you're low or totally out of Owl Intelligence credits, you can contact our support team to buy extra credits without having to upgrade your plan. Refer to How can I buy extra AI credits? for more information.
What if the content you'd like to include in your knowledge base isn't IN your knowledge base? Maybe you'd like to reference the page of another site or a press packet your PR department has put together.
You can set up both categories and articles as URL redirects. For articles, this means you can administer the article as an article (restrict viewing it to groups, restrict editing to teams, use the article callouts) but when someone clicks on the title of the article or navigates to the URL, they'll be redirected to the URL you set up, instead.
URL redirects can be great when used with:
- Links to external sites/files you don't want or can't move into KnowledgeOwl
- Links to files stored within KnowledgeOwl, where you want the file to open directly (Refer to the KnowledgeOwl W-9 for an example of this type!)
Refer to our URL redirect best practices for more detailed guidance on when and how to use URL redirects!
You can create a new article as a URL redirect or convert an existing article to be a URL redirect.
The information below varies based on whether you're using our 2026 new editor or old editor.
To figure out which instructions to follow:
- Open any article for editing.
- If the lefthand navigation is collapsed and there's a link near the top of the page to Switch to old editor, follow the New editor documentation.
- If the lefthand navigation is expanded and the top of the editor and the righthand column have a heavier grey background, follow the Old editor documentation.
Here are side-by-side examples of the new editor and the old editor:
 Sample New editor
 Sample Old editor
Try out the new editor
We'd love your feedback on the new editor. To switch to the new editor, open any article for editing and select the Switch to new editor link at the top of the editor.
Create new URL redirect in new editor
To create a new URL redirect article in the new article editor:
- On Articles, open the category where you want to create the article.
- Select + Add Article. The New article modal opens.
- Enter a Title for your article. You can always edit this later!
- Select Redirect to a URL.
- Select Create. The article editor opens.
- Hover over the Permalink section and select the triple dot menu that appears there:
 Hover over the Permalink section and select the triple dot menu that appears there
 - Select Edit redirect from the menu that appears:
The Edit URL redirect modal opens: Select Edit redirect from the Permalink triple dot menu
- Use the controls around the Redirect URL to choose the URL or file to redirect to:
- For external URLs, type or paste the URL you'd like to use into the Redirect URL field.
- To redirect to a file uploaded to KnowledgeOwl (or to directly upload a file to KnowledgeOwl to redirect to), select Redirect to file. Then use the updated modal to find and select the file you wish to redirect to.
- Use the Redirect link behavior options to choose whether to Open link in new tab or Open link in same tab.
- Select the Redirect type you'd like this redirect to use. This is only relevant for public or mixed access knowledge bases. Refer to URL redirect best practices for more detailed guidance.
- Be sure to Save your changes.


Create new URL redirect in old editor
To create a new URL redirect article in the old article editor:
- On Articles, open the category where you want to create the article.
- Select + Add Article. The New article modal opens.
- Enter a Title for your article. You can always edit this later!
- Select Redirect to a URL.
- Select Create.
- The article editor opens with a Redirect URL field below the Full Article Title.
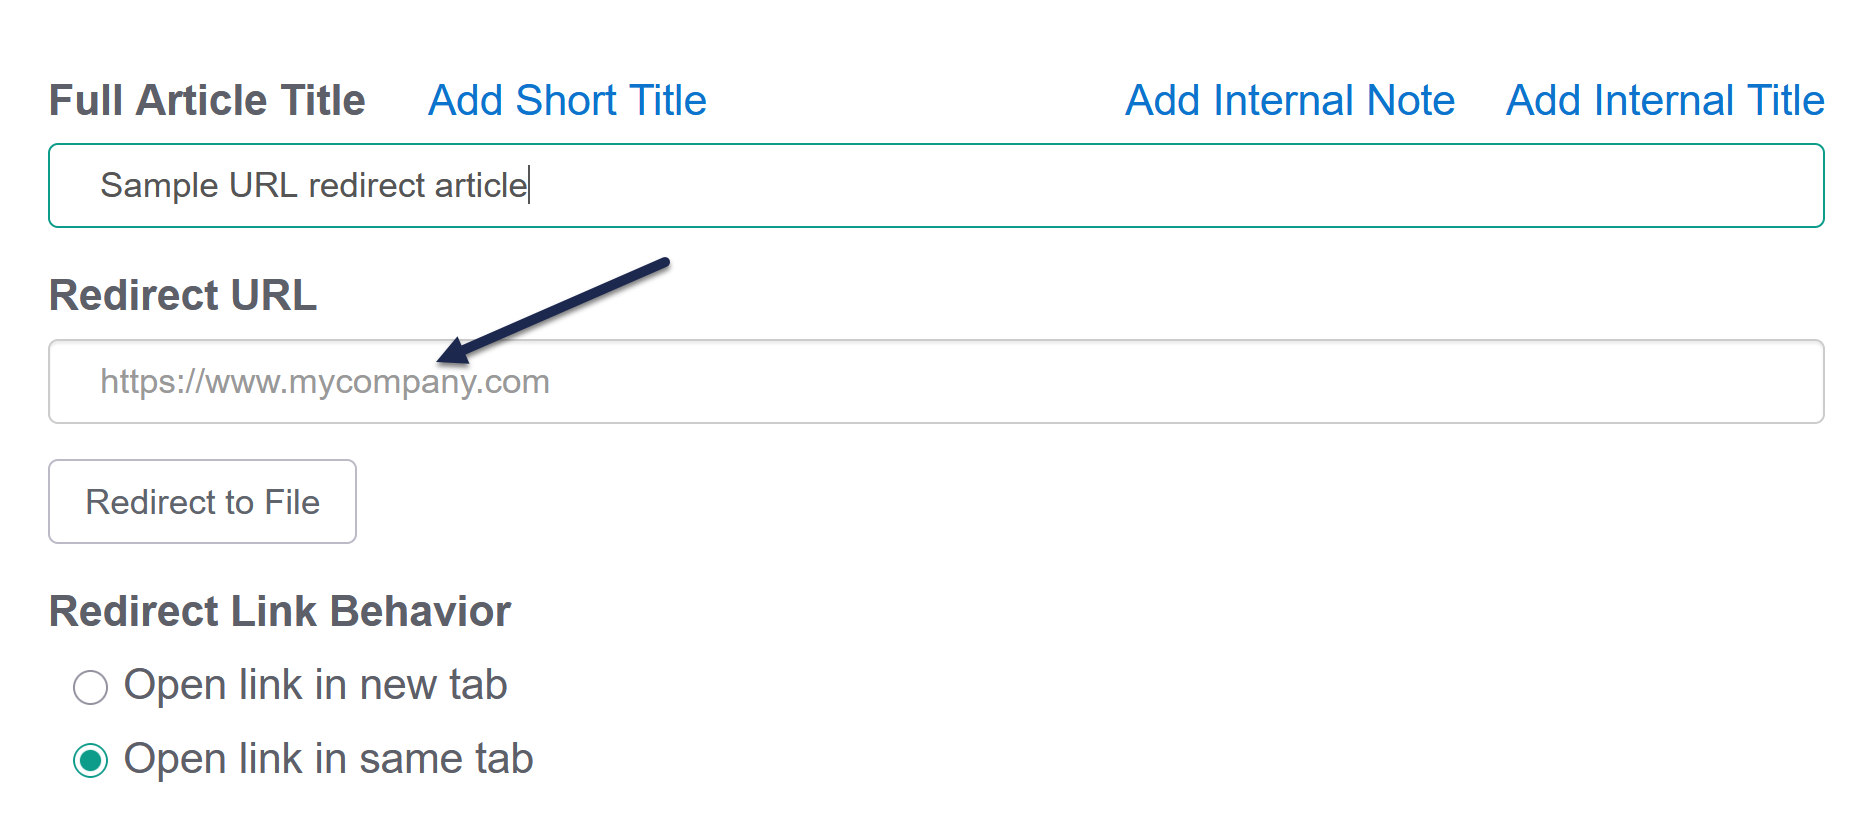
- Use the controls around the Redirect URL to choose the URL or file to redirect to and whether to open in the same tab or a new tab.
- For external URLs, type or paste the URL you'd like to use into the Redirect URL field.
- To redirect to a file uploaded to KnowledgeOwl (or to directly upload a file to KnowledgeOwl to redirect to), select Redirect to File:
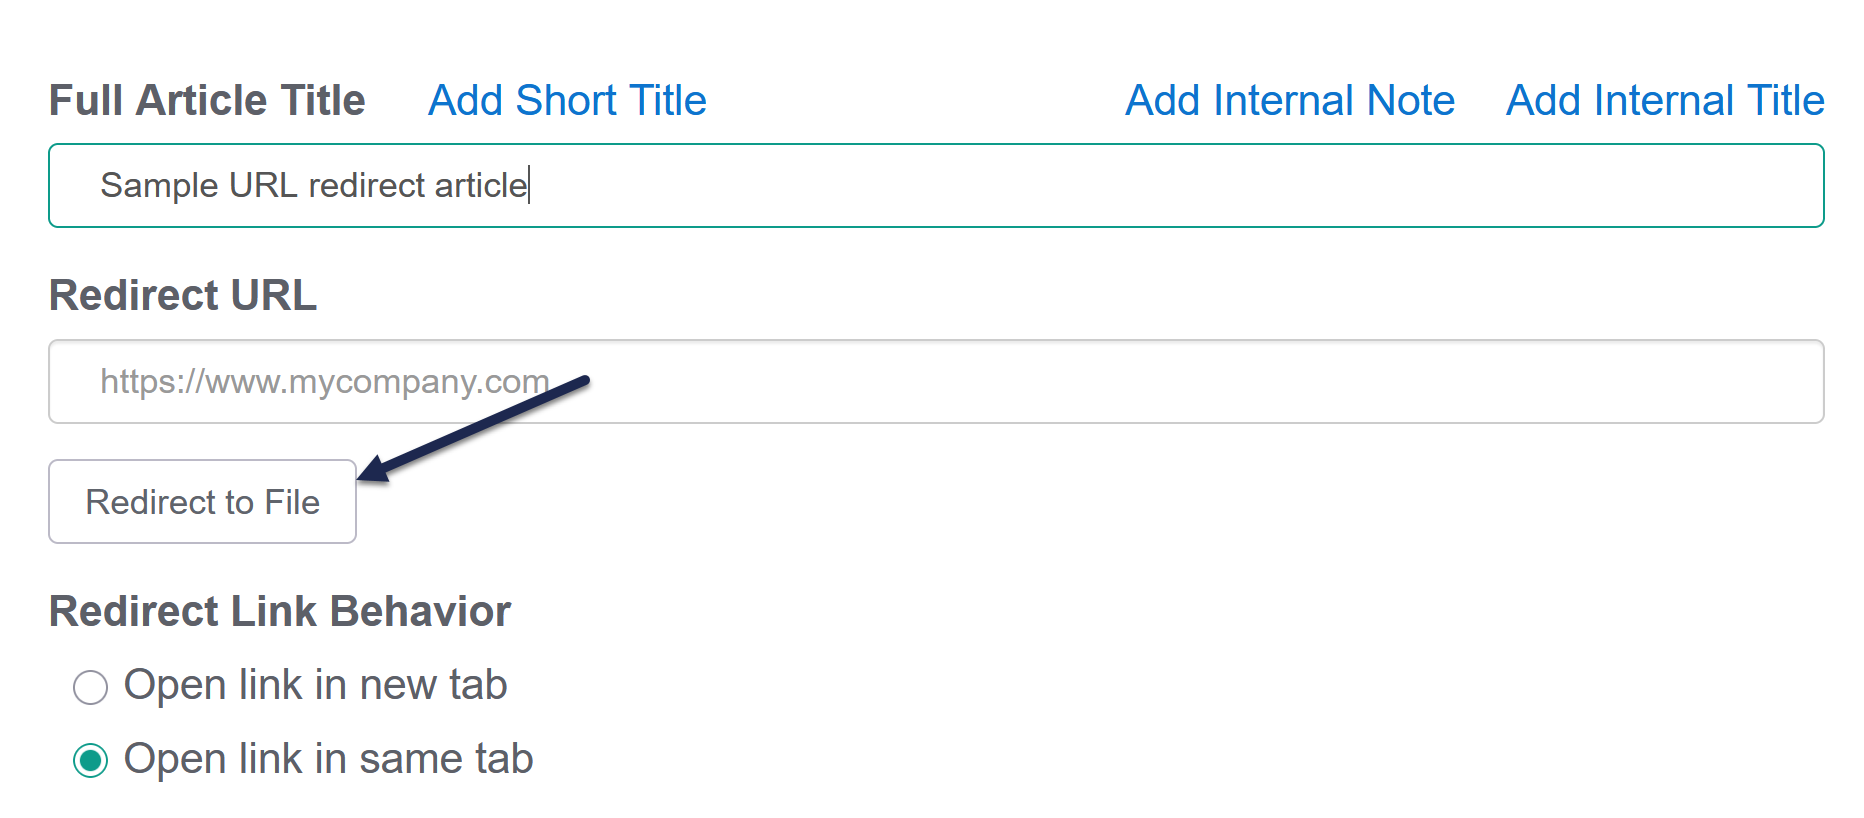 Select Redirect to File
- The Add from Library modal opens.
- Browse or search for the file. (Or select Upload New File to add a new one.)
- Once you've found the file you want to use, select it and then select Insert File. The file's URL is added to the Redirect URL field.
- Use the Redirect Link Behavior section to set whether you'd like the redirect link to Open link in new tab (the default) or Open link in same tab
- Select the Redirect type you'd like this redirect to use. This is only relevant for public or mixed access knowledge bases. Refer to URL redirect best practices for more detailed guidance.
- Save your article.


Search indexing tips
Anything included in the body of the article will still be indexed for search even though it won't be displayed. You can use this to your advantage to help provide additional words or terminology to help people find this article! Refer to URL redirect best practices for more detailed guidance.