
If you haven't scrolled to the bottom of the article editor screen today, you should. 😉
We've added two new fields to articles, just below the Meta Description:
- Thumbnail
- Banner
These fields allow you to select an existing file in your File Library or upload a new one to use as an article thumbnail or banner. Here's a sample of how you might display them:

And here's what they look like in the editor:
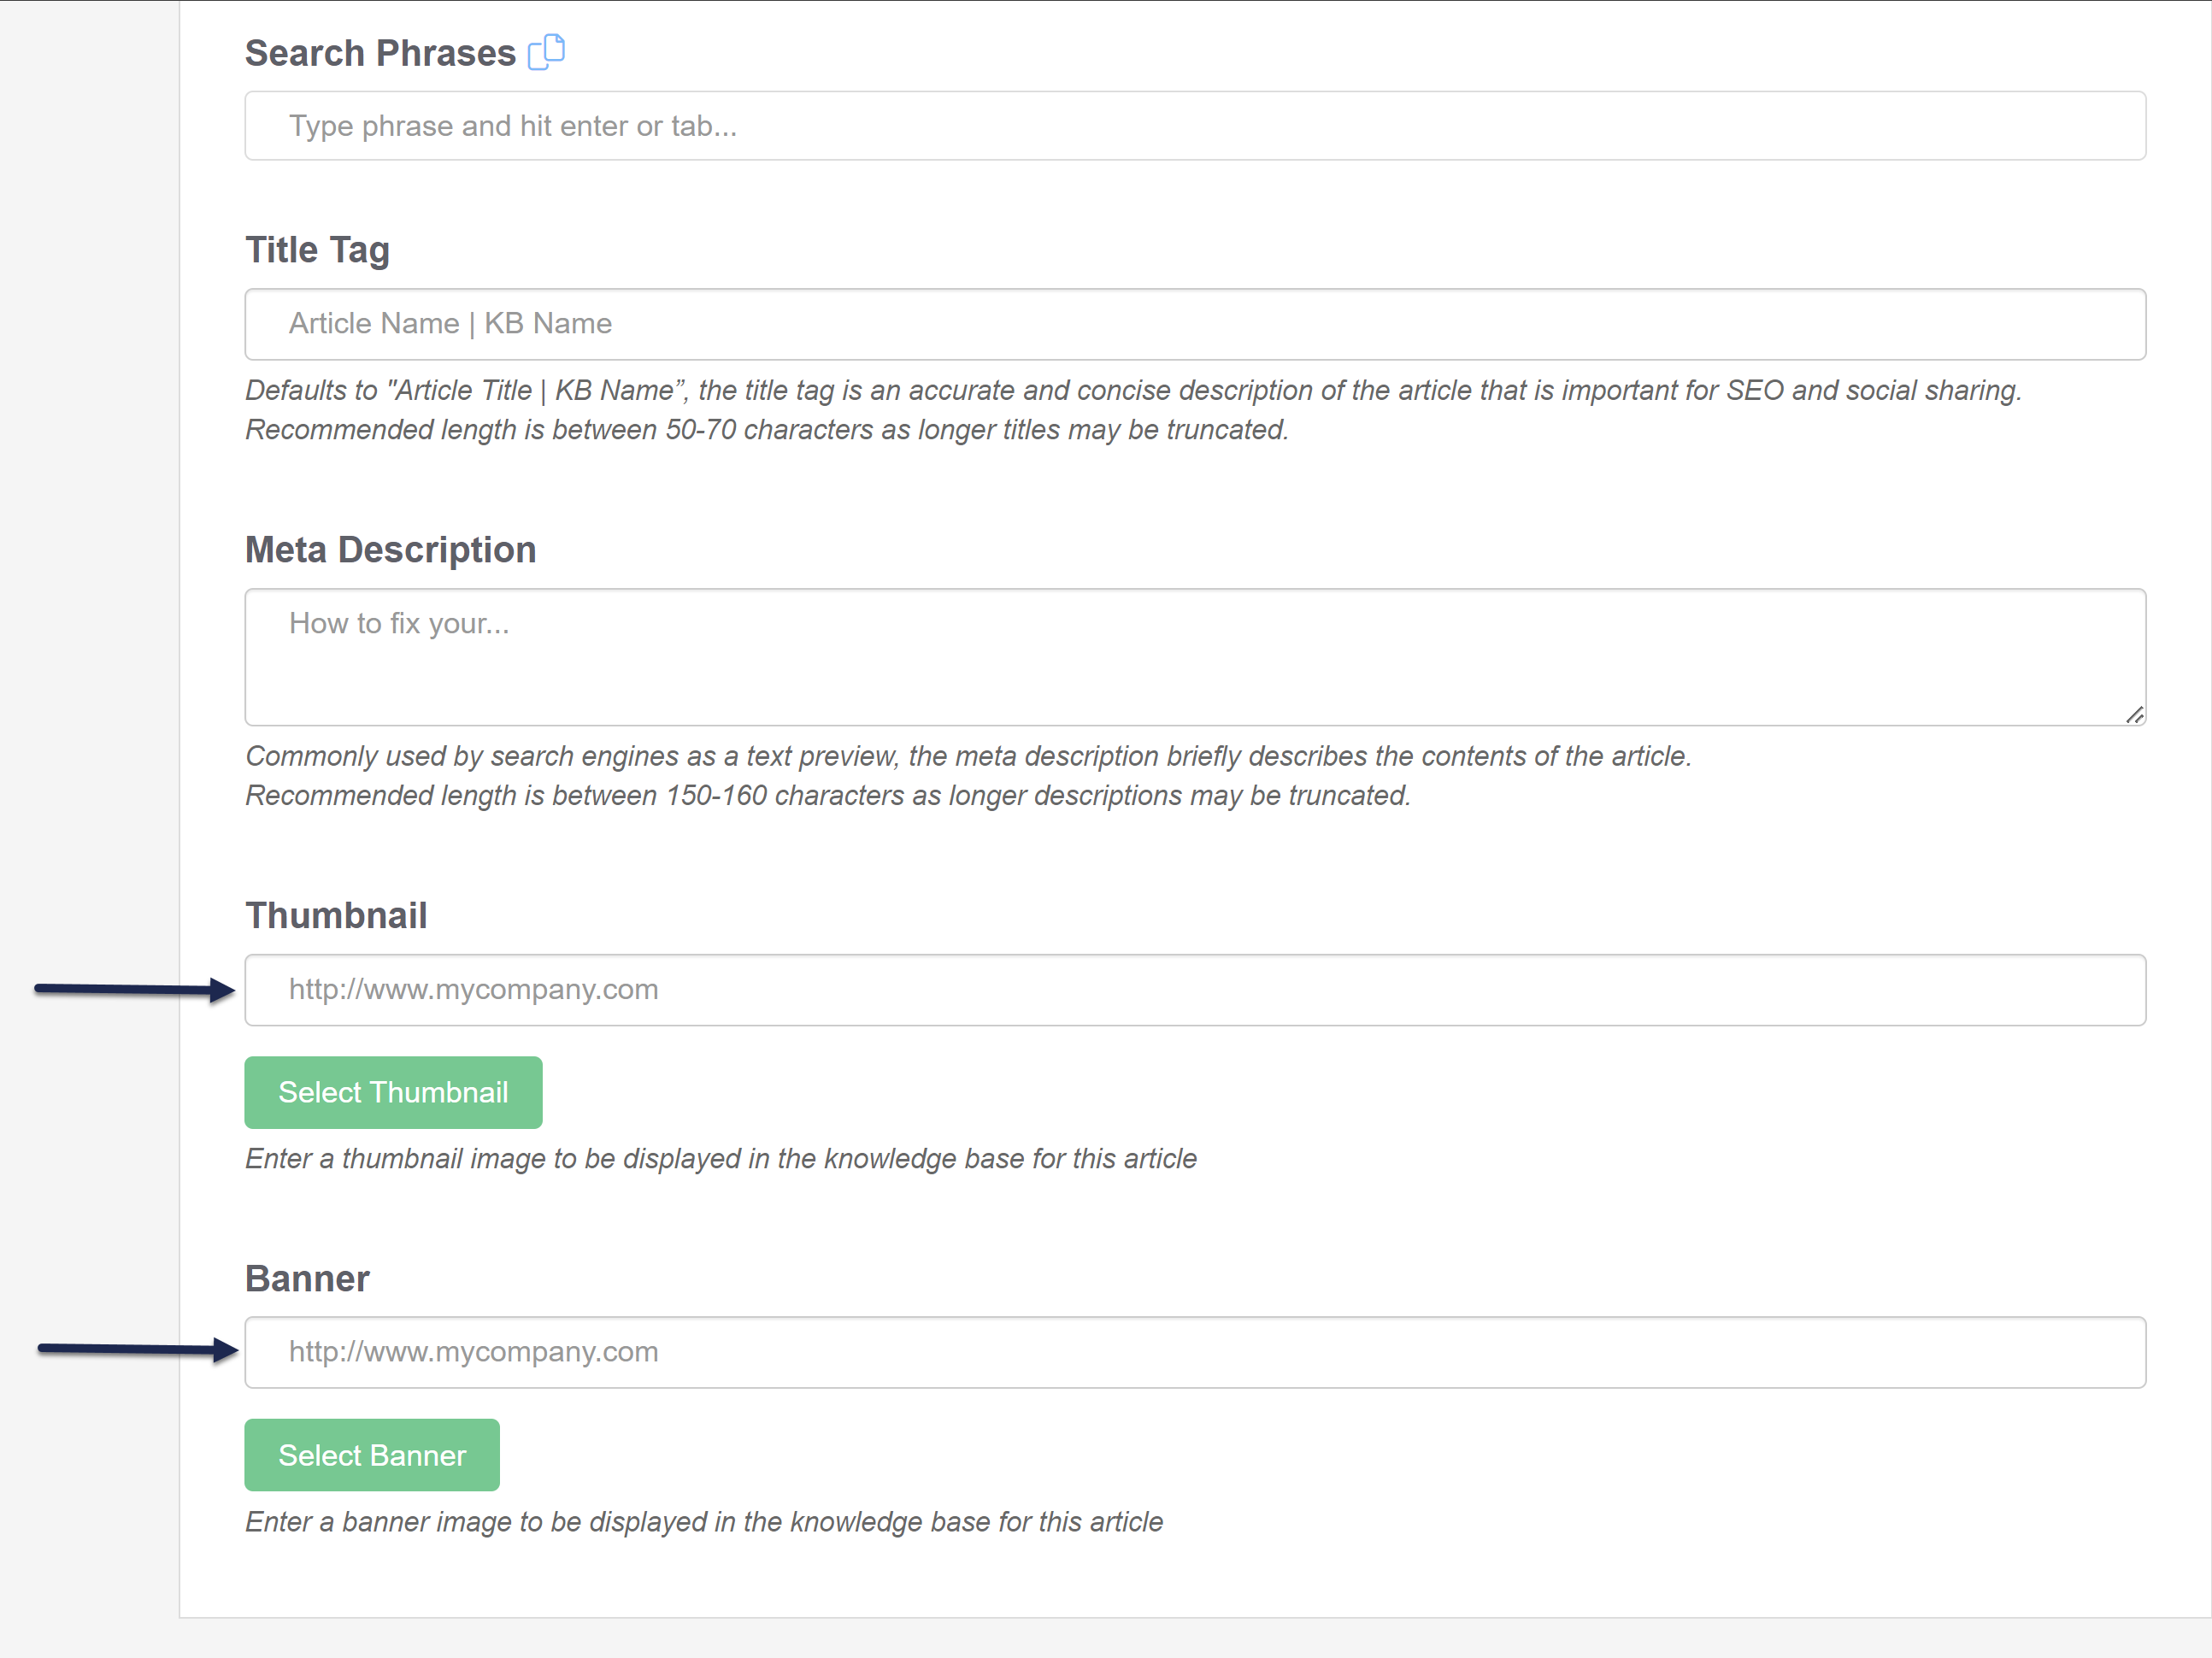
To add a file for either field, click the appropriate Select button. This will open a pop-up where you can search your existing image files in the File Library or upload a new image file.
Once you've finished adding the files, be sure to Save your article.
How to use them
These images won't be displayed anywhere in your knowledge base automatically.
You can add one or both to your Custom HTML Article template using merge codes. To do so:
- Go to Settings > Style.
- Open the Custom HTML section below the preview pane.
- Select Article from the dropdown.
- Put your cursor where you'd like to insert the banner or thumbnail.
- Click the -- Select a Merge Code -- dropdown.
- Look for the Article Merge Codes section. The merge codes are called Banner Image and Thumbnail Image, respectively.
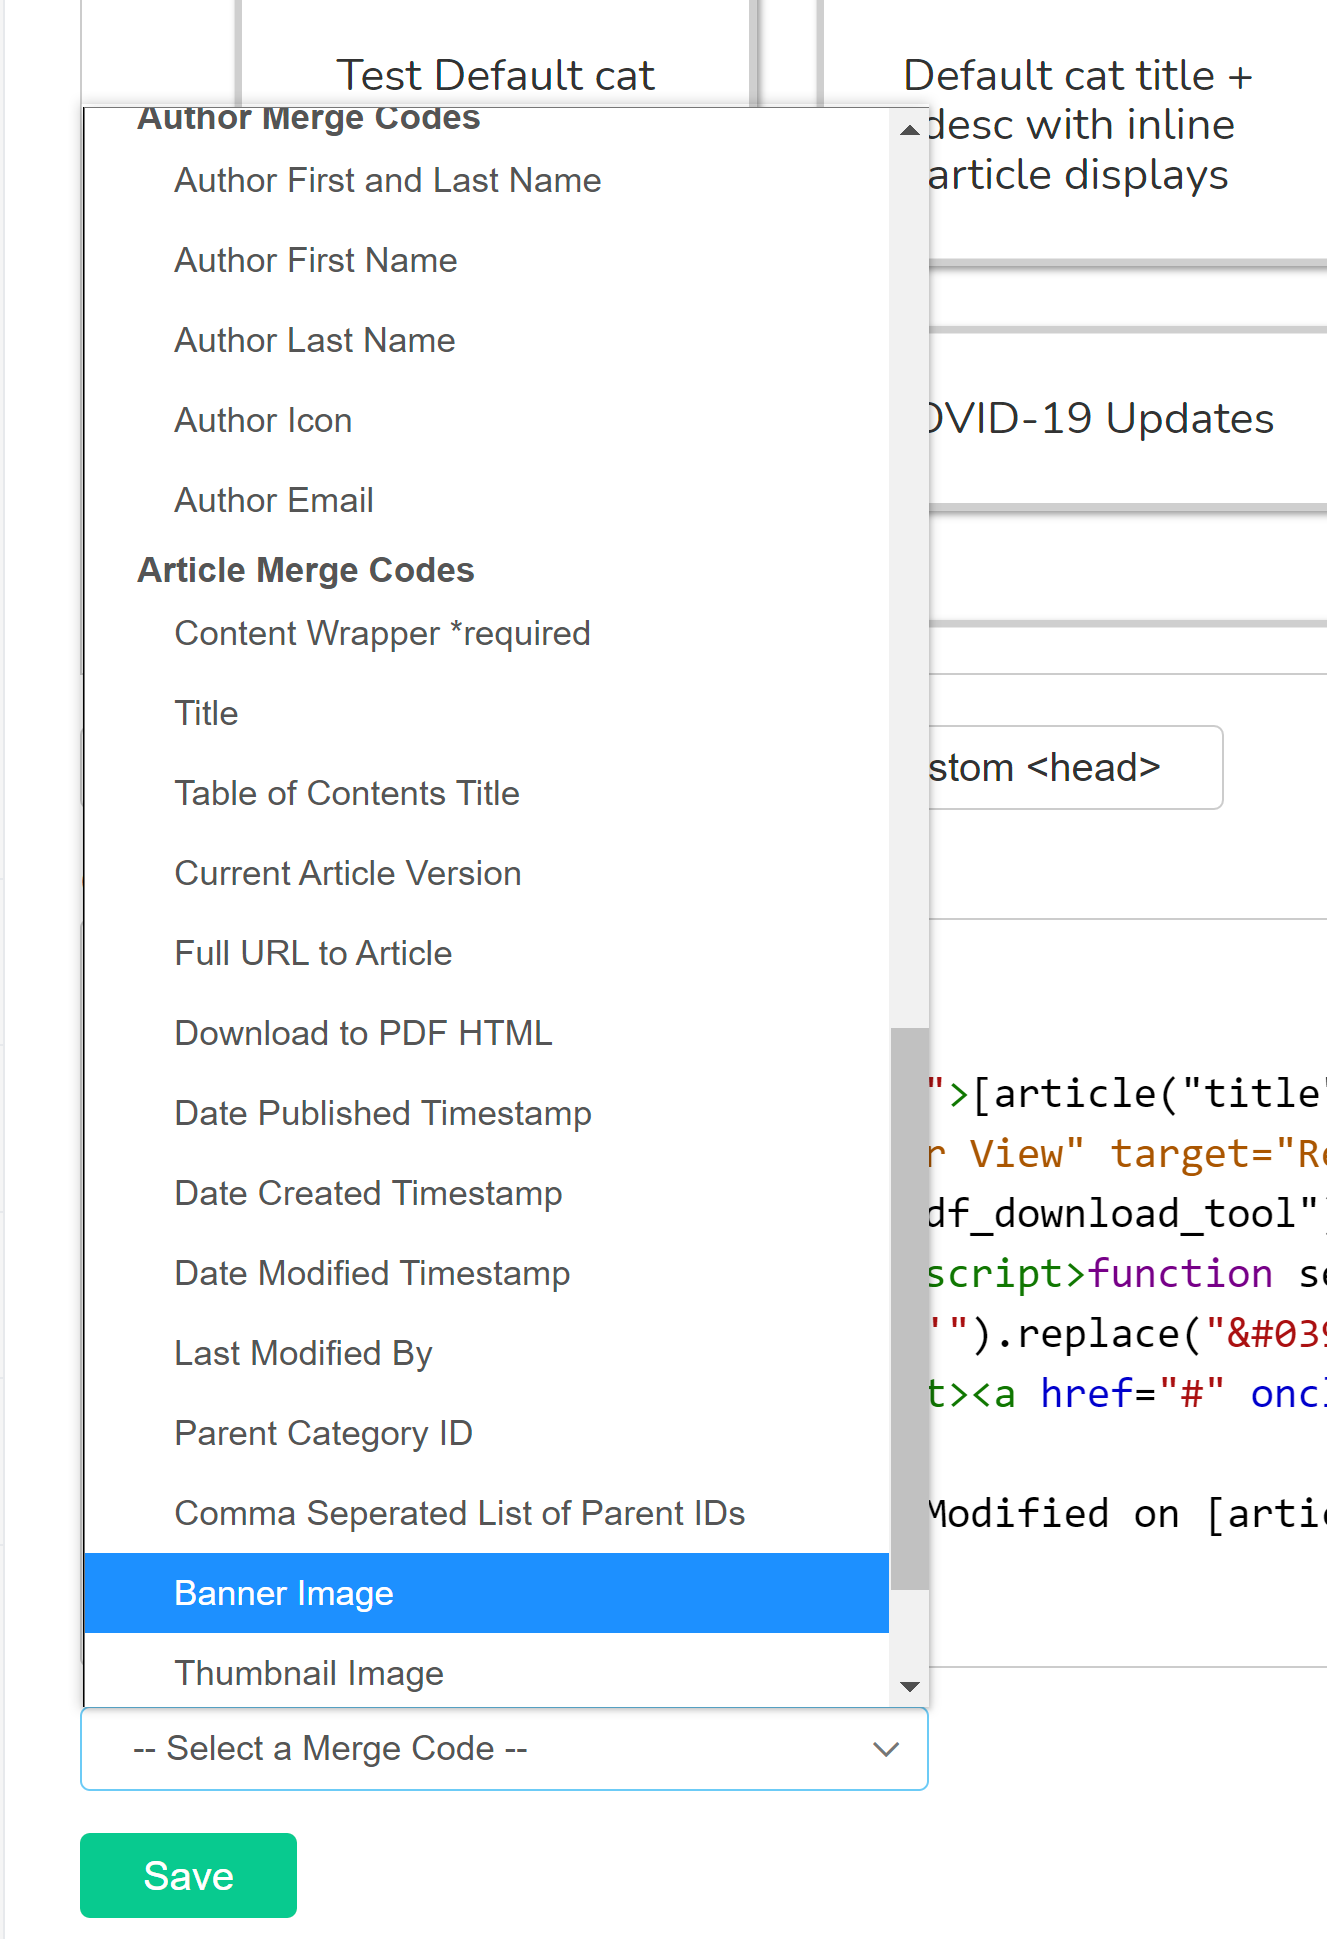
- Select the merge code you'd like to add, then click the Insert button. (or copy the merge code and paste it where you'd like it to go.)
- Be sure to Save your settings.


Styling your banner and thumbnail
You may need to rework the Custom HTML a bit or add some Custom CSS to size/style the images appropriately. For CSS, you can use these classes:
- Banner image class:
.article-banner - Thumbnail image class:
.article-thumbnail
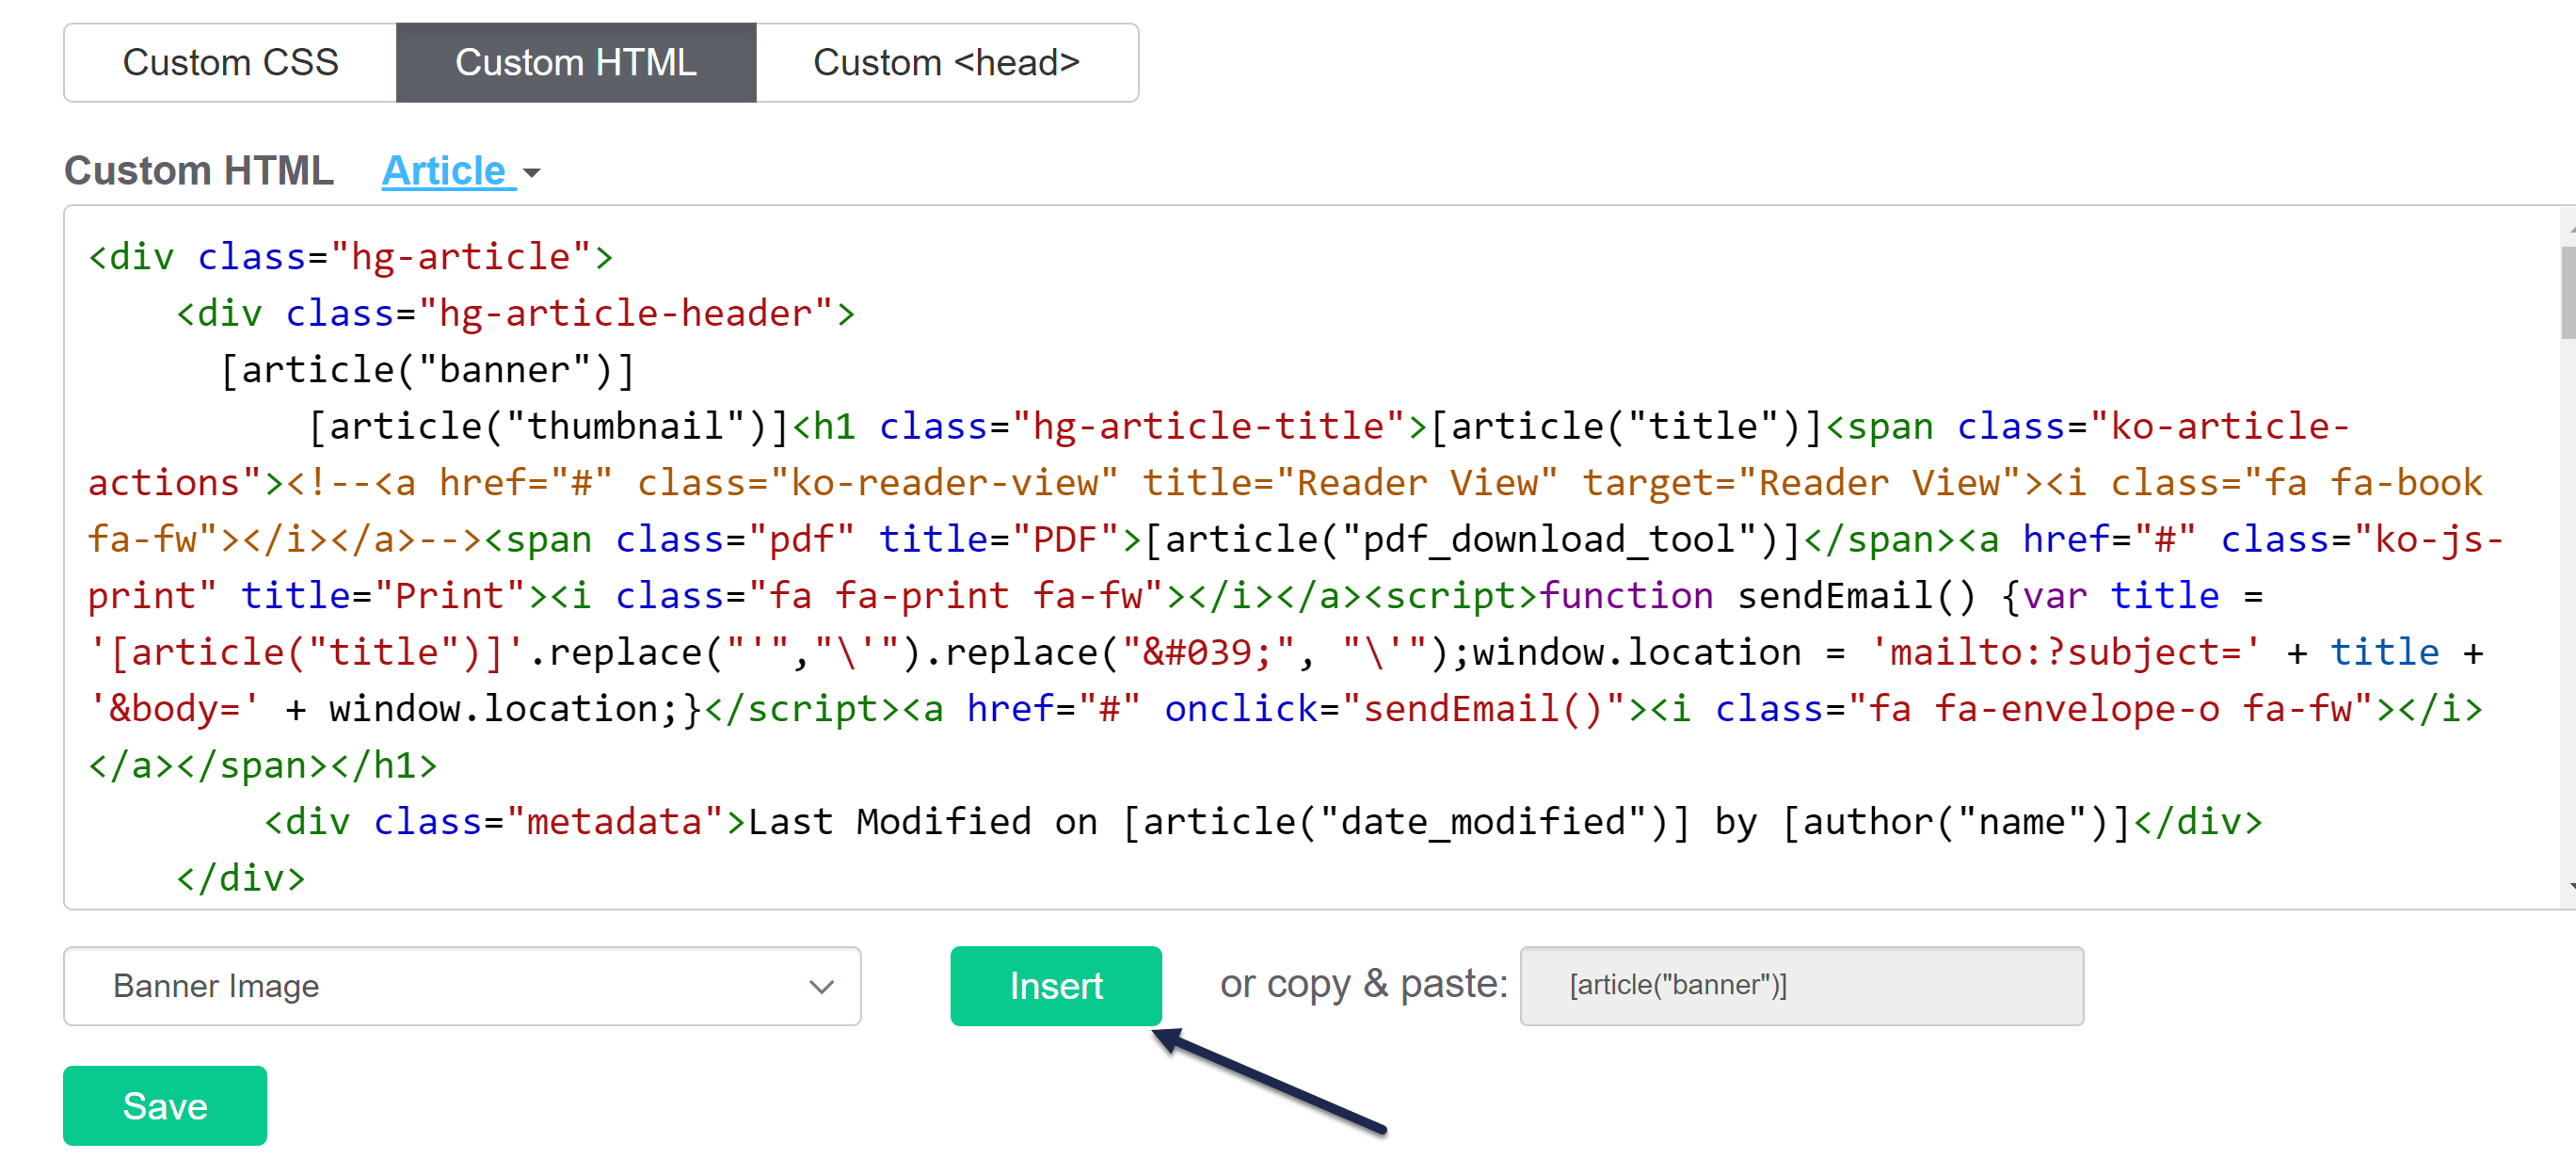
For example, I've added the two merge codes into the header portion of my article, right before the the article title:
 In the Custom CSS tab, I've added this CSS to style them:
.article-banner {
  max-width: 100%;
}

.article-thumbnail {
  display: inline-block;
  width: 25px;
  vertical-align: inherit;
  margin-right: 1em;
}

.hg-article-title {
  display: inline-block;
}
For my article banners, since I have some banner images that are of very different sizes, I've set a max-width of 100% so the images are never wider than the article itself.
I've set my article thumbnail and my article title to display inline-block so they'll display next to each other, and I set a standard width for my article thumbnail. I then played around with the display a bit to get the thumbnail vertically aligned where I wanted it and added a small margin to add some space between the thumbnail and the title.
Here's a sample of what that layout gave me in an article where I'd added a banner and a thumbnail (the address book icon to the left of the title):
Category icon
We've also added an icon field to the category editor, also just below the Meta Description.
![]()
For now, there are no merge codes for displaying these icons in your knowledge base. The icon is only added as a hidden input element to the homepage and category landing pages, with a class of "category-icon-url", so it can be used by scripts to transform/display the icon. We plan to work on a new type of category display that will incorporate these icons, though. :)
Other details of note
Similar to the category icons, we've also made the article thumbnails available as hidden input values in category landing pages. We don't yet have any display options that will show these on these landing pages, but as with the category icon, you could work up a script to transform/display these thumbnails various places.
We're testing out both of these hidden input fields in our custom theme builds and should have some more guidance on ways you can use them in the coming weeks!