
We have long used third-party editors to provide the WYSIWYG (What You See Is What You Get) experience in the Article Editor.
I'm delighted to announce that we just upgraded our third-party Modern Editor to the latest version.
We've added some more awesome stuff to the editing experience (and fixed some awkward interactions, too)!
The quick summary:
- Insert Anchor tool
- List format dropdowns
- Autoplay for videos added via URL
- Way more emoji options
- Table footer option
- New icons/cleaner layout/no more heavy black bar at the top
- Some editor bugs fixed, too
See below for more details on each of those items!
Editor upgrades are a huge undertaking due to the editor's complexity. Please let us know if you notice any unusual or difficult behaviors in the editor as a result of these changes. We tested them a lot but we are also human, so some bugs might have slipped through.
New: Insert Anchor tool
Those of you who have used the old Legacy editor will know that one of the differences between the two was that Legacy had its own tool to create anchors, and Modern did not. (We know some of you have continued to use Legacy editor entirely for this reason!)
We decided the upgrade was the perfect time to build it.
What it does: Allows you to insert an anchor anywhere into your article, so you can create same-page hyperlinks to jump people to a particular heading or section.
Why we love it: No more toggling to Legacy Editor or having to create anchors manually in HTML!
This new tool is located between the Insert Link and Insert Image controls in the editor and is, appropriately enough, an anchor icon:
![]() New Insert Anchor icon
New Insert Anchor icon
The editor will tell you there's an anchor using the same anchor icon:
![]() Editor-only anchor icon helps you find where you have anchors
Editor-only anchor icon helps you find where you have anchors
For more details using this tool, see Add anchors within articles.
(And yes, I DID use the anchor tool to help create all the jump links at the top of this release note. )
New: Ordered and bulleted list formatting dropdowns
This is one of the features I was personally the most excited about in the upgrade. For ordered and unordered lists, there's now a small arrow next to the lists. You can click this arrow to select formatting options for each list type.
What it does: You can choose to keep the "Default" list formatting to keep the traditional styles, or use the dropdown to specify a different style for any level of your lists.
Why we love it: Greater control over list formats; no need to add Custom CSS or edit raw HTML to get the appearance you want!
New Ordered list options are:
- Default: 1, 2, 3 for top-level; will use our default Lower alpha for second-level; Lower Roman for third-level and beyond
- Lower Alpha: a, b, c
- Lower Greek: α, β, γ
- Lower Roman: i, ii, iii
- Upper Alpha: A, B, C
- Upper Roman: I, II, III
New Unordered list options are:
- Default: This uses our existing Unordered list defaults: a Disc for first-level; circle for second-level; and square for third-level and beyond
- Circle: The round circle that's been the default for the second-level of unordered lists. Now you can use it at whatever level you want.
- Disc: The round black dot used as our default first-level. Now you can use it at whatever level you want.
- Square: A small black square used as our default third-level. Now you can use it at whatever level you want.
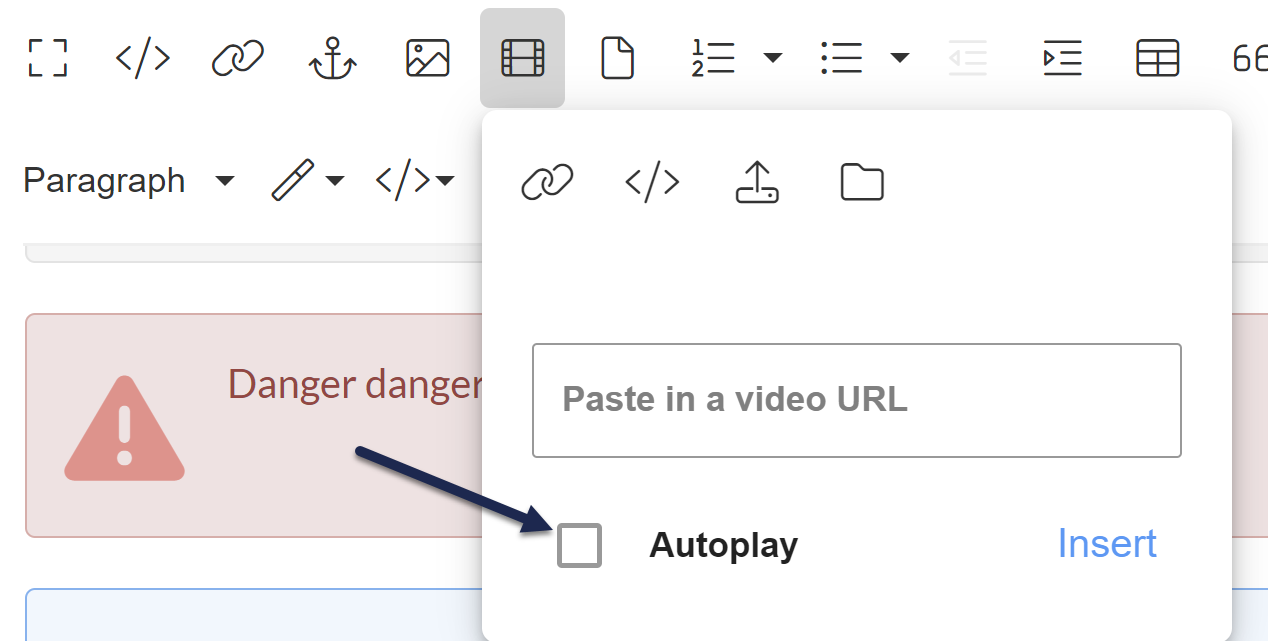
New: Autoplay option for videos added via URL
When you insert a video from URL now, there's a checkbox to have the video autoplay when the article is displayed:
 URL video Autoplay option
What it does: Sets the video to automatically start playing, muted, when the article is loaded
Why we love it: Previously you would have had to mess with the URL directly to add a parameter to set it to autoplay and mute; this control does it all for you!
This option only applies to videos added via URL.
Enhanced: Greatly expanded emoji options
Our editor used to have 56 built-in emojis, most of which were faces. It now has 8 tabs of different emojis, including animals, fruits, holidays, symbols, and more!
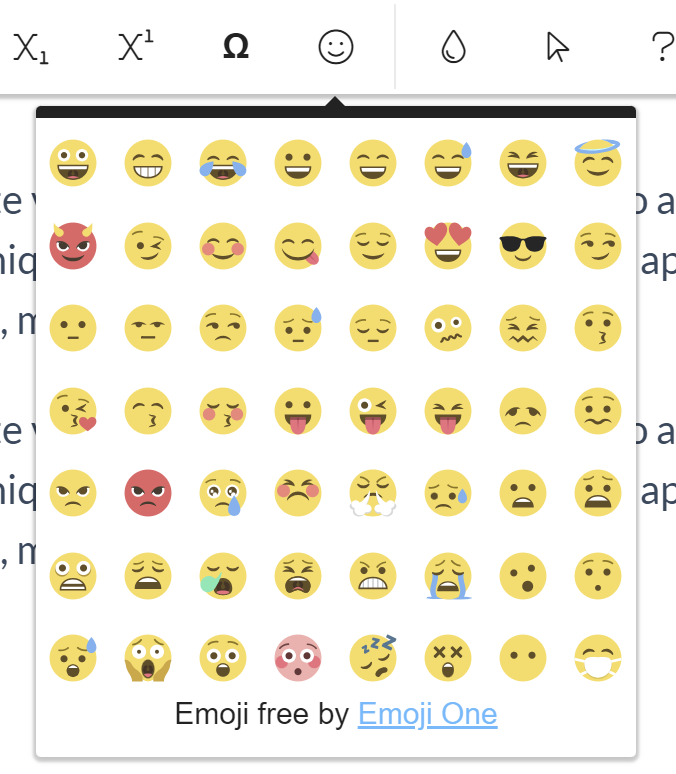 Old emoji options
 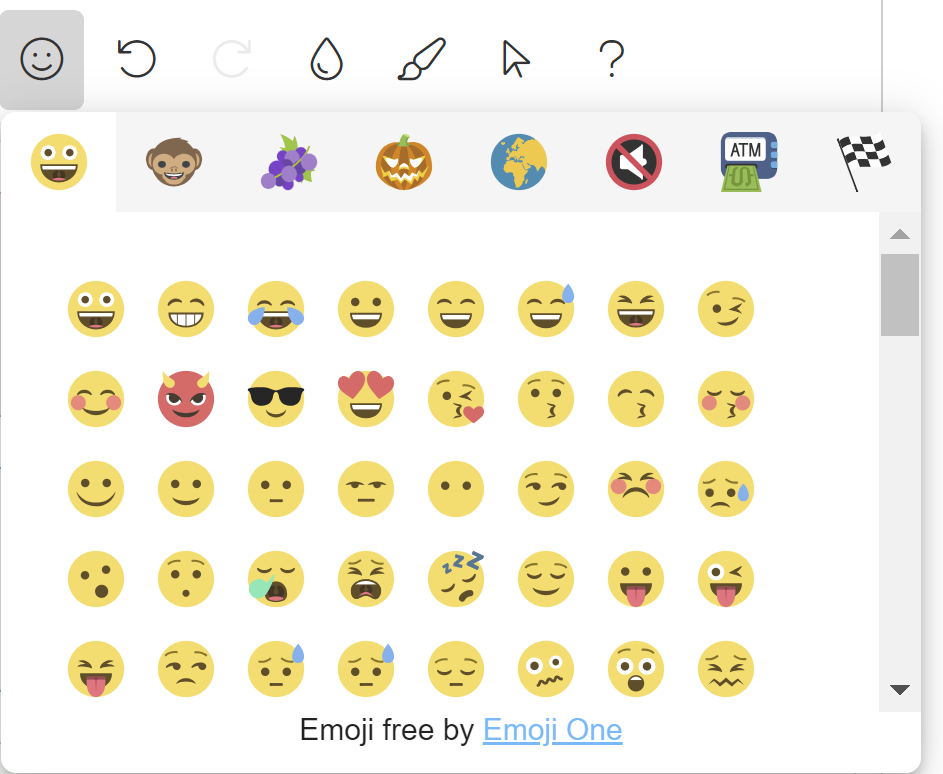 New emoji options!
 Why we love it: Who doesn't love more emojis?
New: Table footer option
The table controls in the Modern Editor have always had the option to add a table header row. They now also include an option to have a table footer row.
What it does: Creates a tfoot section in the table, which has different styles (and you can style differently using CSS).
Why we love it: Easier styling of the final row of a table, if that's your thing!
Here's a quick sample of both the control and what's possible with adding the footer and styling it:
 Sample table with footer row, table control with Table Footer icon displayed
Important changes
No upgrade is complete without a few changes that might take some getting used to. We tried to keep overall changes to a minimum, but there are still a couple changes worth calling out.
Updated icons, no more divider lines
The first thing you'll probably notice in the editor is that we've updated the icons and removed most of the vertical and horizontal grey lines dividing the sections. We are trying to give the editor a cleaner look. But don't worry! Aside from the new Anchor control, everything should still be in the same spot as before.
A lot of the small pop-ups or modals also got a slight facelift, but they should otherwise contain all the same things.
Bugs fixed
As with all upgrades, we also tried to fix some existing bugs with the editor experience. These are the ones we've confirmed seem fixed now:
- Better behavior when adding code blocks inside lists: Previously, if you tried to highlight one list item and make it code, the editor would duplicate the entire list and format the duplicate list as code. Now, only the list item you selected gets the code treatment, and only the text of it (not the number or bullet). So basically the behavior is actually what you'd expect now!
- Better behavior with resizing images with captions: Previously, if you had an image that you'd added a caption to, and you clicked the "Change Size" option in the image menu and entered a percentage as one of the values, the editor did some very odd things. It would basically make the image take up that percentage of space within the captioned section, rather than applying the percentage to the entire image + caption. We customized this behavior so that it properly applies things and doesn't leave you with any weird behavior.